If the inkjet nozzles on your printer clog, and cleaning / deep cleaning doesn't resolve the issue, you may need to reseat (remove then reinsert) the print head.

PRO-100 images are used in this article, but the same steps apply to the PRO-10.
Remove the print head
To remove the print head, follow the steps below.
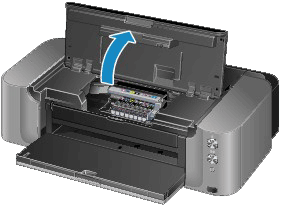
- Turn the printer ON, then open the paper output tray and the top cover. The print head holder moves to the replacement position.
 Don't try to hold or forcibly move the print head holder. Wait until it completely stops .
For the PRO-10, press and release RESUME / CANCEL after you open the top cover. This moves the print head holder to the replacement position.
-
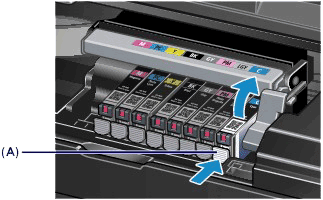
When the print head holder stops, push the tab (A) on the front of one ink tank. Lift the tank and remove it from the printer. Remove all remaining tanks, one at a time.
Handle the ink tanks carefully so you don't stain your clothes or the surrounding area.
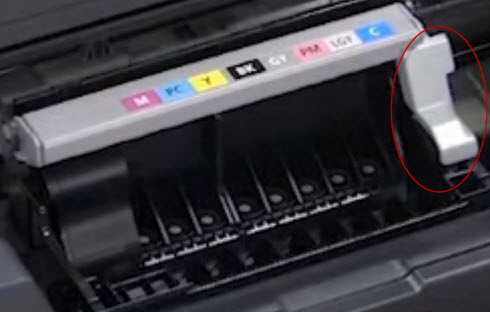
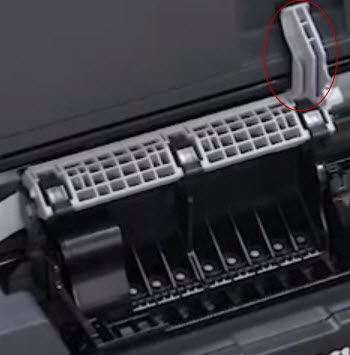
- After you remove the ink tanks, lift the print head lock lever.
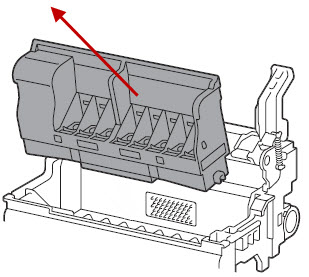
- Tilt the print head forward and lift it out of the holder.

Reinsert the print head
Follow the above steps in reverse order to seat the print head.
-
Insert the print head and close the lock lever.
-
Insert an ink tank and push the tab back down. Do this for each tank.
-
Close the top cover and the paper output tray.
If your product issue was not resolved after following the steps above, or if you require additional help, please create or log in to your Canon Account to see your technical support options.
Or if you still need help, visit our Canon Community by clicking the button below to get answers:

____________________________________________________________________________________________
