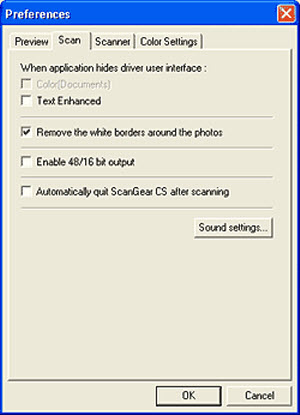
Preferences Dialog (Scan tab)
You can pre-set the functions that are automatically carried out during a preview or scan, such as the Auto Crop or Auto Tone function, in the Preferences dialog.
When application hides driver user interface
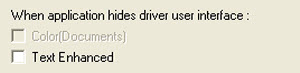
Some applications, such as OCR software, do not display ScanGear CS's main window while scanning (UI off mode). These applications set the scanning settings, preventing you from changing the Color Mode settings with the usual procedures. If you wish to scan with one of the Color Modes below, use this function to override the application's settings.
|
Text Enhanced (Windows only)
|
A check mark in this option overrides the application program's settings to set the Color Mode to Text Enhanced.
|
 This setting is disabled when the UI mode (main window displays) is active.
When ScanGear CS is first installed, this options is set to Off by default.
Remove the white borders around the photos

This function is only enabled when the Multi-Crop or Multi-Scan option has been selected.
This option automatically crops white spaces on the perimeter of photos when the Multi-Scan or Multi-Crop mode is used to scan.
When ScanGear CS is first installed, this option is selected by default.
Enable 48/16 bit Output

When a check mark is placed in this category, the
Color (48 bit) and
Grayscale (16 bit) options are added to the Color Mode category in the Advanced Mode, permitting finely detailed scanning.
 The Grayscale (16 bit) setting can only be set when Film is chosen in the Select Source category. It cannot be set when Platen is selected.
If you remove the check mark from the Enable 48/16 bit Output category in the Preferences window after you select Color (48 bit) or Grayscale (16 bit) in the Advanced Mode, the Color (48 bit) setting will switch to the regular Color setting and the Grayscale (16 bit) setting to the regular Grayscale setting.
Automatically Quit ScanGear CS after Scanning

A check mark in this option causes ScanGear CS to automatically close after a scan.
Some applications override this setting and always automatically close the ScanGear CS main window after scanning.
When ScanGear CS is first installed, this option is selected by default.
 Sound Settings Button
A sound file can be played during a scan or serve as an alert at the end of a scan.
Click the [Sound Settings] button to display the following dialog.
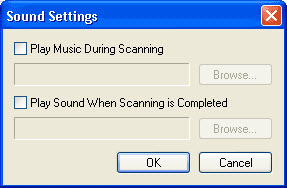
A check mark in either the Play music during scanning or Play sound when scanning is complete option allows you to click the Browse button and select a sound file.
The Play music during scanning option is not available in the Macintosh version.
Please adjust volume settings with the computer. They cannot be adjusted with ScanGear CS.
When the [Play Sound When Scanning is Completed] option is selected, it takes longer than usual for the scanned image to appear in the application. It may, depending upon the length of the chosen sound, take up to 10 seconds longer to display.
The following sound file formats can be selected.
-
MIDI (*.mid, *.rmi, *.midi)
-
Audio (*.wav, *.aif, *.aiff)
-
MP3 (*.mp3)
