If your wireless router has a WPS push button on it, you can use this button to connect your MAXIFY GX6020 or GX7020 to the wireless network. Follow the steps below to perform this connection.
-
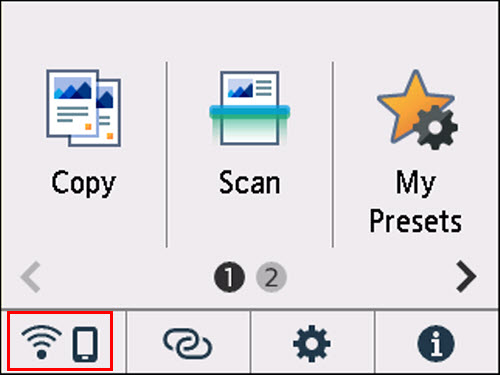
With the printer powered on, and on the HOME screen, tap the network symbol at the lower left corner.
-
Tap Wi-fi.

-
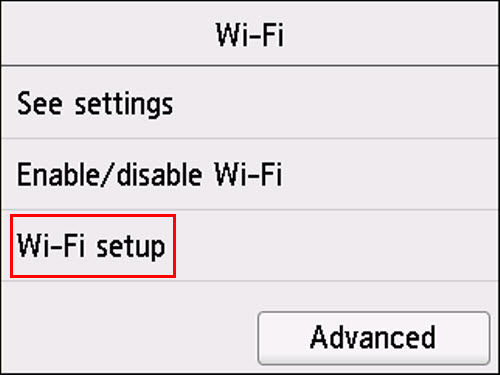
Tap Wi-Fi setup.
-
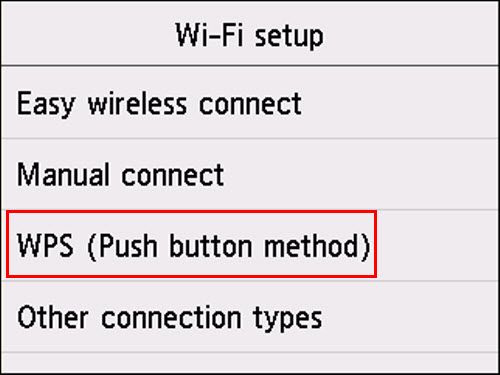
Tap WPS (Push button method).
-
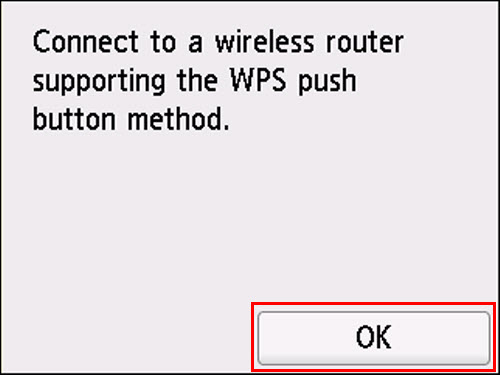
Tap OK.
-
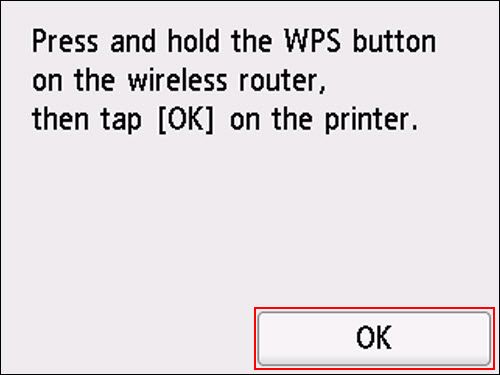
When the message shown below appears, press and hold the WPS button on your wireless router for about 5 seconds and then release it.
 The WPS button on your router may look like either of the following:


The button itself may be labelled simply as WPS or Wi-Fi Protected Setup.
Refer to your router's documentation for more information.
After pressing and holding the WPS button on the router for 5 seconds, tap OK on the printer.
-
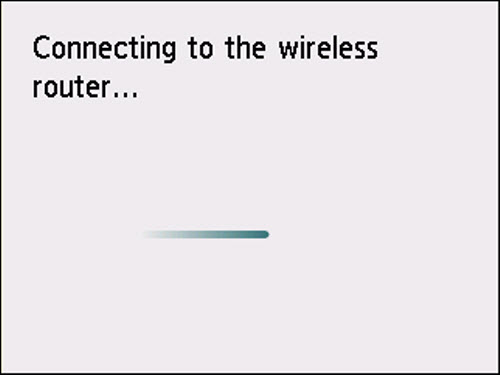
The printer will attempt to connect to the wireless router.
-
The printer will display a message indicating that it has connected to the network. Tap OK.
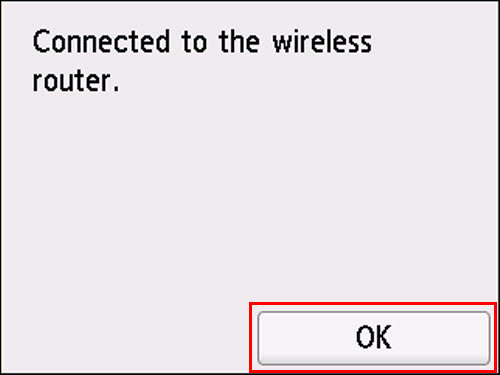
The printer is now connected to the wireless network.
If you haven't already done so, you'll need to install the software for the printer on your Windows PC or Mac. To obtain the installer package for your printer, click the appropriate link for your model and computer operating system.
If your product issue was not resolved after following the steps above, or if you require additional help, please create or log in to your Canon Account to see your technical support options.
Or if you still need help, visit our Canon Community by clicking the button below to get answers:

____________________________________________________________________________________________
