Sending a Fax**
**
Instructions given are for Mac computers. If using on Windows, click here for instructions
 Note
Note
- Only black and white transmission is supported.
-
Make sure printer is on.
-
In application, open document to fax.
-
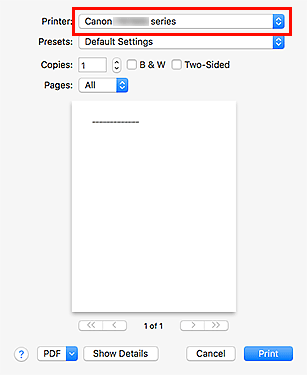
Open Print dialog.
To open the Print dialog, you typically select Print... from the File menu of your application software.
-
Select Canon XXX series - Fax (where "XXX" is the model name) from Printer list.
-
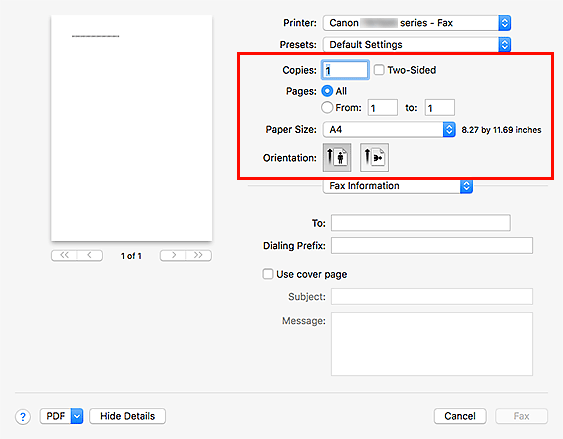
Specify fax paper settings as needed.
-
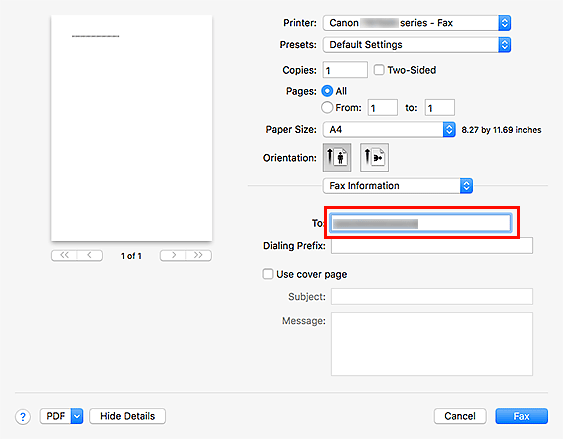
Enter fax/telephone numbers in To.
If you specify a dialing prefix, enter the code in Dialing Prefix and specify the cover page settings as needed.
-
Click Fax.
The number is dialed automatically and the fax is sent.
Note
- To cancel sending the fax, press the printer's Stop button.
Automatic Redialing
If the fax could not be sent (for example, when the recipient was busy), the number is redialed automatically according to the automatic redialing setting of the printer.
You can enable or disable automatic redialing. If you enable automatic redialing, you can specify the maximum number of redial attempts and the length of time the printer waits between redial attempts.
General Notes (Fax Transmission Using AirPrint)
Sending faxes is subject to the following restrictions.
Enter the characters in To and Dialing Prefix so that the total number of characters is within 40 characters.
You can use the following characters for To:
| Character |
Explanation |
| 0 - 9 * # |
For use in telephone and fax numbers. |
| + space |
To make the number easier to read. You cannot insert a space at the front of a number. |
You can use the following characters for Dialing Prefix:
| Character |
Explanation |
| 0 - 9 * # |
For use in telephone and fax numbers. |
| p |
To place a pause between numbers. |
| T |
Numbers after the T will be sent as a tone signal. |
| + space |
To make the number easier to read. You cannot insert a space at the front of a number. |
TR4520 / TR4522 Support Page