
Printer Alarm Lamp Flashes Orange - PIXMA iX6520
| Article ID: ART114274 | | | Date published: 05/11/2015 | | | Date last updated: 11/27/2020 |
Description
Understand what the Alarm and/or Power flashing lamp lights mean on your PIXMA iX6520 printer and how to resolve the problem.
Solution
There are several reasons why the Alarm and/or Power lamps flash on the LCD panel.
 The definition of the terms Error Code and Support Code are similar, and are therefore interchangeable. Both refer to errors communicated on your printer and/or computer.
Power and Alarm lamps flash alternately
When the blue Power lamp and orange Alarm lamps flash alternately, a hardware failure has occurred. Follow these steps:
-
Disconnect the printer cable from the printer.
-
Turn the printer off, and then unplug the printer from the power supply.
-
Plug the printer back in, and turn it back on.
There are two options currently available to you.- Warranty Service – If you are within the 1-year manufacturer’s warranty and have your proof of purchase you are entitled to service or replacement. If you have purchased a CarePak Canon extended warranty, you may be entitled to additional options. Please create or log into your Canon Account to obtain service.
- Out of Warranty – If you are outside of your warranty period, you may qualify for purchasing a replacement through the Canon Upgrade Program. Please contact our Sales group to inquire about your upgrade options at 866-443-8002.
- Warranty Service – If you are within the 1-year manufacturer’s warranty and have your proof of purchase you are entitled to service or replacement. If you have purchased a CarePak Canon extended warranty, you may be entitled to additional options. Please create or log into your Canon Account to obtain service.
Alarm only lamp flashes
When a printer error occurs, the Alarm lamp flashes orange as shown below. The number of flashes indicates the type of error that has occurred. Count the flashes and take the appropriate action to correct the error.
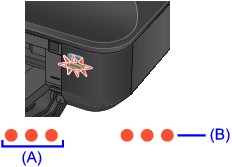
(A) Note the number of flashes
(B) Flashes repeatedly
Error cause and action
The following table describes the cause of an error by the number of repeated orange (Alarm) lamp flashes. Count the number of flashes to identify the error cause in the first column. Then, use the corresponding action in the right column to resolve the error message.
|
Number of flashes / Cause |
Action |
|---|---|
|
2 flashes: |
Reload the paper and press the RESUME/CANCEL button on the printer. |
|
3 flashes: |
If the Front Cover is closed, open it. The printer resumes printing. If opening the Front Cover does not resolve the problem, or if the cover was open to begin with, the paper may be jammed. Remove the jammed paper, reload paper properly in the printer, then press the RESUME/CANCEL button on the printer. |
|
4 flashes: |
If printing is in progress and you want to continue printing, press the printer's RESUME/CANCEL button with the ink tank installed. Then printing can continue. |
|
5 flashes: |
Follow the directions given in your setup manual to install the Print Head. If the Print Head is already installed, remove the Print Head once and then reinstall it. If the error is still not resolved, the Print Head may be damaged. Service is required. |
|
7 flashes: |
Confirm that the ink tanks are installed in the appropriate positions. |
|
8 flashes: |
The ink absorber is almost full. Press the printer's RESUME/CANCEL button to continue printing. Service will soon be required. |
|
11 flashes: |
After carrying out the above measures, if the problem continues after aligning the Print Head again, press the RESUME/CANCEL button to dismiss the error, and then perform Manual Print Head Alignment. |
|
12 flashes: |
You cannot print the contents on CREATIVE PARK PREMIUM. When you print the contents on CREATIVE PARK PREMIUM, confirm the message on the computer screen, make sure that genuine Canon ink tanks are installed properly for all colors, then start printing again. |
|
13 flashes: |
The remaining ink level cannot be correctly detected. (The lamp on the ink tank flashes.) Replace the ink tank and close the Top Cover. Printing with an ink tank that was once empty may damage the printer. If you want to continue printing in this condition, you need to release the function for detecting the remaining ink level. Press and hold the printer's RESUME/CANCEL button for at least 5 seconds, and then release it. With this operation, releasing the function for detecting the remaining ink level is memorized. Please be advised that Canon shall not be liable for any printer malfunction or damage caused by refilled ink tanks.
|
|
14 flashes: |
|
|
15 flashes: |
The ink tank cannot be recognized. (The lamp on the ink tank is off.) |
|
16 flashes: |
The ink has run out. (The lamp on the ink tank flashes.) Printing under the current condition may damage the printer. If you want to continue printing in this condition, you need to release the function for detecting the remaining ink level. Press and hold the printer's RESUME/CANCEL button for at least 5 seconds, and then release it. With this operation, releasing the function for detecting the remaining ink level is memorized. Please be advised that Canon shall not be liable for any malfunction or trouble which may be caused by continuation of printing under the ink out condition. |
If your product issue was not resolved after following the steps above, or if you require additional help, please create or log in to your Canon Account to see your technical support options.Or if you still need help, visit our Canon Community by clicking the button below to get answers:

____________________________________________________________________________________________