Learn how load paper in the cassette of your PIXMA TS8120 printer.
Solution
Watch the video or skip to the written instructions below to learn how to load paper in your PIXMA printer.
Written Instructions
Before you begin
Before you begin there are a few things to know about paper.
Load only plain paper in the cassette (paper tray).
You can use general copy paper or Canon Red Label Superior WOP111/Canon Océ Office Colour Paper SAT213.
Be sure to use the correct page size and paper weight. For help, see supported media types.
Load paper in the tray
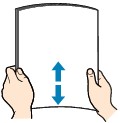
If the paper is curled, bend the paper stack gently in the opposite direction of the curl to flatten it.
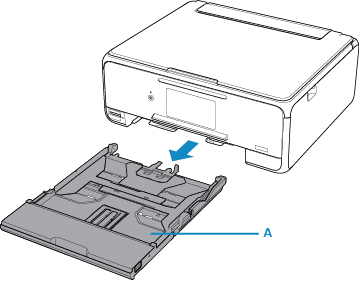
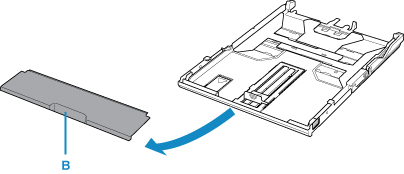
Pull out the tray (A) from the printer and remove the cover (B).
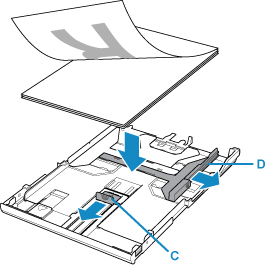
Slide the paper guide in front (C), and on the right (D) to open the guides.
Load the paper stack with the print side facing down in the center of the tray. Be sure to align the edges of paper to prevent paper jams. Always load the paper in portrait orientation (E). If you load it in landscape orientation (F), it can cause paper jams.
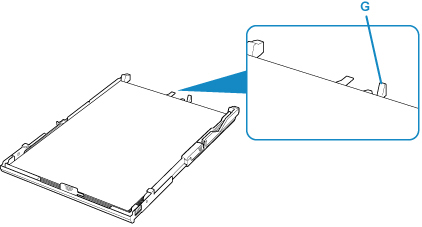
Make sure the edges of the paper touch the guide (G), or the paper may not be fed correctly.
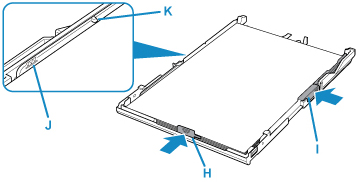
Align the paper guide (H) against the paper until the guide clicks into place. Then, align the guide (I) on the right side of the paper stack.
Don't slide the paper guide too hard against the paper or it may not feed correctly.
Don't load sheets of paper higher than the load limit mark (J).
Keep the paper stack height below the tabs (K) of the paper guides.
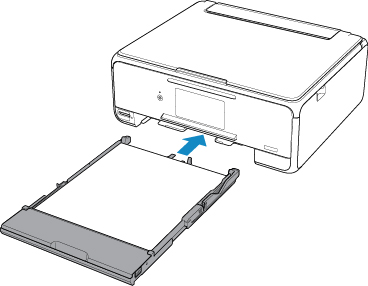
Push the tray into the printer until it stops. The paper information screen displays on the printer panel.
On the Register cassette paper info screen, select the Page size and Type (of paper), then Register. The printer detects whether the paper loaded in the cassette matches the paper settings. If they don't match, an error message displays.
If these instructions aren't followed completely, Support Code 1259 may appear. In this case, go back over the steps to make sure you haven't missed anything.

 Be sure to align the edges of paper to prevent paper jams.