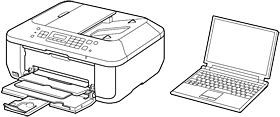
To perform setup, place the machine near the access point* and computer. (* Required for wireless LAN)
 Check the included items.
 REFERENCE Network connection: Prepare network devices such as a router or an access point as necessary.
Remove the protective sheets and tape.
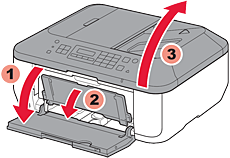
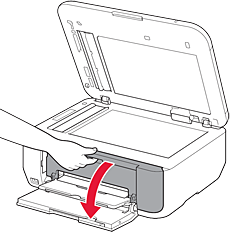
 1. Preparation 1. Open the Front Cover, the Paper Output Tray, and the Document Cover. 2. Open the Paper Output Cover. 3. Remove all the protective tapes and the white fixing material. 4. Close the Paper Output Cover and the Document Cover. 5. Connect the power cord. IMPORTANT - Do not connect the USB cable yet.
6. Press the ON button. 7. Select your language, then press the OK button. (A) Back button IMPORTANT - To change the language setting, press the Back button.
8. Check that this screen is displayed. 2. Install the FINE cartridge 1. Open the Paper Output Tray and the Paper Output Cover. (A) Check that the Head Cover has opened automatically. REFERENCE - If the Head Cover is closed, close the Paper Output Cover and open it again to open the Head Cover.
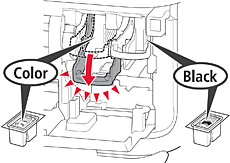
2. Lower the Ink Cartridge Lock Lever. IMPORTANT - The left is where the Color FINE Cartridge is to be installed and the right is where the Black FINE Cartridge is to be installed.
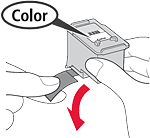
3. Unpack the FINE Cartridge, then remove the protective tape.  Do not touch! IMPORTANT - Be careful of ink on the protective tape.
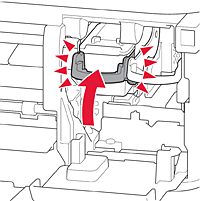
4. Insert the FINE Cartridge until it stops. (A) Insert it straight until it stops. Do not knock it against the sides! 5. Lift the Ink Cartridge Lock Lever. 6. Repeat (2) to (5) to install the other FINE Cartridge. REFERENCE Confirm that the FINE cartridge is properly installed. (A) When the cartridge is properly installed (B) When the cartridge is NOT properly installed
7. Close the Paper Output Cover. Wait for about 1 to 2 minutes until this screen disappears, then proceed. IMPORTANT - If an error message appears, check that the FINE Cartridge is installed correctly.
REFERENCE - The LCD turns off if the machine is not operated for about 5 minutes. To restore the display, press any button (except the ON button) on the Operation Panel.
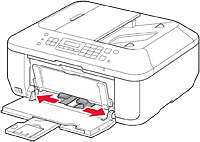
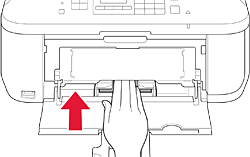
3. Setting Up the Wireless LAN To connect to wireless LAN, select Start setup on the screen, then follow the onscreen instruction. In the following conditions: - If you want to use wired connection or USB connection - If you have difficulty with the procedure Select Cancel for now. Even after you select "Cancel for now," you can perform the network setup following the screen on the computer. - In order to connect with the access point supporting WPS, When the screen left above is displayed, go to the (1). When the screen right above is displayed, go to the (4). (1) Press and hold the WPS button on the access point (for about 5 seconds). For details on pressing the WPS button, refer to the access point manual. (2) Press the OK button on the printer within 2 minutes. The (blue) Wi-Fi lamp on the printer flashes while searching for or connecting to the access point. (3) When the left screen appears, press the OK button. This is the end of the procedure for the wireless LAN setup using WPS. (4) Select WPS, and Press the OK button. (5) Select Push button method, and Press the OK button. (6) Press and hold the WPS button on the access point (for about 5 seconds). For details on pressing the WPS button, refer to the access point manual. (7) Press the OK button on the printer within 2 minutes. The (blue) Wi-Fi lamp on the printer flashes while searching for or connecting to the access point. (8) When the left screen appears, press the OK button. This is the end of the procedure for the wireless LAN setup using WPS. 4. Load Paper 1. Check that the Paper Output Tray is closed, then pull out the Paper Support. 2. Slide the right Paper Guide to the end. The left Paper Guide moves simultaneously with the right guide. 3. Insert paper until it stops. 4. Adjust the Paper Guide to fit the paper size used, then open the Output Tray Extension. 5. Open the Paper Output Tray and the Paper Output Support. IMPORTANT - Printing without opening the Paper Output Tray causes an error.
REFERENCE
Insert paper with the printable side down until it stops. When using photo paper, machine settings for media type and size should be adjusted.
|