Scanning Film Using MP Navigator
- Click 'Start' on the taskbar, 'All Programs' (for Windows XP) or 'Programs' (for Windows 98, Me or 2000), 'Canon', 'MP Navigator 1.1' and then select 'MP Navigator 1.1'.
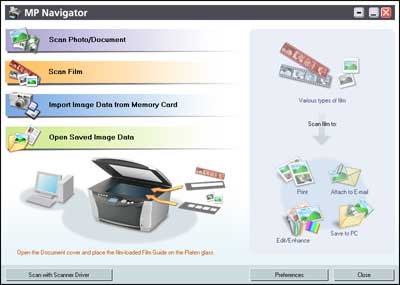
- Click 'Scan Film'.

- Configure settings such as Continuous Scan according to preference. Click 'Specify' for additional settings.
- To keep the setting changes and scan, click 'OK' to return to 'MP Navigator' window.
- To return to 'MP Navigator' without making any changes, click 'Cancel'.
Change advanced settings for scanning such as 'Scanning Resolution', 'Enhance contours' and 'Preview before scanning'.
Scan Settings
Make advanced settings to scan in film.
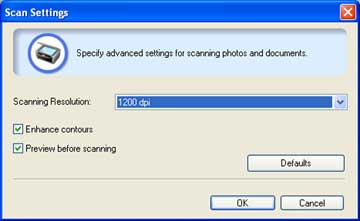
Scanning Resolution
Select the resolution at which to scan in film.
Enhance contours
Check this to emphasize and sharpen the outline of an image. It is effective for scanning photos etc., which have a soft focus.
Preview before scanning
Select this checkbox to display a preview before scanning. Clicking 'Back' returns to the MP Navigator window. Clicking 'Next' starts scanning of the selected frames.
Defaults
Click this to restore the factory pre-defined settings.
Continuous
Select this checkbox to scan multiple documents continuously.
- Click 'Scan'.
A preview scan is performed.

- Select the frames that you want to scan, then click 'Next'.
The scanned images will be displayed in the preview area.
NOTE:
To scan all frames, click 'Select all frames' box.

- Edit the scanned image as required.
When there are multiple images, first select the image to edit (the status of the image with a gray exterior frame).
- Icon A (Trimming)
Trim off the currently selected image. Click this button to display the trimming screen where you specify the trimming frame.

Icon A
- Icon B (Right rotation)
The currently selected image rotates 90 degrees clockwise.

Icon B
- Icon C (Left rotation)
The currently selected image rotates 90 degrees counter-clockwise.

Icon C
- Icon D (Invert)
The currently selected image inverts horizontally.

Icon D
- Clear
Cancels all image selections in the preview area.
- Select All
Selects all images in the preview area.
- Zoom in
Zooms in the image selected in the preview area (the status of the image with a gray exterior frame). You can zoom in the image by double-clicking it.
NOTE:
* Click 'Back to Main Menu' to return to the main menu.
* Click 'Rescan' to redo scanning.
- Select what to do with the scanned image data according to preference.
Save
Print Photo
Send
Edit/Convert
When there are multiple images, first select the image to edit (the status of the image with a gray exterior frame).
