Load envelopes in cassette 1.
Once you have set up the printer driver correctly, addresses are automatically rotated and printed to suit the envelope orientation.
 Important
 Note
Note
-
Prepare the envelopes.
-
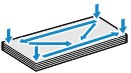
To flatten the envelopes, press down on the corners and edges.
-
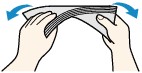
If the envelopes are curled, hold opposite corners and gently bend them the opposite way.
- Flatten any flaps that are bent.
-
Using a pen, press the leading edge in the direction of insertion to flatten the envelope.
Side view of the envelope's leading edge.
Important
- Envelopes that are not flat or that are loaded unevenly may become stuck. Make sure that any curled or bowed surfaces are no higher than 0.1 inch (3 mm).
-
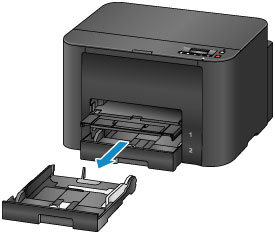
Pull out cassette 1.
-
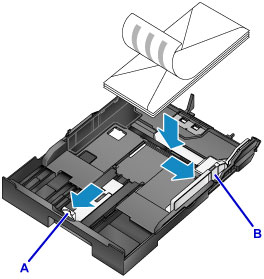
Slide the front (A) and right (B) paper guides out to make room for the paper.
-
Load the envelopes face-DOWN, centered in cassette 1.
The flap will face up, as shown below.
Up to 10 envelopes can be loaded at once.
Note
-
Align the front paper guide (A) with the edge of the envelopes.
-
Slide the right paper guide (B) to align the right and left guides with both edges of the envelopes.
Do not set the paper guides too firmly against the envelopes, which may cause feeding problems.
Note
- Do not load envelopes past the load limit mark (D).
- Keep the stack height below the paper guide tabs (E).
-
Insert cassette 1.
Push cassette 1 into the printer until it stops.
After you insert the cassette, a screen for registering paper information for the cassette is displayed on the LCD.
-
Press the OK button.
-
Use the  or
or  button to select the size of envelopes in the cassette, and then press the OK button.
Note
-
Use the or button to select Envelope, and then press the OK button.
-
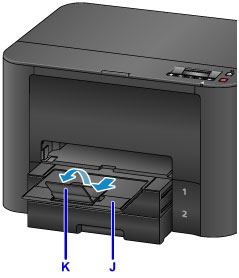
Pull out the output tray extension (F), and then open the paper output support (G).
Note
- Before printing, select the size and type of loaded envelopes on the print settings screen of the printer driver.


 .
.