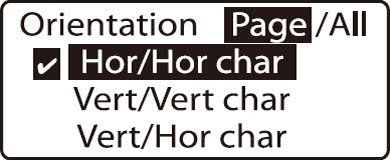
Changing the Printing Orientation
It is possible to print characters with their orientation changed as shown below. It is also possible to change the oriantation on a page basis or for all pages together after entering characters.
|
Horizontal / Horizontal
|

|
|
Vertical / Vertical
|

|
|
Vertical / Horizontal
|

|
If entered characters are expected to be omitted from the page after the orientation is changed on a page basis, it is not possible to select such an orientation with the Page option. It is also not possible to change the orientation to Vertical / Horizontal Character after entering characters.
 Once character data has been entered, the Vertical / Horizontal Character selection can no longer be made. In this case, delete all character data, then make the Vertical / Horizontal Character selection and re-enter the character data.
Printing might not be performed correctly in some orientations, depending on the settings for the media size and the character size.
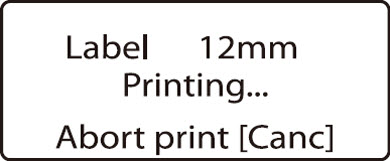
Example: Print label tape (12mm wide)
|
1. Press 
To change the orientation of all pages after entering characters, press  or or  to select All. to select All.
|
Confirm that Page is selected.
|
|
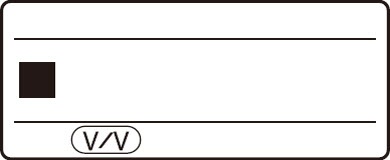
2. Press  or to select Vert / Vert char, then press [Enter]. or to select Vert / Vert char, then press [Enter].
|
|
|
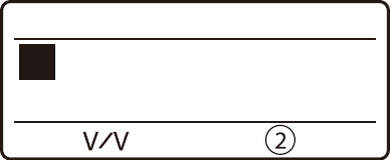
3. Press [Set Lines].
|

A check mark is displayed next to the currently selected number of lines.
|
|
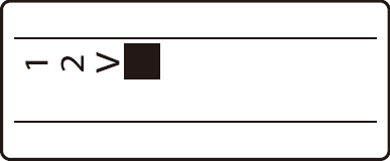
4. Press or to select 2 lines, then press [Enter].
|
|
|
5. Input 12V.
|
|
|
6. Press or .
If you press [Enter] instead of or , a new page is created.
|
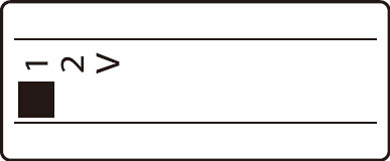
The cursor moves to the second line.
|
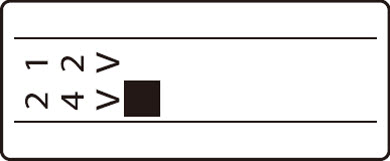
| 7. Input 24V. |
 |
|
8. Press [Print].
|
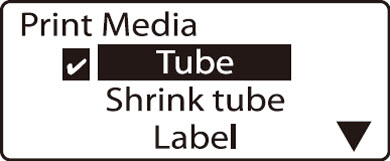
A check mark is displayed next to the currently selected print media.
|
|
9. Press or to select Label, then press [Enter].
|
A check mark is displayed next to the currently selected print media.
|
|
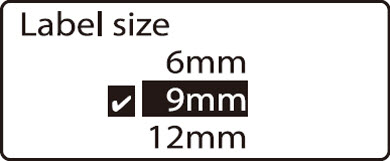
10. Press or to select 12mm, then press [Enter].
|
|
|
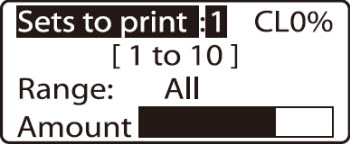
11. Press [Enter].
|
|
When the print orientation is changed to Horizontal / Horizontal Character or Vertical / Vertical Character, characters which cannot be in the page are deleted. When changing the orientation of the characters on multiple pages by selecting All, characters which cannot be in the pages are deleted together from all pages. To avoid deleting the input characters, save the data to a file before changing the orientation.
If your product issue was not resolved after following the steps above, or if you require additional help, please create or log in to your Canon Account to see your technical support options.
Or if you still need help, visit our Canon Community by clicking the button below to get answers:

____________________________________________________________________________________________
