Selecting a Shooting Mode
You can take an optimal picture simply by selecting the appropriate shooting mode.
|

|
Auto
|
Leaves almost all of the settings choices up to the camera.
|
|

|
Manual
|
Lets you adjust the exposure, white balance, photo effect and other settings yourself.
|
|

|
Digital Macro
|
You can approach as close as 3 cm (1.2 in.) (minimum focusing distance) to a subject to shoot. Since this mode trims all but the image center and magnifies it with the digital zoom, you can make a subject appear even larger than in the normal macro mode.
|
|

|
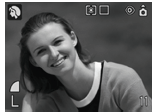
Portrait
|
Produces a soft effect when photographing people.
|
|

|
Night Snapshot
|
Use this to take snapshots of people against twilight or night backgrounds to reduce the effects of camera shake even without using a tripod.
|
|

|
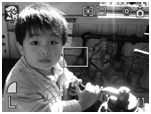
Kids&Pets
|
Allows you to capture subjects that move around, such as children and pets, without missing photo opportunities.
|
|

|
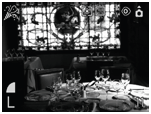
Indoor
|
Prevents camera shake and maintains the subject's true color when shooting under florescent or tungsten lightning. The exposure is regulated so as to avoid the use of flash as much as possible.
|
|

|
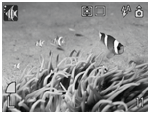
Underwater
|
Appropriate for shooting images with the All Weather Case AWDC30 (sold separately). This mode uses an optimal white balance setting to reduce bluish tones and record images with natural hues.
|
|

|
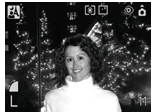
My Colors
|
Use these modes to change image colors and then shoot. |
- With the camera mode switch set to mode. Press the <FUNC./SET> button.

- Use the
 or
or  buttons to select the Shooting Mode menu.
- Use the
 or
or  buttons to select a Shooting Mode. You can shoot right after selecting an option. The menu displays again after the shot, allowing you to change the settings easily.

-
Press the <FUNC./SET> button.
- The display will return to the shooting screen and the icon of the selected shooting mode will appear on the LCD monitor.
- Except for the , , and modes, the shooting procedures are the same as for Shooting in Auto Mode.


- In , , , , and modes, the ISO speed may increase and cause noise in the image.
- In mode , shoot with the subject 1 - 4 m (39 in. - 3.3 ft.) (telephoto range zoom settings)/1 m (39 in.) - infinity (non-telephoto range zoom settings) from the end of the lens.
|

- Results may vary depending on the subject.
- In mode, you are recommended to use the LCD monitor to shoot. To shoot underwater, install the camera in All Weather Case AWDC30 (sold separately).
|