Before Starting
These instructions refer to performing an initial wireless setup of your printer to a wireless network using Canon PRINT.
Instructions
You can use the Canon PRINT app to easily set up a wireless connection so you can print from a ChromeOS device.
-
If you have not already done so, start Easy Wireless Connect on your printer. For instructions, select your printer model from one of the drop-down lists below.
 Be sure to start Easy Wireless Connect before starting the app. For some models, this is called Cableless Setup. If you have already initiated Easy Wireless Connect on your printer, please proceed to step 2.
|
PIXMA iP / iX
|
PIXMA TS
|
PIXMA TR
|
MAXIFY
|
PIXMA G
|
PIXMA MX
|
PIXMA MG
|
Pro
|
-
Start the Canon PRINT app. If you don't have the app, download it from Google Play.
-
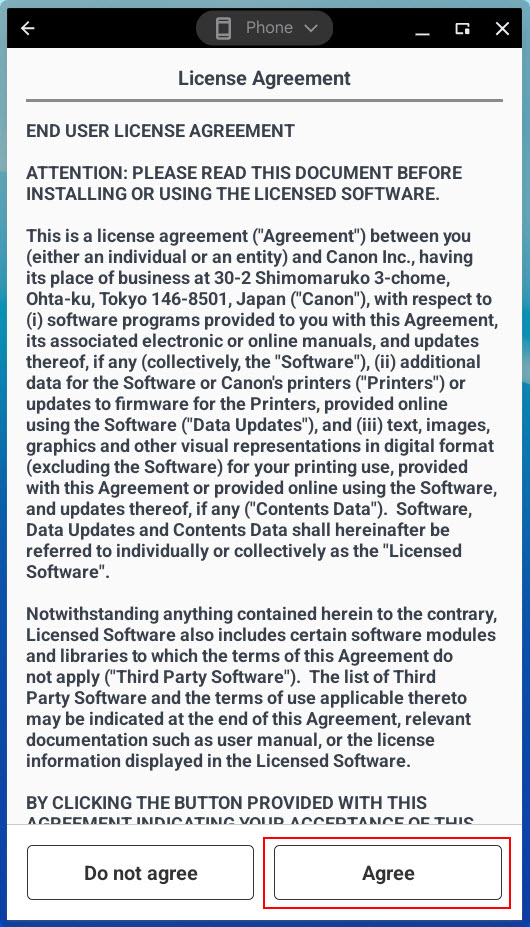
Upon opening the app for the first time, you'll see a License Agreement. Read the terms and tap or click Agree to continue. If you tap or click Do not agree, you won't be able to use this app.
-
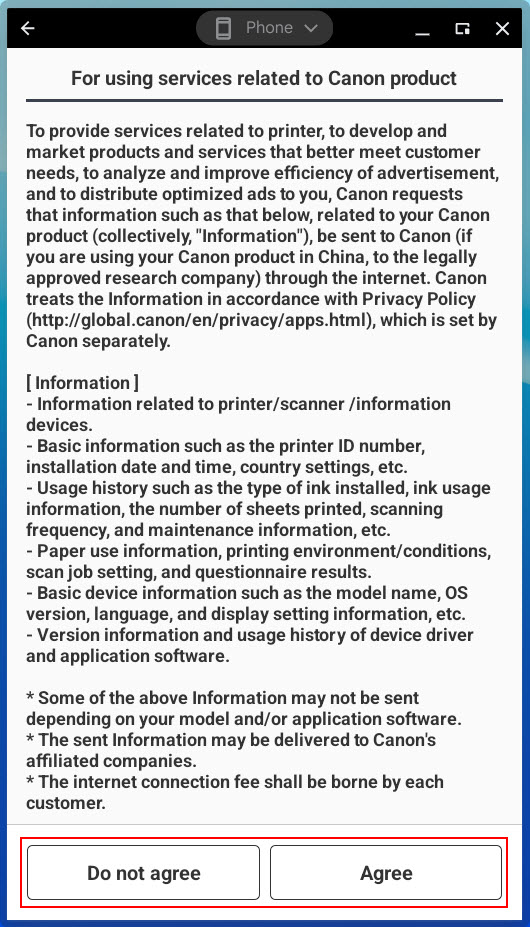
The For using services related to Canon product screen will appear. Read this information, then tap or click or click Agree or Do not agree.
-
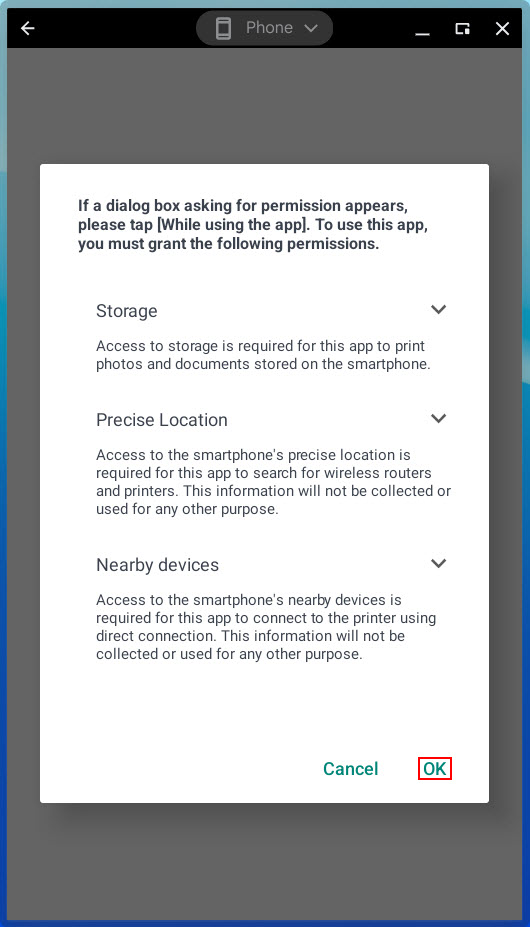
The following screen will appear. Tap or click OK to proceed.
-
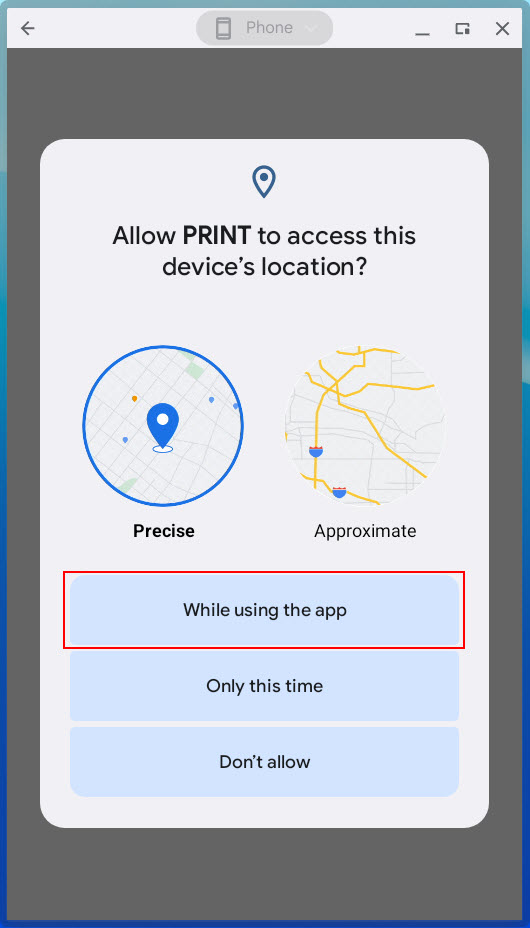
When asked to allow the app to access your device's location, tap or click While using the app or the appropriate affirmative option.
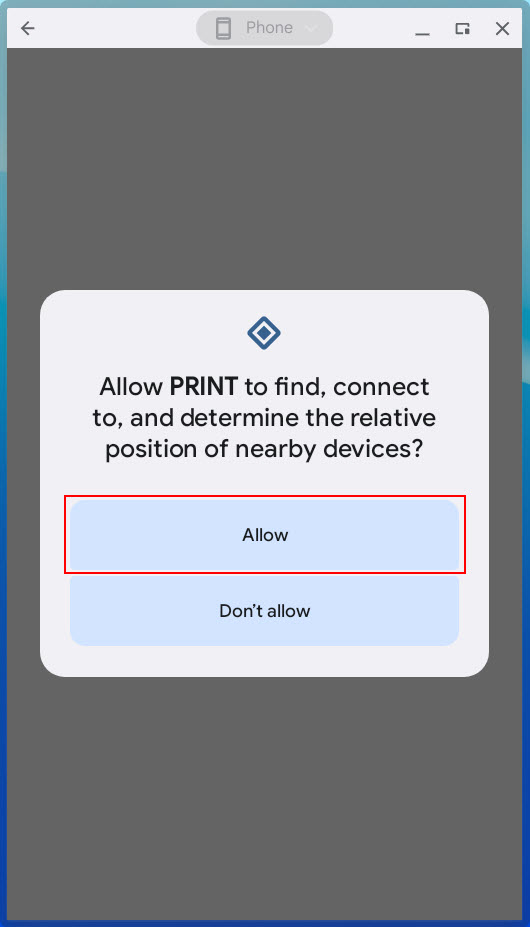
When asked to allow the app to access your find, connect to, and determine the relative position of nearby devices, tap or click Allow or the appropriate affirmative option.
-
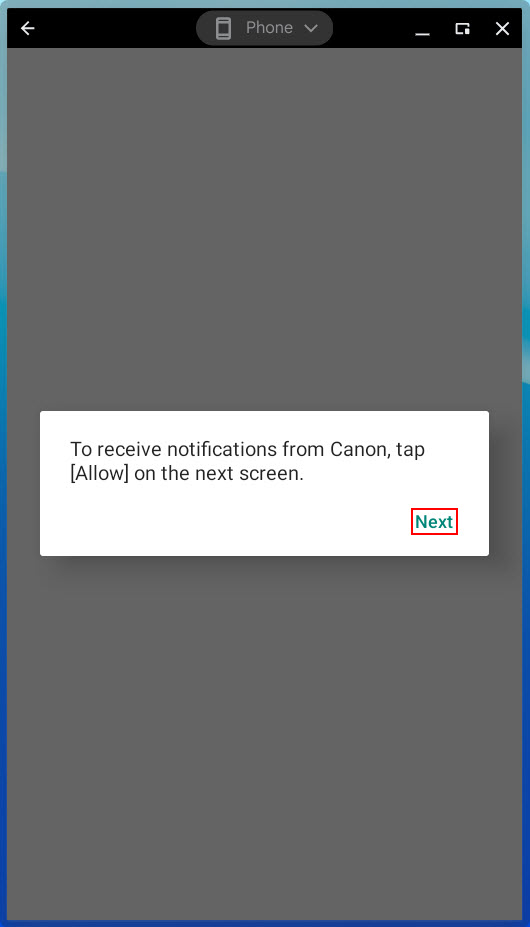
When this message appears, tap or click Next.
-
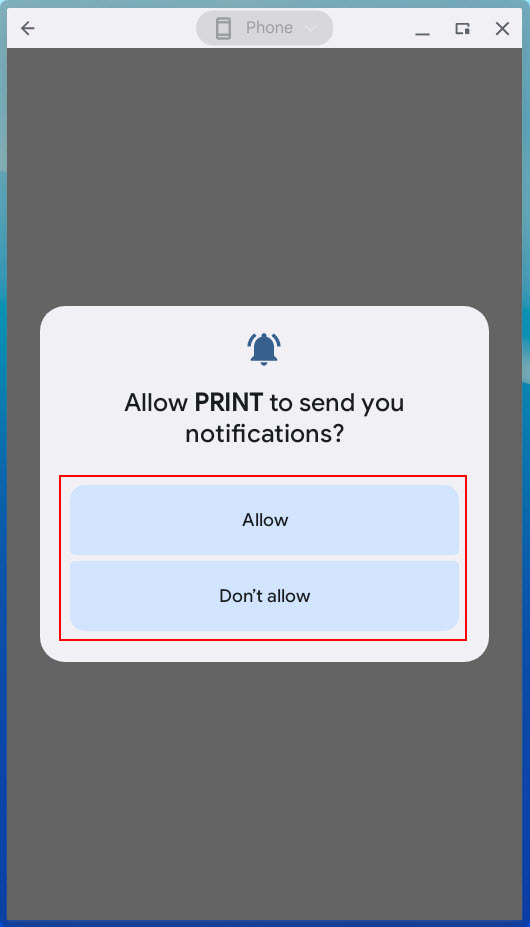
Tap or click Allow or Don't allow.
-
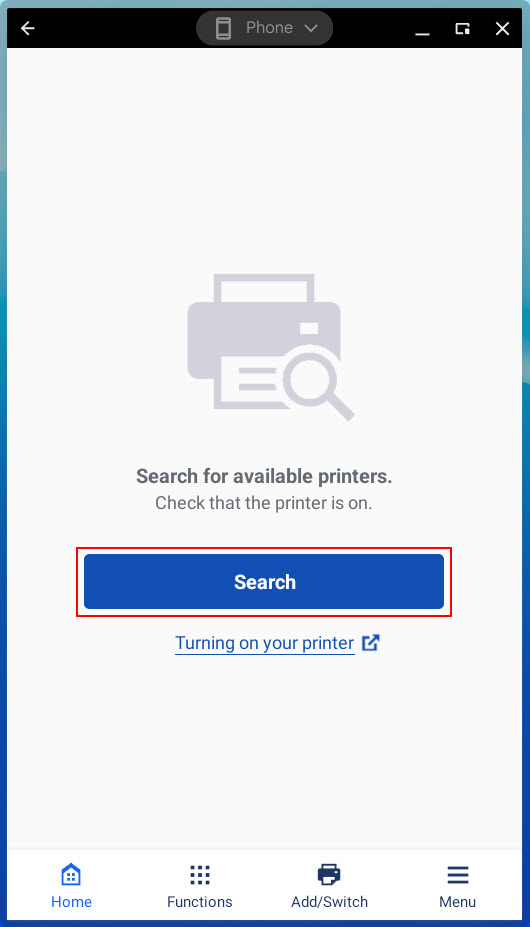
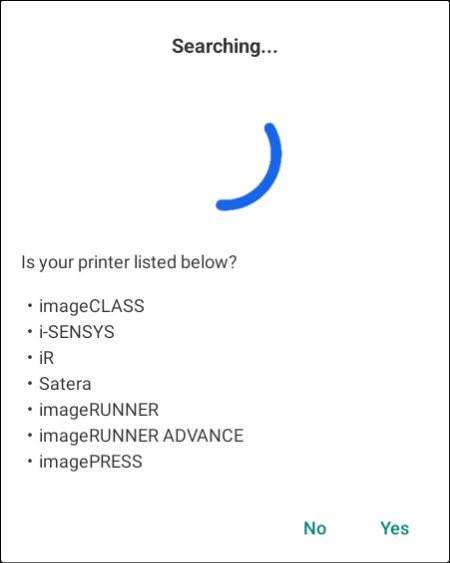
When the screen below appears, tap or click Search.
 If you see this message, do not tap or click Yes or No. Tapping or clicking Yes will start the process over. Tapping or clicking No will cause the app to indicate that it is still searching for a printer.
-
Tap or click Next when this message appears.

-
You'll be prompted to connect directly to the printer. Tap or click Connect or the appropriate affirmative option.
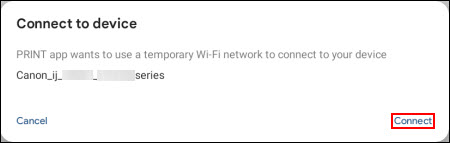
Depending on the model, it may be named Canon_ij_setup or it may have the name of the printer, such as Canon_ij_xxxxx_GX7000series.
 If you tap or click Cancel, you'll be prompted to manually connect to the printer. If you see this screen, tap or click Open Wi-Fi Settings, then select the printer's network name and return to the app.
-
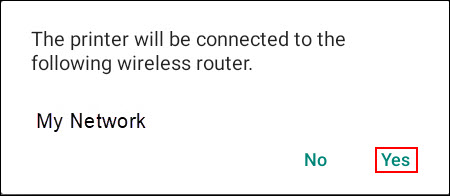
A message appears saying the printer will connect to your wireless network. Make sure your network name appears in this message, then tap or click Yes.
If your printer is too far away from your router, your ChromeOS device may try and fail to connect and you won't see the screen shown below. In this case, turn off the printer, move it closer to your router, and restart the process.
-
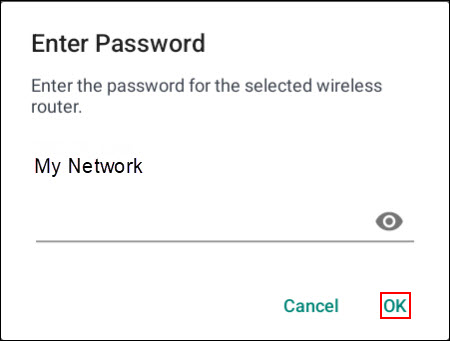
Enter the password for your wireless router. Tap or click the eye symbol to check the password entry to be sure it's correct, then tap or click OK.
If the cableless setup process fails at this stage, you may need to restart the process and connect your ChromeOS device to the Canon_ij_XXXX SSID. Set your printer to cableless setup mode, connect to the Canon_ij_XXXX SSID, and start again from step 1. Click here if you need help with this.
The app will send your network information to the printer. Please wait.
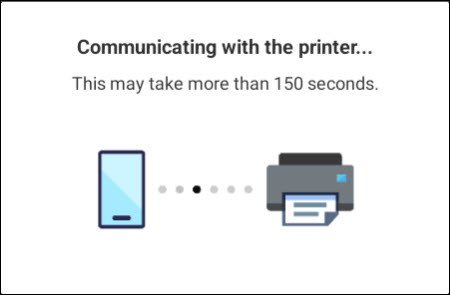
At this point, your device will communicate with the printer, which will be automatically added.
-
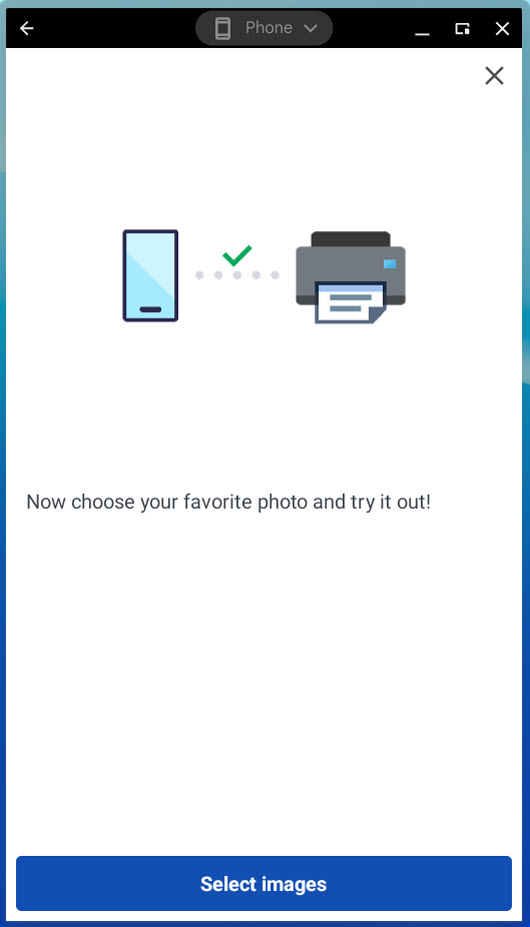
Wireless connection is complete. Tap or click Select images to start using the application or tap the X to exit.
You may see a prompt similar to the following.
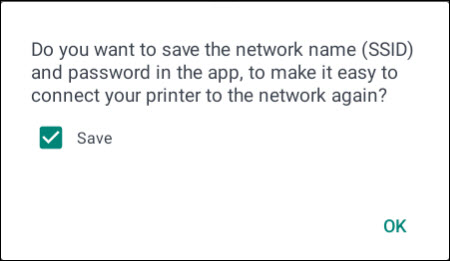
If you want this app to save your network name and password to make it easier to reconnect this printer, or to add a new one, make sure the Save box is checked, then tap or click OK.
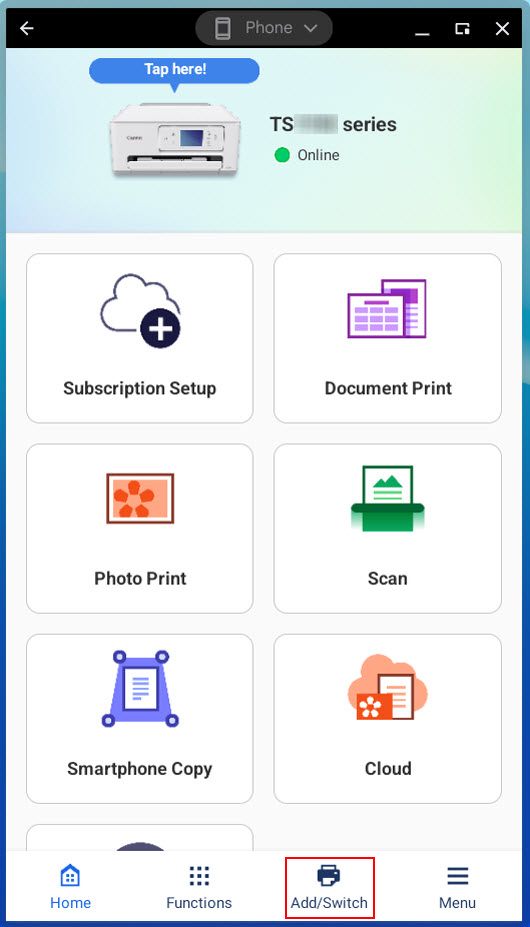
How to Rename the Printer (Optional)
-
On the main screen, tap or click the Add/Switch icon.
-
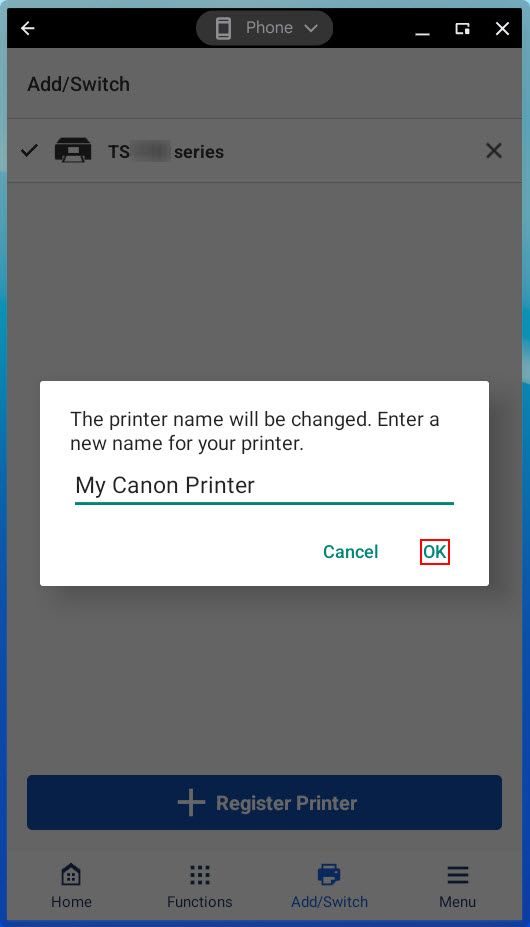
Tap or click and hold the printer you want to rename. An on-screen keyboard will appear. Enter a new name for the printer, then tap or click OK.
-
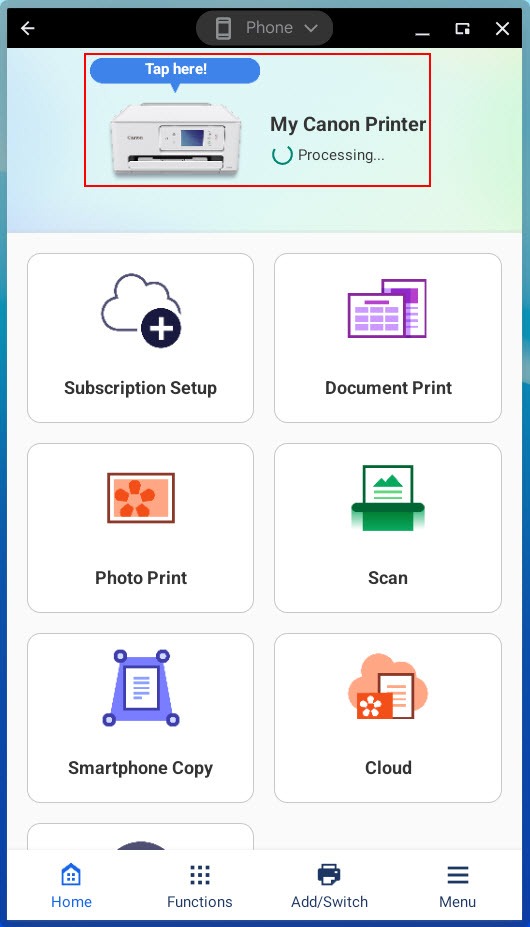
Tap or click the Home icon at the bottom of the screen. The printer will show the new name you entered.
If your product issue was not resolved after following the steps above, or if you require additional help, please create or log in to your Canon Account to see your technical support options.
Or if you still need help, visit our Canon Community by clicking the button below to get answers:

____________________________________________________________________________________________
