important:
Before turning on the printer, remove all orange tapes and protective sheets from the inside and outside of the printer.
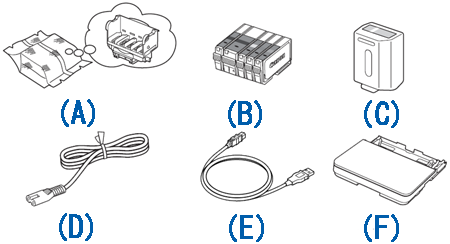
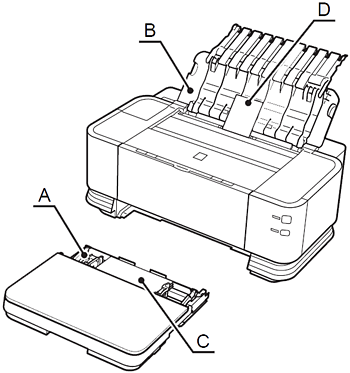
(A) Print Head
(B) 5 ink tanks (PBK, BK, Y, M, C)
(C) clear ink tank
(D) power cord
(E) USB cable
(F) Cassette
(containing the drivers, applications and on-screen manuals)
note:
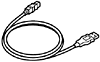
- The USB cable is used during the network setup procedure.
important:
- When installing the printer, lift and move it with the help of another person.
- Do not install the printer where an object may fall on it. The object may fall inside the printer, resulting in malfunction.
- Do not place any object on top of the printer. It may fall into the printer when opening covers, resulting in malfunction.
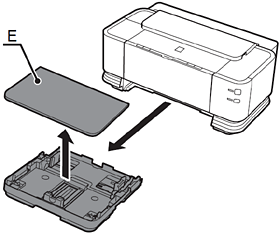
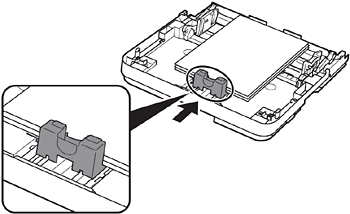
Cleaning sheets are used for cleaning the Transport Roller.

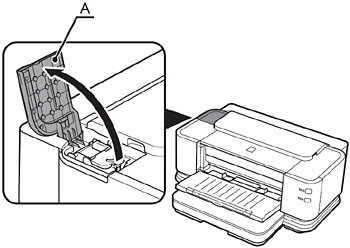
Store the cleaning sheets in the Cleaning Sheet Holder (A).

Insert the Cassette (B) against the back end of the printer.
Turn the Power On
1. Plug the power cord into the back right of the printer, then connect the other end to the wall outlet.
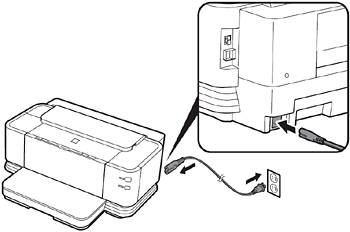
important:
- Do NOT connect the USB cable or LAN cable at this stage.
2. Turn on the printer (A).
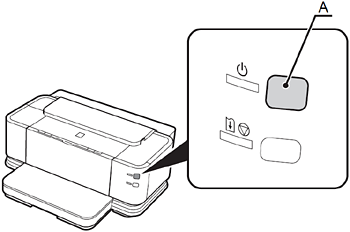
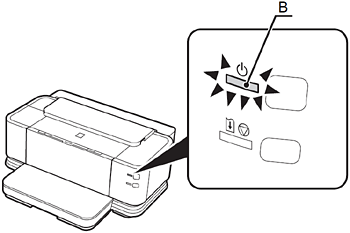
3. Make sure that the POWER lamp (B) lights green.
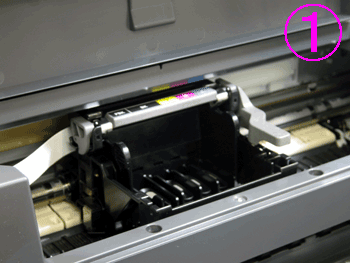
Install the Print Head
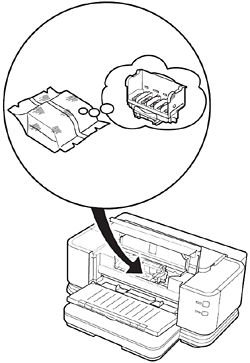
important:
- Handle the Print Head carefully. Do not drop or apply excessive pressure to it.
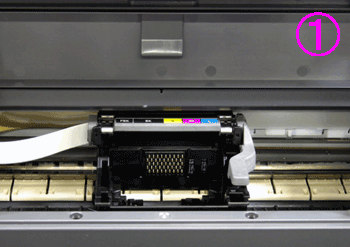
1. Open the Paper Output Tray (A) and the Top Cover (B).

2. Make sure that the Print Head Holder (C) moves to the installation position.
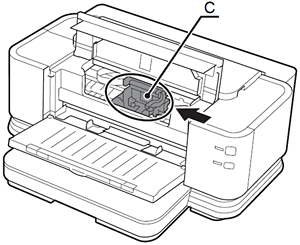
important:
- The Print Head Holder makes a noise as it moves. This is normal operation.
- If the Print Head Holder does not move, make sure that the printer is turned on.
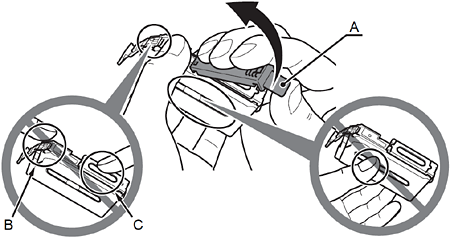
3. Firmly raise the Print Head Lock Lever (D) of the Print Head Holder until it stops.
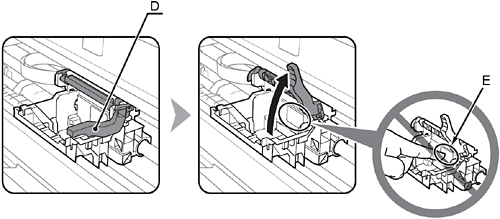
important:
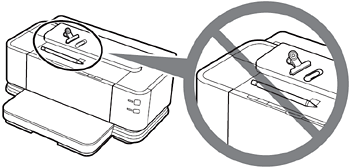
- Do not touch the inside of the Print Head Holder (E). The printer may not print properly if you touch it.
4. Remove the Print Head from the silver package.
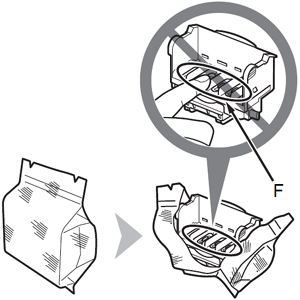
5. Remove the orange protective cap.

important:
- Do not touch the inside (F) or metal parts (G) of the Print Head. The printer may not print properly if you touch them.
- There may be some transparent or light color ink on the inside of the bag the Print Head comes in, or the inside of the protective cap - this has no effect on print quality. Be careful not to get ink on yourself when handling these items.
6. Tilt the Print Head forward and set it in place as shown.
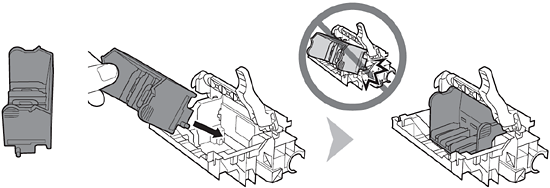
important:
- Do not knock the Print Head against the sides of the holder.
7. Lower the Print Head Lock Lever completely.

important:
- Hold the Print Head Lock Lever firmly and lower it gently.
- Once you have installed the Print Head, do not remove it unnecessarily.
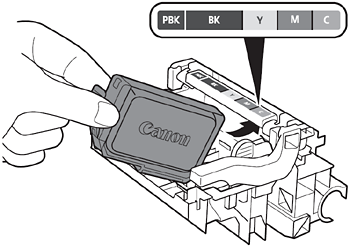
Install the Ink Tanks
important:
- Handle the ink tanks carefully. Do not drop or apply excessive pressure to them.
- If the Top Cover is left open for more than 10 minutes, the Print Head Holder moves to the right. In this case, close and reopen the Top Cover.
- If the Top Cover is left open for more than 10 minutes, the Print Head Holder moves to the right. In this case, close and reopen the Top Cover.
- Be sure to use the supplied ink tanks.
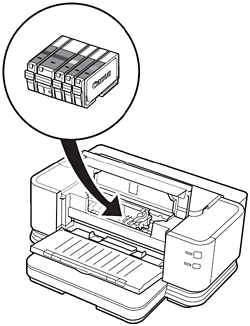
1. Remove the ink tank from its package.

2. Remove and discard the orange protective cap (A) located on the bottom of the ink tank.
important:
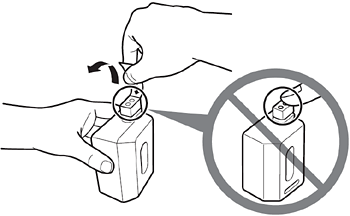
- Do not touch the electrical contacts (B) or open ink port (C) on the ink tank. The printer may not print properly if you touch them.
- Do not hold the sides of the ink tank; ink may splash.
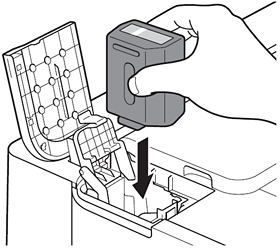
3. Tilt the ink tank, then insert it under the label and against the back end of the slot.
Make sure that the color of the label matches the ink tank.
important:
- Match the labels when installing.
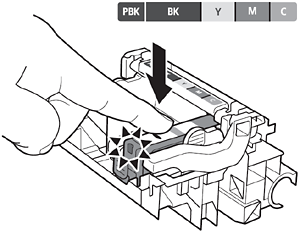
4. Press the PUSH mark on the ink tank firmly until it clicks.
When the installation is completed properly, the Ink lamp lights red.
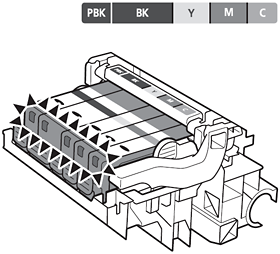
5. Install all the other ink tanks in the same way.
Install all the ink tanks.
Make sure all the Ink lamps light red.
important:
- Once you have installed the ink tanks, do not remove them unnecessarily.

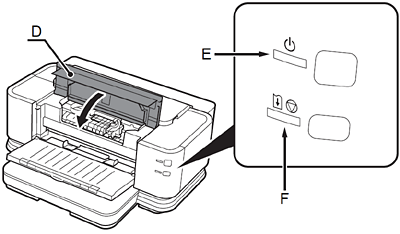
6. Close the Top Cover (D).
- Wait for about 2 minutes until the POWER lamp (green) (E) stops flashing and stays lit then operating noise stops, and go to the next step. Do not open the Top Cover while the lamp is flashing. The printer vibrates while the lamp is flashing because ink is stirred inside the printer.
important:
- If an Alarm lamp (F) flashes orange, make sure that the Print Head and the ink tanks are correctly installed.
Install the Clear Ink Tank
1. Open the Clear Ink Tank Cover (A).
2. Open the Clear Ink Tank Locking Cover (B).
Pinch the tab and push back to open.
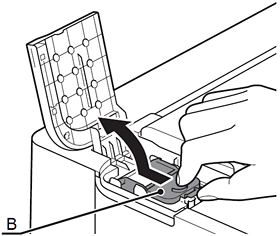
3. Remove the orange tape in the direction of the arrow from the clear ink tank.
4. Insert the clear ink tank straight.
5. Replace the Clear Ink Tank Locking Cover, then press the center firmly until it clicks.

important:
- Once you have installed the clear ink tank, do not remove it unnecessarily.
6. Close the Clear Ink Tank Cover.
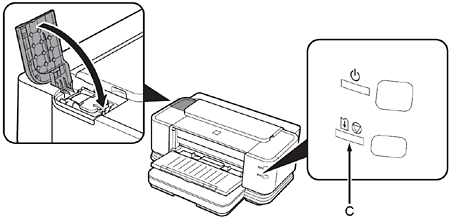
important:
- If an Alarm lamp (C) flashes orange, make sure that the clear ink tank are correctly installed.
Loading Paper
note:
This section explains how to load paper in the Cassette (A) and the Rear Tray (B).
The Cassette supports plain paper (C) only. To print photo paper / Hagaki (D), be sure to load it in the Rear Tray.
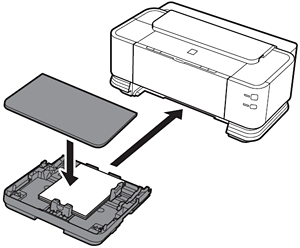
1. Pull out the Cassette slowly with hands, then remove the Cassette Cover (E).
Pull the Cassette out slowly with hands until it stops, then lift its front slightly and pull it out.
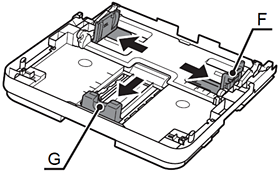
2. Pinch the Paper Guides (F) and (G), then move them to edges.
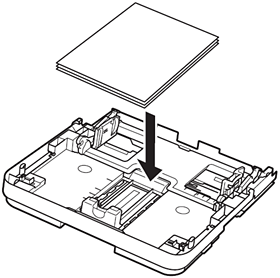
3. Load plain paper.
Load paper with the printing side facing down.
4. Pinch the Paper Guide, then align it with the paper size.
The Paper Guide will stop when it aligns with the corresponding mark of paper size.
note:
- There may be a little space between the Paper Guide and the paper stack.
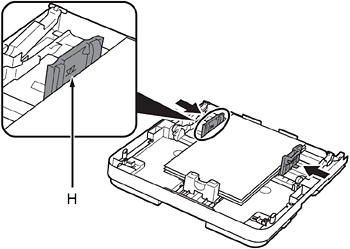
5. Pinch the Paper Guide on the right, then slide it to set the Paper Guides against edges of the paper.
Make sure that the paper stack does not exceed the line (H).
important:
- To print on specialty paper, be sure to load it in the Rear Tray.
6. Attach the Cassette Cover, then insert the Cassette against the back end of the printer.
note:
- Pull and extend the Cassette to load paper larger than A4.
7. Open the Paper Support (I).
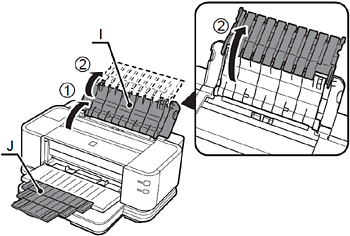
note:
- Pull out the Front Tray Extension (J) beforehand.
8. Move the Paper Guides (K) to edges.

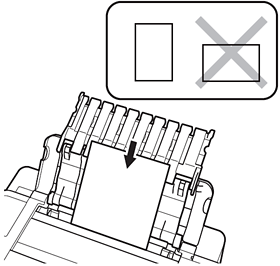
9. Load paper in the center of the Rear Tray.
Load paper in portrait orientation with the printing side facing up.
10. Slide the left and right Paper Guides against edges of the paper.
Make sure that the paper stack does not exceed the line (L).

