Setting the TX Reports to Print Automatically
This section describes how to set TX reports to print automatically.
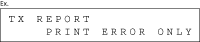
The default setting is <PRINT ERROR ONLY>.
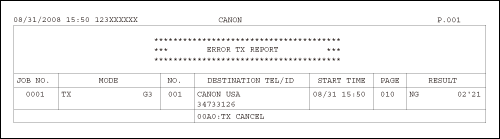
The following items are printed in a TX Report:
JOB NO.: Job number
MODE: Mode of transaction (G3 or ECM)
NO.: Sequence number
DESTINATION TEL/ID: Name and number of recipient
START TIME: Date and time of transaction
PAGE: Number of pages sent
RESULT: Result of transaction
- OK: Transmission successful
- NG: Transmission failed
- STOP: Transmission manually canceled before completion
- NO ANSWER: Call not answered
- PAPER JAM: ADF jam occurs during Manual TX
1. Press  [Menu].
2. Press [  ] or [
  ] to select <REPORT SETTINGS>, then press [OK].

3. Press [ ] or [ ] to select <TX REPORT>, then press [OK].

4. Press [ ] or [ ] to select the setting you want, then press [OK].
- <PRINT ERROR ONLY>: Prints a report only when a transmission error occurs.
- <OUTPUT NO>: Does not print a report.
- <OUTPUT YES>: Prints a report every time you send a document.
5. Press  [Stop/Reset] to return to the standby mode.
