
Installation Procedure for USB Connection Windows
| Article ID: ART102579 | | | Date published: 05/11/2015 | | | Date last updated: 08/15/2015 |
Description
Installation Procedure for USB Connection Windows
Solution
Installation Procedure for USB Connection
Printer Drivers
Perform the following procedure to install the printer and fax drivers. If you install these drivers, you can print and fax from your computer. Printer drivers are divided into two types: PCL and UFRII LT.
- PCL : This is the Hewlett-Packard's PCL printer driver, which includes the PCL5c, PCL5e, and PCL6 drivers. ThePCL5c printer driver is for color printers, while the PCL5e and PCL6 printer drivers are for black-and-white printers. PCL6 is an advanced version of PCL5e and offers superior printing quality and speed. This machine supports the PCL5e and PCL6 printer drivers.
- UFRII LT : This is the Canon UFRII LT printer driver. Using this driver, the various data processing tasks conventionally executed within the printer are appropriately divided between the host PC and the printer to greatly reduce the overall printing time. The workload can be delegated to match the output data, thus realizing a significant increase in speed through optimization.
- PCL : This is the Hewlett-Packard's PCL printer driver, which includes the PCL5c, PCL5e, and PCL6 drivers. ThePCL5c printer driver is for color printers, while the PCL5e and PCL6 printer drivers are for black-and-white printers. PCL6 is an advanced version of PCL5e and offers superior printing quality and speed. This machine supports the PCL5e and PCL6 printer drivers.UFRII LT : This is the Canon UFRII LT printer driver. Using this driver, the various data processing tasks conventionally executed within the printer are appropriately divided between the host PC and the printer to greatly reduce the overall printing time. The workload can be delegated to match the output data, thus realizing a significant increase in speed through optimization.
Before Installationnote:- imageCLASS MF7460 does not come with PCL User Software CD-ROM.- The following procedures is an example for installing all the drivers for the machine, using the installer on the UFRII LT/FAX User Software CD-ROM and PCL User Software CD-ROM.
- Do not connect the USB cable before installing the software. If you connect the USB cable before installing the software and the Found New Hardware Wizard screen appears, click [Cancel].
- For Windows 2000/XP/Server 2003/Vista, log on as Administrator to install the software.
- Make sure the machine is turned on before connecting the USB cable.
- On the screen shown at each step, click on the circled button to proceed.
- The machine does not come with a USB cable.
1. Insert the UFRII LT/FAX User Software CD-ROM.

2. If the CD-ROM Setup screen is not displayed, click [start] on the Windows task bar[My Computer].
- Windows Vista: click [start] on the Windows task bar
- Windows 98/Me/2000: double-click [My Computer] on the Windows desktop.
- Windows Vista: click [start] on the Windows task bar
Open the CD-ROM icon, then doubleclick [MInst] ([MInst.exe]).
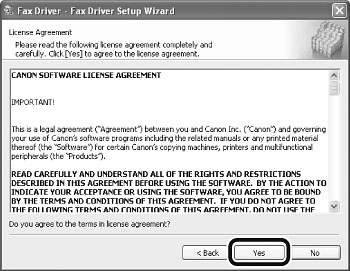
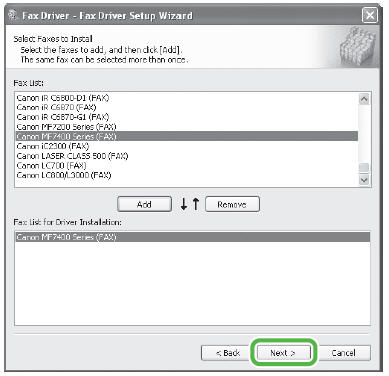
3. Select the UFRII Printer Driver, FAX Driver and Color Network ScanGear.

4.

5.

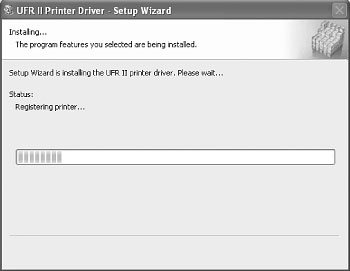
6.

7.

8.

9.
10.

11. Attach the ferrite core (A) as close as possible to the B-type side (square) of the USB cable (B).

12. Connect the machine and your computer with a USB cable (A).
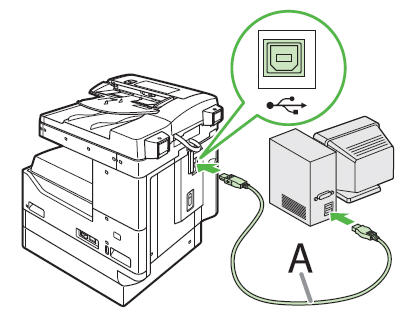
note:If you are using Windows XP, [Found New Hardware Wizard] dialog box appears. Select [Install Software Automatically (Recommended)] then click [Next].
13.

14.

15.
16.
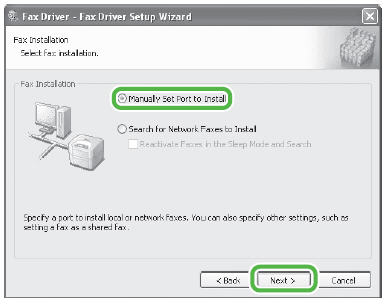
17. A [Process to Install Fax Driver] dialog box will appear if drivers that can be installed with this Installer are already installed.
Select the desired installation and then click [Next].

18.

19.
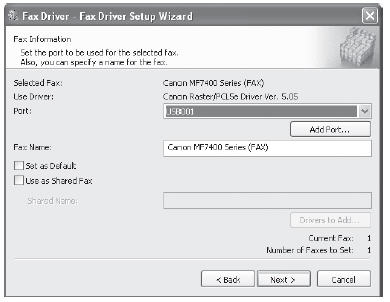
20. Select the USB port you want to use from [Port]. If you want to add a port, click [AddPort] and then select the USB port you want to add.
21.

22.

23.
24.
25. The Color Network ScanGear installation screen appears. Follow the on-screen instructions.

note:If you are using MF7460, skip the Color Network ScanGear installation.
26.

27.
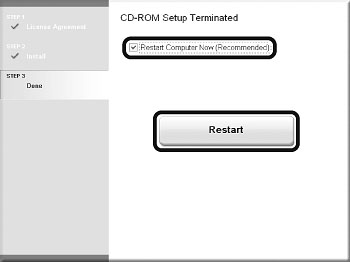
28. Remove the UFRII LT/FAX User Software CD-ROM.

note:If you are using MF7460, you have now completed installation.
29. Insert the PCL User Software CD-ROM. (MF7480/MF7470 Only)
30. If the CD-ROM Setup screen is not displayed, click [start] on the Windows task bar ? [My Computer].
- Windows Vista: click [start] on the Windows task bar
- Windows 98/Me/2000: double-click [My Computer] on the Windows desktop.
- Windows Vista: click [start] on the Windows task bar
Open the CD-ROM icon, then doubleclick [MInst] ([MInst.exe]).

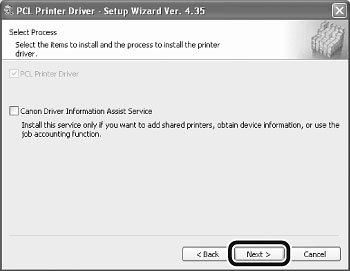
31. Select the PCL Printer Driver.

32.

33.

34.

35.
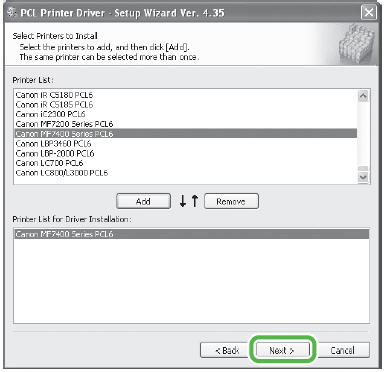
36. Select [Canon MF7400 Series PCL5e] or [Canon MF7400 Series PCL6] .

37.
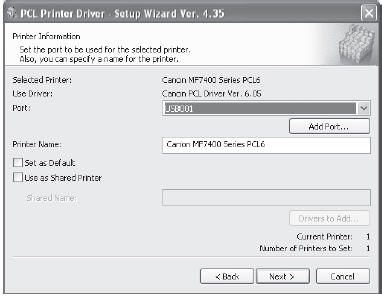
38. Select the USB port you want to use from [Port]. If you want to add a port, click [Add Port] and then select the printer port you want to add.
39.

40.

41.
42.

43.

44.
Checking the Installation
Check if the drivers are installed successfully and that the machine is selected as the default printer.
note:If your machine is selected in the [Printer] area when you open the [Print] dialog box from an application, your machine is set as the defaultprinter.
1. Open the [Printers and Faxes] folder (Windows 98/2000: the [Printers] dialog box).
- Windows XP/Server2003: Click [start] on the Windows task bar
- Windows Vista: Click [start] on the Windows task bar -> select [Control Panel]
- Windows 98/Me/2000: [Start]
- Windows XP/Server2003: Click [start] on the Windows task bar
Make sure the corresponding printer driver icon is displayed.
2. Set as default printer.
Click the printer icon of this machine. Click [Set as Default Printer] from [File] menu.
3. Open the [Scanners and Cameras] folder (Windows 98/2000: the [Scanners and Cameras Properties] dialog box).
- Windows XP/Server2003: Click [start] on the Windows task bar
- Windows Vista: Click [start] on the Windows task bar
- Windows 98/Me/2000: [Start]
Make sure the corresponding scanner driver icon is displayed.
4. Check if the [Color Network ScanGear] appears in the program list.
- Windows XP/Server2003: Click [start] on the Windows task bar
- Windows Vista: Click [start] on the Windows task bar
- Windows 98/Me/2000: [Start]
Make sure the [Color Network ScanGear] is listed in [All Programs] (or [Programs]).
SIMS Doc Id
0