You can change the resolution and compression (excluding movies) settings to suit the purpose of the image you are about to shoot.
|
Resolution
|
Purpose
|
|
L (Large) 2592 X 1944 pixels
|
Print larger than A4 size 210 x 297 mm (8.3 x 11.7 in.)
Print larger than letter size 216 x 279 mm (8.5 x 11 in.)
|
|
M1 (Medium 1) 1600 X 1200 pixels
|
Print postcard size 148 x 100 mm (6 x 4 in.) prints
Print L size 119 x 89 mm (4.7 x 3.5 in.) prints
|
|
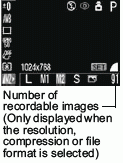
M2 (Medium 2) 1024 X 768 pixels
|
Print card size 86 x 54 mm (3.4 x 2.1 in.) prints |
|
S (Small) 640 X 480 pixels
|
Send images as e-mail attachments
Shoot more images
|
*Paper sizes vary by region
|
Compression
|
Purpose
|
 Superfine Superfine |
Shoot higher quality images |
 Fine Fine |
Shoot normal quality images |
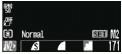
 Normal Normal |
Shoot more images |
Movies can be shot with the following resolution.
|
Resolution
|
 320 X 240 pixels 320 X 240 pixels |
 160 X 120 pixels 160 X 120 pixels |
Changing the Resolution and Compression
1. Turn the shooting mode dial to the desired Shooting mode.
2. Press the <FUNC.> button.
3. Select L* using the  or
or  button.

* The current setting is displayed.
4. Select the resolution you wish to set using the  or
or  button. (Excluding
  )
)
5. Press the <SET> button.
6. Select the compression you wish to set using the left or right button.
You can shoot the image right after selecting settings by pressing the shutter button. This screen will appear again, once the image is shot.
7. Press the <FUNC.> button.
8. Shoot the image.
