
Different ways to send a fax (JX210P)
| Article ID: ART152406 | | | Date published: 05/22/2015 | | | Date last updated: 12/28/2015 |
Description
Solution
Before you send a document, see "Document Requirements" , and "Loading Documents and Paper".
- You can send up to 20 A4-size (10 legal-size) pages at a time (based on the Canon FAX Standard Chart No.1, standard resolution).You cannot add pages while the fax is sending.
- The fax stores the document temporally in memory when sending a document, however, when memory is full, it will send the document as it scans the document without storing document in memory.
- Direct Sending
1. Load the document face up into the ADF.
You can set the scanning resolution and contrast .
2. Dial the receiving party's fax number.
Use one of the dialing methods described in this chapter.

3. Press [Start/Copy].
The fax begins sending.
- If an error occurs during sending, the fax beeps intermittently for a few seconds and an error message appears on the LCD. If this happens, correct the problem and then press [Stop/Reset], then try sending the document again.
- The fax automatically redials if the receiving party does not answer or if the line is busy .
- Manual Sending
If you would like to first speak with the person you are sending the document to, use manual sending.
1. Load the document face up into the ADF.
You can set the scanning resolution and contrast .
2. Pick up the Handset or press [Hook] and dial the receiving party's fax number.
Use one of the dialing methods described in this chapter.

3. If a person answers, converse normally, then ask them to press the start button on their fax. Press [Start/Copy] and hang up.
If you hear a high pitch tone, press [Start/Copy] and hang up.
- If you pressed [Hook] in step 2, you need to pick up the Handset when a person answers the phone.
- The fax will beep if the Handset is not hang up properly. Make sure the Handset is seated properly in its cradle. If you do not want the fax to beep, disable the <OFFHOOK ALARM> setting .
- If an error occurs during sending, the fax beeps intermittently for a few seconds and an error message appears on the LCD. If this happens, correct the problem then try sending the document again. See .
- Canceling Sending
1. Press [Stop/Reset].
- When you cancel sending, you may need to press and hold [Start/Copy] for a few seconds to feed out the document.
- You can set whether or not the fax prints the TX REPORT .
- Adjusting the Quality of Your Documents
- Setting the Scanning Resolution
Resolution is a measure of the fineness or clarity of a printout. Low resolutions may cause text and graphics to have a jagged appearance, while higher resolutions provide smoother curves and lines, crisp text and graphics, and a better match to traditional typeface designs.
Using a higher resolution will increase the output quality, but will slow down the scanning speed.
1. Load the document face up into the ADF.
2. Press [Receive Mode/Resolution] to select the resolution.You can select <FAX STANDARD>, <FAX FINE> or <FAX PHOTO>.
You cannot change the resolution setting while the machine is sending a fax or after it starts scanning.
- Setting the Scanning Contrast
Contrast is the difference in brightness between the lightest and darkest parts of a printed document. You can adjust the contrast your fax uses to send or copy documents, according to how light or dark your document is.
1. Press [Menu].
2. Use [  ] or [
  ] to select <DATA REGSTRATION>, then press [Start/Copy] twice. The LCD displays <DATE & TIME>.
3. Use [ ] or [ ] to select <SCAN CONTRAST>, then press [Start/Copy]. The LCD displays <STANDARD>.
4. Use [ ] or [ ] to adjust the scanning contrast, then press [Start/Copy].You can select <STANDARD>, <DARKER> or <LIGHTER>.
5. Press [Stop/Reset].
Setting ends and the fax returns to standby mode.
Automatic Dialing- Sending a Document Using One-Touch Speed Dialing or Coded Speed Dialing Numbers
To use this feature you must first register numbers for one-touch speed dialing (see ) or coded speed dialing (see ).
1. Load the document face up into the ADF.
You can set the scanning resolution and the contrast .
2. Press the one-touch speed dialing button under which the number you wish to fax is registered.
-or-
Press [Coded] and enter the appropriate two-digit coded speed dialing code. The registered name and number appear.
If you make a mistake, press [Stop/Reset]. Then press the correct one-touch speed dialing button or press [Coded] and re-enter the code.
3. Press [Start/Copy].
The fax begins sending.
-or-
After about 10 seconds of no operation panel input, the fax starts sending automatically.
- Sending a Document Using Directory Dialing
This feature is convenient when you know the other party's name but cannot recall the one-touch speed dialing button or the code for coded speed dialing where the number is registered.
This procedure can also be used to look up the other party's name and retrieve the number for dialing.
1. Load the document face up into the ADF.
You can set the scanning resolution and the contrast.
2. Press [Directory].
3. Press a numeric button to enter the first letter of the name of the party you are searching for.
4. Press [  ] or [
  ] to display the other names and numbers registered for the button letter group.
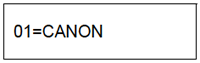
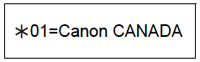
- The names for one-touch speed dialing numbers are prefixed with two digits and the names for coded speed dialing numbers are prefixed with an asterisk (
 ) and two digits.
 - When you reach the last name and number registered for the letter group, you will return to the first name and number in the group.
- If the LCD does not change after you press [ ] or [ ], this means only one name and number is registered for the button you just pressed.
- Press [Redial] to switch between the name and number on the LCD.
5. With the telephone number you want to dial displayed, press [Start/Copy] to start the document transmission.
Special Dialing- Sending a Document Using Caller History
If the <CALLER ID> setting is set to <ON>, the caller's name and phone/fax number appear on the LCD when you receive a call . The fax keeps up to 20 latest caller IDs in memory.
The caller history feature is only available in some countries. The feature uses the Telcordia or the ETSI EN 300 778-1 protocol. Contact your local telephone company for detailed information.
1. Press [Caller History], then wait for 2 seconds or press any button.The numbers, names, and date and time from which you have received calls recently will be displayed on the LCD.

- Press [Redial] or [Caller History] to switch between the date and time, name, and phone/fax number on the LCD.
2. Use [  ] or [
  ] to select the receiving party, then press [Start/Copy].The fax begins calling the number.
- Switching Temporarily to Tone Dialing
Many information services for banks, airline reservations, hotel reservations, etc. require tone dialing for their services. If your machine is connected to a rotary pulse line, you can set the machine to temporarily switch to tone dialing.
1. Press [Hook] or lift the Handset.
2. Use the numeric buttons to dial the number of the information service.
3. When the recorded message of the information service answers, press [Tone] ([  ]) to switch to tone dialing.If you pressed [Hook] in step 1 and wish to talk to the other party, lift the Handset.
4. Use the numeric buttons to enter the numbers requested by the information service.
5. When you have finished using the service, press [Hook] or hang up the Handset.
- Long-Distance Dialing
When you register a long-distance number, you may have to insert a pause within or after the number. For long-distance dialing, the location and length of the pause may differ depending on the telephone system. To enter a pause, press [Pause]. The length of this pause can be adjusted. A pause at the end of a number is fixed at 10 seconds.
Redialing When the Line is BusyThere are two methods of redialing: manual redialing and automatic redialing. This section explains these two methods.
- Manual Redialing
Press [Redial] to dial the last number you dialed with the numeric buttons*. (This starts redialing regardless of whether automatic redialing is enabled.)
*This setting is only available when you dialed with the numeric buttons.
- Canceling Manual Redialing
To cancel manual redialing, press [Stop/Reset]. You may then need to press [Start/Copy] for a few seconds to feed out the document.
- Automatic Redialing
- What is Automatic Redialing?
When you are sending a document and the receiving party?s line is busy, the fax waits the specified time and then dials the same number again. You can set the fax to redial several times if previous attempts fail because of a busy signal.
Automatic redialing can be turned off and on. The number of redialing attempts and the time interval between attempts can also be adjusted .
If all redialing attempts are unsuccessful, the fax will cancel the transmission. You can set the fax to print the ERROR TX REPORT to remind you that the transmission was not completed .
When automatic redialing is in use, the LCD displays <AUTO REDIAL> while it is waiting to redial.
- Canceling Automatic Redialing
1. Press [Stop/Reset].
If you want to cancel a memory-sending transmission while the fax is waiting to redial, you will have to delete the document from memory (See ).
- Setting the Options for Automatic Redialing
You can set the following options for automatic redialing:
- Whether or not the fax redials automatically.
- The number of times the fax attempts to redial.
- The time interval between redialing attempts.
1. Press [Menu].
2. Use [  ] or [
  ] to select <DATA REGSTRATION>, then press [Start/Copy]. The LCD displays <USER SETTINGS>.
3. Use [ ] or [ ] to select <TX SETTINGS>, then press [Start/Copy]. The LCD displays <ECM TX>.
4. Use [ ] or [ ] to select <AUTO REDIAL>, then press [Start/Copy]. The LCD displays <ON>.
- To disable automatic redialing, use [ ] or [ ] to select <OFF>, then press [Start/Copy]. Press [Stop/Reset] to return to standby mode.
- To enable automatic redialing, use [ ] or [ ] to select <ON> and continue with the steps below.
5. Press [Start/Copy] twice. The LCD displays <2TIMES>.
6. Use the numeric buttons, or [ ] or [ ] to enter the number of times you want the fax to redial, then press [Start/Copy] twice. The LCD displays <2MIN.>.
7. Use the numeric buttons, or [ ] or [ ] to enter the time interval between redialing attempts, then press [Start/Copy].
8. Press [Stop/Reset].
The fax returns to standby mode.
Delayed SendingYour fax can send a document automatically at a preset time. This allows you to take advantage of lower late-night long-distance rates offered by some telephone companies.
The fax can only register one preset sending operation at a time.
1. Load the document face up into the ADF.
You can set the scanning resolution and contrast .
2. Press [Menu].
3. Use [  ] or [
  ] to select <FAX OPTIONS>, then press [Start/Copy].
4. Use [ ] or [ ] to select <DELAYED TX>, then press [Start/Copy].
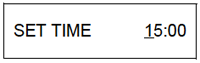
5. Enter the desired sending time (in 24-hour clock format) using the numeric buttons.
- Precede single digits with a zero.
- Press [Clear] if you need to re-enter the time.
- You can also use [
 ] or [
  ] to move the cursor.
6. Press [Start/Copy].
7. Enter the receiving party's fax number.
- You can enter the receiving party's fax number by using the numeric buttons, one-touch speed dialing, coded speed dialing, or directory dialing .
- If you use the numeric buttons, press [Start/Copy] after entering the number to register it.
8. Press [Start/Copy].
- Press [Start/Copy] when using directory dialing.
- The fax scans the document into memory.
If <MEMORY FULL> appears on the LCD during scanning, delete unnecessary documents from the memory (See ), then rescan your fax.
9. The fax will automatically dial at the programmed time.
- Sending Other Documents While the Fax is Set for Delayed Sending
You can send, receive, and copy other documents even when the fax is set for sending at a preset time.
To send or copy other documents after setting the fax for delayed sending, simply send or copy using any other sending procedure in this guide.
Delayed sequential broadcasting is applicable for sending one document to more than one location at a later time when multiple fax numbers are dialed .
- Canceling Delayed Sending
1. Press [Menu].
2. Use [ ] or [ ] to select <MEMORY REFERENCE>, then press [Start/Copy].
3. Use [ ] or [ ] to select <DELETE DOCUMENT>, then press [Start/Copy].
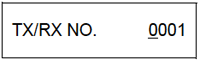
4. Use [ ] or [ ] to select the transaction number (<TX/RX NO.>) of the document you want to delete, then press [Start/Copy]. The LCD displays <YES=(  ) NO=( # )>.
- If the LCD does not change after you press [ ] or [ ], this means only one transaction is stored in memory.
- If you are unsure of the transaction number (<TX/RX NO.>), print the MEMORY LIST (see ).
5. Press [ ] to delete the document.
If you want to continue sending, press [ # ].
6. Press [Stop/Reset].
The fax returns to standby mode.
Sequential Broadcasting- Sending a Document to More Than One Location
Sequential broadcasting sends one document to more than one location.You can send to a total of 110 locations (70 locations for the JX210P model) as follows:
- One-touch speed dialing = 9 locations
- Coded speed dialing = 100 locations (60 locatitons for the JX210P model)
- Regular dialing (Numeric buttons dialing) = 1 location
You can enter the one-touch speed dialing and coded speed dialing locations in any order. You simply press the one-touch speed dialing button, or press [Coded] or [Directory] followed by the two-digit code.
You can also include one location using regular dialing. Remember that when using regular dialing, you must press [Start/Copy] after entering the number.
- You must press each button within 10 seconds of the preceding one. The fax begins the operation approximately 10 seconds after you press the last button.
- The regular dialing number must be entered last.
1. Load the document face up into the ADF.
You can set the scanning resolution and contrast .
2. Dial the receiving party's fax numbers as you need.
You can also press [Redial] to redial the last number dialed with the numeric buttons.
3. Press [Start/Copy].
- The fax reads the document into memory and begins sending.
- To cancel a transmission, press [Stop/Reset] during dialing or transmission. All transmissions in the sequence are canceled.