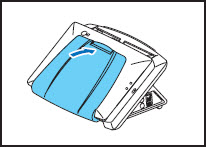
Use the procedure below to replace the rollers.
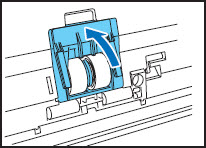
- Pull the lock lever toward you and then fully open the panel unit.
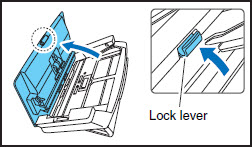

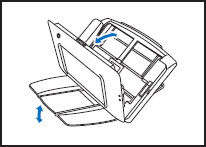
The open/close movement of the panel unit is linked to the up/down movement of the document eject tray. Do not press on the document eject tray when you open the panel unit.
Do not use excessive force when removing or attaching the retard or feed rollers. Doing so may cause the rollers to become deformed, resulting in feed errors.
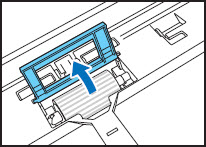
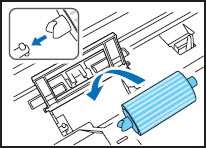
- To remove the retard roller, open the roller cover.
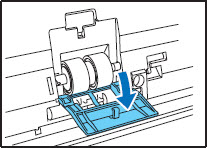
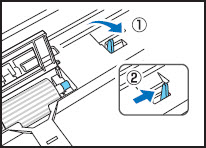
- Lift up the roller lock lever
 , and slide it in the direction of the arrow
  .
.
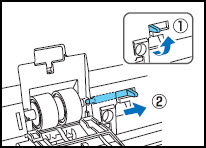
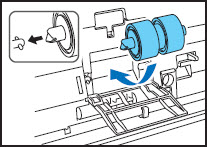
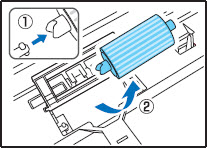
- Move the retard roller in the direction of the arrow , and then remove it from the shaft .

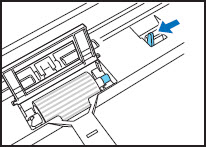
- Place the new roller in the roller compartment inside the roller cover, and then align the notch in the roller with the shaft of the scanner.
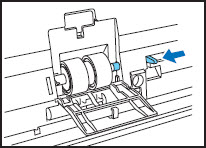
- Slide the roller lock lever in the direction of the arrow, and then insert it into the hole of the retard roller.
- Lower the lever to lock the shaft of the retard roller into position.
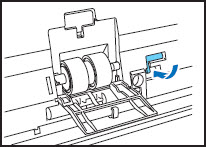
- Close the roller cover. Make sure that you hear a click, which indicates the cover has returned to its original position.
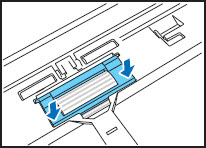
- To remove the feed roller, open the roller cover.
- Lift up the roller lock lever , and slide it in the direction of the arrow .
- Move the feed roller in the direction of the arrow , and then remove it from the shaft .
- Align the notch in the shaft of the new roller with the shaft of the scanner, and place the feed roller into position.
- Move the roller lock lever in the direction of the arrow, and then insert it into the hole in the feed roller.
- Lower the roller lock lever to lock the feed roller into position.

- Close the roller cover. Make sure that you hear a click, which indicates the cover has returned to its original position.
- Gently close the panel unit. Press on sides of the unit until you hear a click, which indicates the unit is locked.
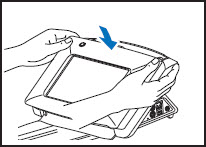
- Gently close the document eject tray.