How to Install the Drivers and Software (Windows) - LiDE 300
Article ID: ART171833
|
Date published: 09/13/2018
|
Date last updated: 09/13/2018
Description
Driver and software installation
Solution
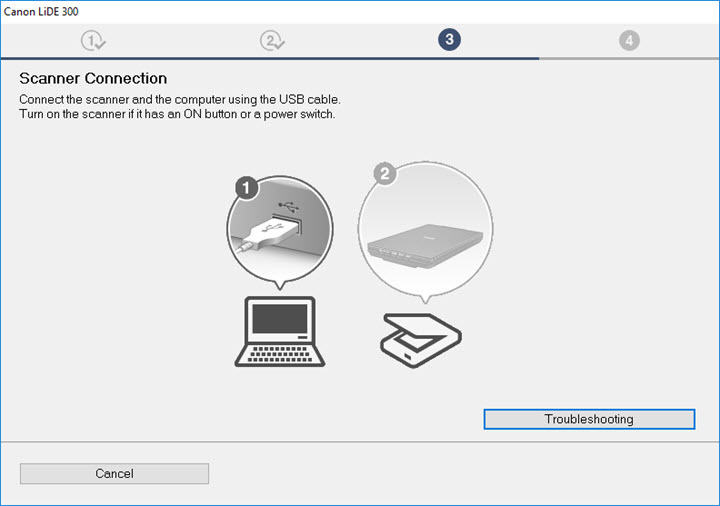
Insert the Setup CD-ROM or download the setup file here. If using the downloaded file, double-click the file to start the setup program. If you are prompted to grant permission for the setup program to proceed, click the appropriate affirmative option (Yes, OK, etc.).
Follow the directions below.
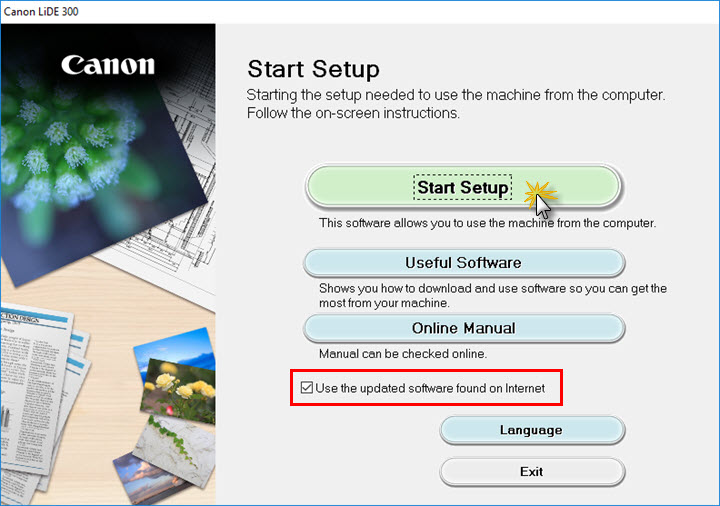
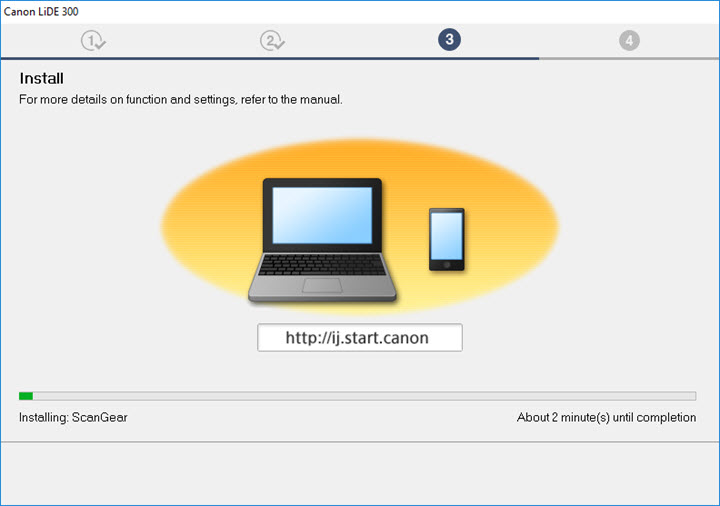
When the setup program begins, click Start Setup.
NOTE: If you are using the Setup CD-ROM to install the scanner to your computer, you will see an option labeled Use the updated software found on Internet. If this option is selected, the installer will connect to the internet and download the latest versions of the driver and software for your scanner. If you wish to use the drivers and software contained on the Setup CD-ROM, leave this option unchecked.
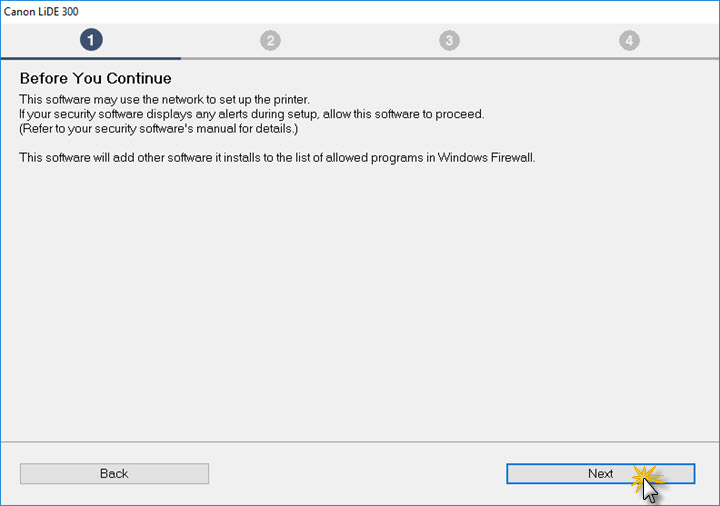
Read the network security notice and click Next.
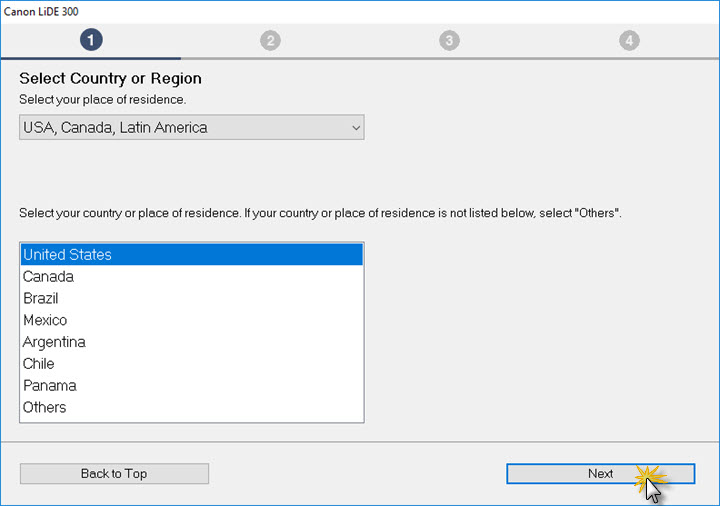
Select your region and click Next.
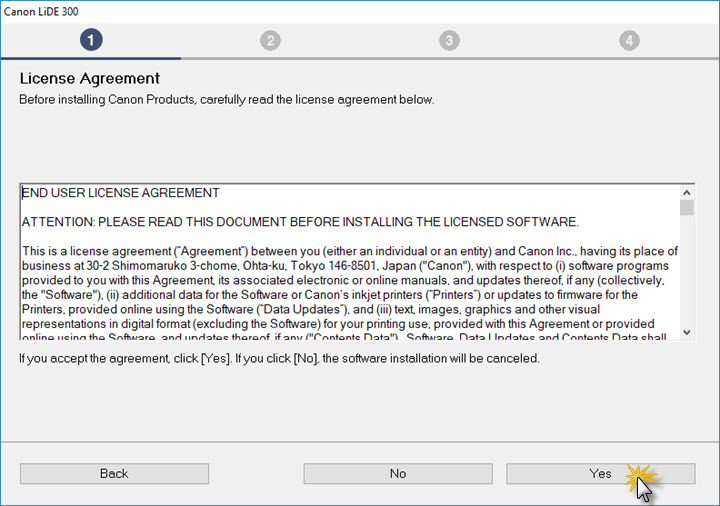
Read the license agreement. Select Yes to continue.
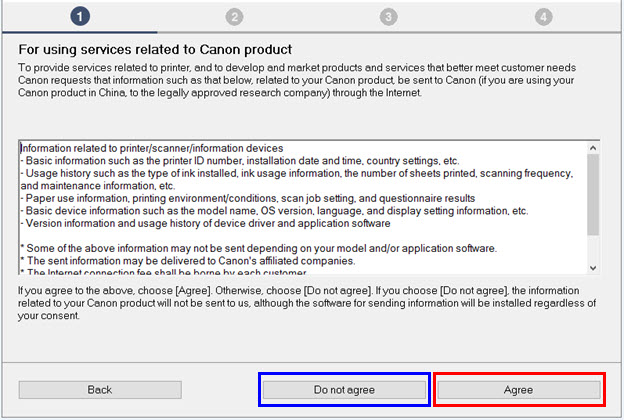
Select Agree or Do Not Agree to the information request.