How to install the MP drivers using the prepackaged CD-ROM (Windows)
The MP drivers can be installed using the Easy Install or Custom Install methods.
Easy Install automatically installs the software, which is in the CD-ROM. This method is recommended for first-time users.
Custom Install allows the user to select which software program(s) to install from the MP drivers, application software and digitized manual.
Before Installation :
Login as a user with Administrator privileges to install on WindowsXP/Vista/2000.
If your computer has resident software such as antivirus software, exit that software in advance.
Turn the printer off and remove the cable connecting the computer and the printer.
How to install the MP drivers
- Set the prepackaged CD-ROM in the computer.
-
The Setup program starts automatically.
- If the setup program does not start automatically, click 'Start' and go to 'My Computer', then double-click the CD-ROM icon.
- If you use Windows Vista, select 'Computer' from the Start menu, then double-click the icon of the CD-ROM.
- Click 'Easy Install' or 'Custom Install'.

When selecting Easy Install:
a. Click 'Install'.

**Software varies by model
Note: To install the OCR program, use Custom Install. Click the 'Back' button on the Easy Install window and then click 'Custom Install'.
When selecting Custom Install:
a. Select MP Drivers and preferred Application Software and click 'Next'.

- The number of application software varies depending on the printer you are using.
b. The installation location can be changed depending on application software.
(The following procedures show Easy-PhotoPrint EX.)
- If you do not need to change the location, click 'Install'.
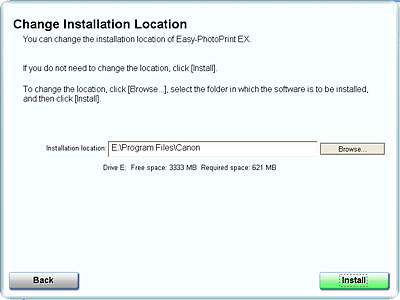
- If you want to change the installation location, type in the name of the folder in which the application is installed in Installation location, or click 'Browse' to select a folder. Click 'OK', and you will return to the Change Installation Location window. Confirm that the installation location has been changed, and click 'Install'.

- Read the License Agreement carefully. If you agree with the agreement, click 'Yes'.

- The installation of the MP drivers and application software will start.
A message may be displayed during installation. If it is displayed, follow the directions on the screen to continue the installation.
- When the Setup Method screen appears, select Use the printer via USB, then click Next.
- When the Printer Connection screen is displayed, connect the computer and the printer with the cable and turn the printer ON.

*Display varies according to the printer model.
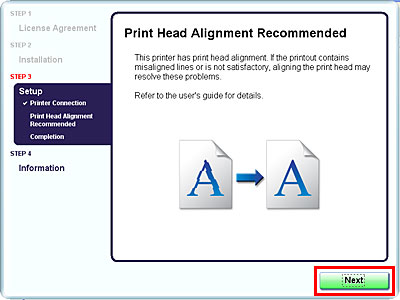
- When the Print Head Alignment Recommended window is displayed, click 'Next'.
The Print Head Alignment Recommended window may not be displayed depending on the printer you are using. In such a case, go to the procedure 8.
- Check the content and click 'Next'.

- The installation of the MP drivers and application has completed. Proceed to the Canon user registration.
- If you want to register now, click 'Register'. If not, click 'Next'.
Registration can be done after the MP drivers installation.
- Then, Inkjet Extended Survey Program will be launched. If you agree, click 'Agree'. If you do not agree, click 'Do not agree'.
- Click 'Exit'.

- Then the Restart button is displayed, confirm that "Restart the system now (recommended)" is checked and click 'Restart'.
Installing the MP drivers is completed.
