Setting the Print Quantity
This feature allows you to specify the number 01 prints (up to nine) of a frame to be produced at one time. This is useful as it saves the trouble of having additional prints made and can be used to avoid getting prints of unsuccessful shots. Note that you can only set or change the print quantity for the frame about to be shot (next frame) or the frame just shot (previous frame).
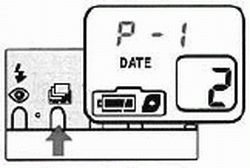
- When you load negative film, the print quantity is automatically set to 1 (P-I).
- When you toad reversal film, the print quantity is automatically set 0 (P-O).
- Always use the push-button projection on the strap buckle to push the SELECT and SET buttons.
Setting the Print Quantity For the Next Frame
 |
Set the print quantity.
• Press the  button. button.
~ Each time you press the button. the selling changes sequentially from P-l, to p.2, through to P-9 and then back to P-O, P-l, etc. (This cyde begins at P.O when reversal film is used.)
• Hold the button down for 2 seconds or more to cycle continuously through the settings.
|
 |
Take the picture.
~ After you shoot a frame, the print quantity specification reverts 10 the default setting of l print (0 prints for reversal film),
|
Changing the Print Quantity After Taking a Shot
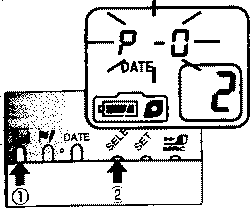 |
Select the mode for specifying the print quantity for the previous frame.
- Press the button (1) and then press the SELECT button (2) for at least 2 seconds. P.O (no prints) blinks on the LCD panel.
|
 |
Set the print quantity.
• Press the button.. Each time you press the button, the settings changes sequential from P.I. to P.2. through to P-9 and then back
• Hold the button down for 2 seconds or more to cycle continuously through the settings
|
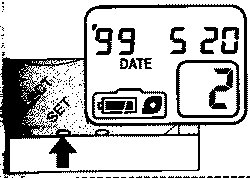 |
Complete the setting.
• Press the SET button . The film rewinds I frame and the print quantity specification for the previous frame is replaced.
• The date time display reappears .
|
- If you switch the camera off before completing the setting, the setting reverts to its previous value.
- If you replace the battery, the date and time display on the LCD panel reverts to three blinking dashes ("-") and you cannot specify the print quantity. When this occurs, set the date and time before specifying the print quantity.
- Some processing and printing stores may not support, the print quantity specifications function. Check with your processing and printing store before hand
