Erasing Single Images
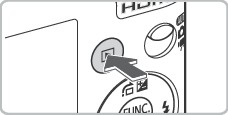
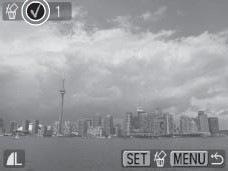
1. In the camera's playback mode, select the image you wish to erase using the  or
or  buttons and press the
  button. A confirmation screen appears.

2. Confirm that [Erase] is selected and press the <FUNC./SET> button to confirm erasure of the image.
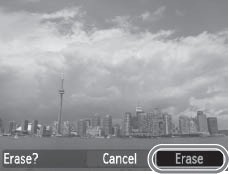
- To cancel instead of erasing, select [Cancel] and press the <FUNC./SET> button.
|
 Protected images cannot be erased with the erase function. Please also note that erased images cannot be recovered using the camera. Excercise adequate caution before erasing an image. Protected images cannot be erased with the erase function. Please also note that erased images cannot be recovered using the camera. Excercise adequate caution before erasing an image.
|
Erasing All Images / Using a Filter to Erase Images
The following table shows the different ways you can choose to erase an image.
| Select |
Erase images after selecting them one at a time. |
| Select Range |
For picking a first and last image and erasing all the images in the range. |
| All Images |
Erases all images on a memory card. |
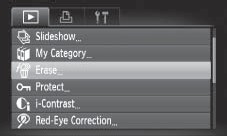
1. In the [ (Replay)] menu select [Erase] and press the <FUNC./SET> button.
2. Select the desired menu item and press the <FUNC./SET> button.
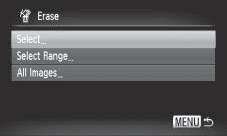
[Select]
- Select the image.
Use the or button to select the image you wish to erase and press the <FUNC./SET> button.
- Pressing the <FUNC./SET> button again cancels the setting.
- Press the <MENU> button to complete the setting.
- Erase the image.
Use the or button to select [OK].
Press the <FUNC.SET> button.
- Selecting [Stop] cancels the selection of the image you are about to erase and returns to Step 2.
[Select Range]
- Select the first image.
- You can circle your finger on the Touch Control Dial to select the first and last image.
1. Press the <FUNC./SET> button.
2. Use the or button to select the first image for the range to erase.
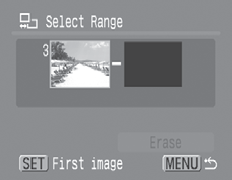
3. Press the <FUNC.SET> button.

Select the last image.
1. Use the button to select [Last Image].

2. Press the <FUNC./SET> button.
3. Use the or button to select the last image in the range.
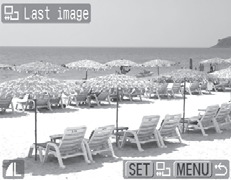
4. Press the <FUNC./SET> button.
- An image with a lower number than the first image cannot be selected as the last image.
- Up to 500 images can be selected.
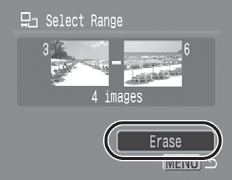
Erase the Images.
1. Press the  and choose [Erase]
2. Press the <FUNC./SET> button.
All Images
- Erase the images.
1. Use the or button to select [OK].
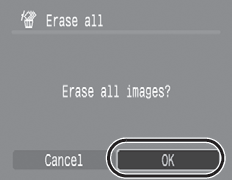
2. Press the <FUNC./SET> button.
- Selecting [Cancel] cancels the selection of the image you are about to erase and returns to step 2.
- Pressing the <FUNC./SET> button while erasing is in progress cancels the procedure.
|

- Please note that formatting (initializing) a SD card erases all data, including protected images and other file types. Please check the contents of a SD card before formatting it.
|
