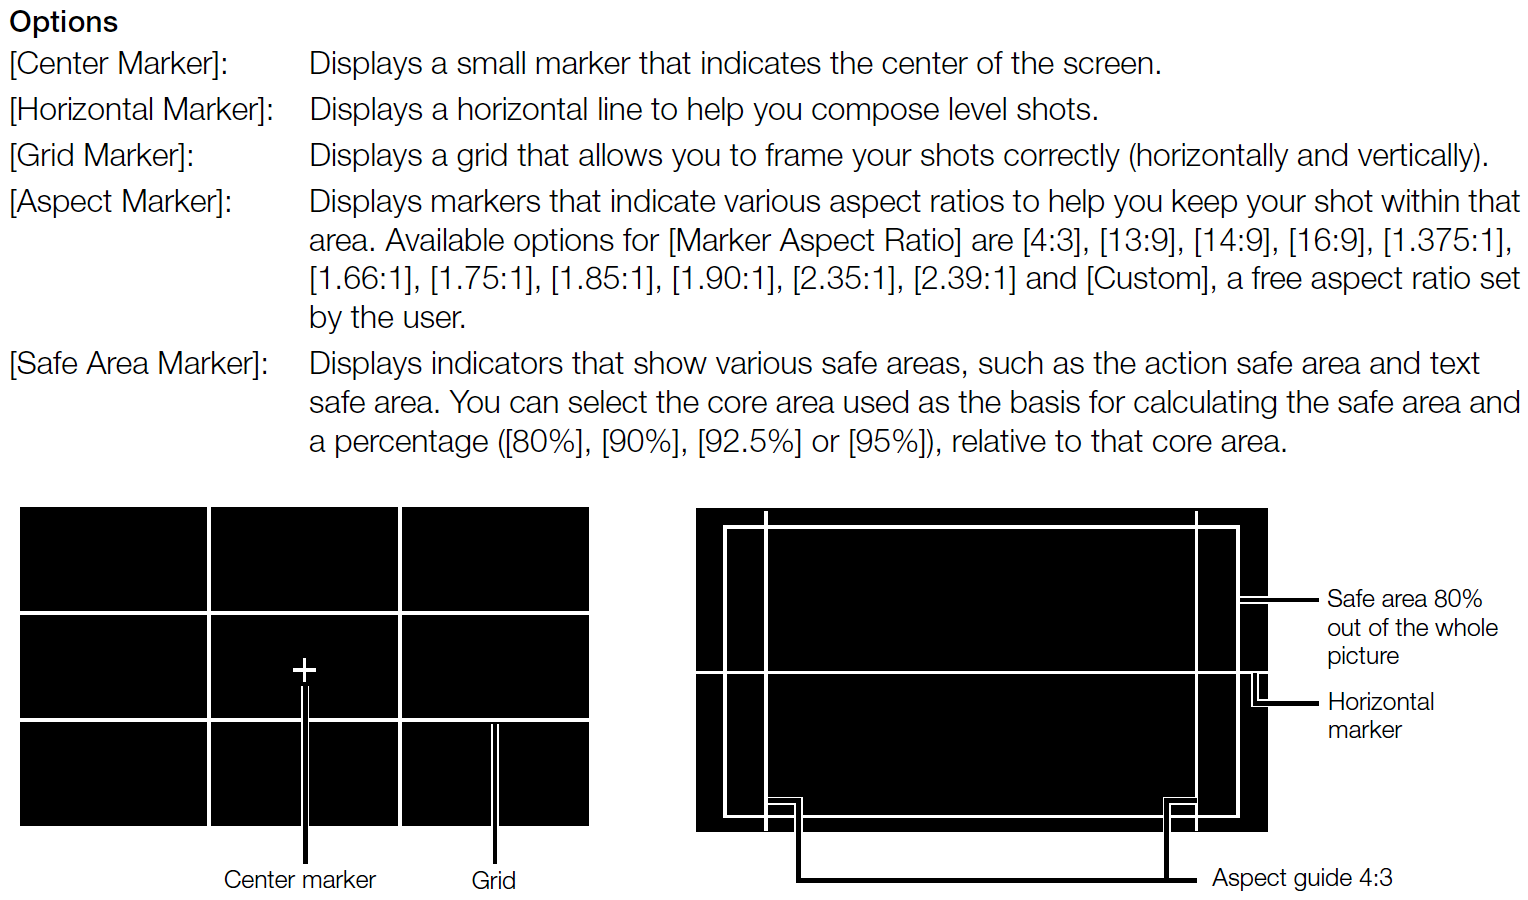
Using onscreen markers allows you to make sure your subject is correctly framed and is within the appropriate safe area. The zebra patterns help you identify areas that are overexposed. The onscreen markers and zebra pattern will not affect your recordings.
Operating modes:
 Displaying Onscreen Markers
The camcorder offers several onscreen markers. You can display multiple onscreen markers simultaneously.
1 Turn on the display of markers.

- If [Markers] is not set to [On], the markers will not be displayed even if you made individual selections.
2 Select a setting menu corresponding to a marker you want to display.


3 Select the desired marker color and then press SET.
- Select [Off] to turn off the selected marker.
- You can display multiple markers simultaneously. Repeat steps 2 and 3 as necessary.
- If you selected [Aspect Marker] or [Safe Area Marker], select the desired safe area or aspect ratio with the following procedures
 To set the aspect ratio
1 Select [Marker Aspect Ratio].

2 Select the desired option and then press SET.
- If you selected one of the preset aspect ratios, the rest of the procedure is not necessary. If you selected
[Custom], continue the procedure to set the desired aspect ratio.
3 Select [Marker Custom Asp. Ratio].

4 Push the joystick up/down to select the first digit of the aspect ratio and then press SET to move to the next.
- Change the rest of the digits in the same way.
5 Select [Set] and then press SET.
To set the safe area
If an aspect marker is not selected, the safe area will be calculated as a percentage of the whole image ([Whole Picture]) and you can only select the percentage (step 3). To calculate the safe area as a percentage of an aspect ratio marker ([Selected Aspect Marker]), select an aspect ratio marker in advance and perform the procedure from the beginning.
1 Select [Basis for Marker Safe Area].

2 Select [Whole Picture] or [Selected Aspect Marker] and then press SET.
3 Select [Marker Safe Area %].

4 Select the desired option and then press SET.
NOTES
• You can turn off all other onscreen displays, leaving only the markers
• If you set an assignable button to [Markers], you can press the button to turn the markers on and off.
Displaying Zebra Patterns
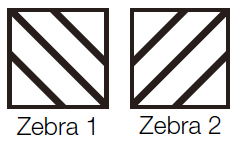
The camcorder has a zebra pattern function that shows black and white diagonal stripes over areas that are overexposed. There are two types of zebra patterns and you can display both simultaneously. Zebra 1 lets you identify areas within a certain range (±5% of a specified level from 5% to 95%) while zebra 2 lets you identify areas that are over a specified level (from 0% to 100%). |
 |
1 Select [Zebra].

2 Select a zebra pattern and then press SET.
3 Select the menu setting corresponding to the zebra
level you selected.

4 Select the desired zebra level and then press SET.
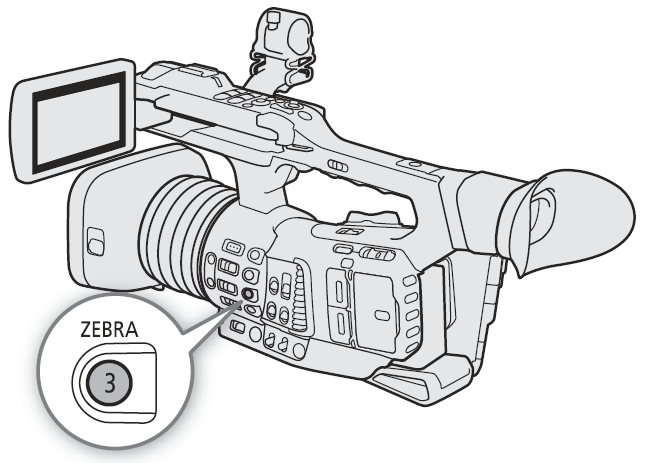
5 Press the ZEBRA button to activate the selected zebra
pattern. |
 |
NOTES
• You can use the

and [Zebra: HDMI] settings to turn the zebra pattern on and off separately on the LCD screen, viewfinder and external monitors connected to the respective terminals.
