E-mail/i-fax settings (MF 7480)
note:
You may need to specify the DNS Settings to resolve the host names of the SMTP and POP servers in order to send e-mail/I-fax.
1. Press

(Additional Functions).
2. Press [System Settings]  [Network Settings] [
 ] [E-maiI/l-Fax].
If the System Manager ID and System Password have been set, enter the System Manager ID and System Password using  (numeric keys), then press
  (Log In/Out) to enter the System Settings menu. The E-mail/l-Fax screen appears.
3. Select [On] or [Off] for <SMTP Receive> and <POP>.
[On] for <SMTP Receive> and [Off ] for <POP>: Receives e-mail/l-faxes using the machine's own SMTP receiving function.
[Off ] for <SMTP Receive> and [On] for <POP>: Receives e-mail/l-faxes using a POP server.
note:
- The machine supports SMTP and POP3 functions.
- The machine can receive I-fax images and communication error notices only.
- You must register the host name of the machine with the DNS server if you want to receive e-mail using the machine's own SMTP receiving function.
4. Press [Authentication/Encryption].
5. Select [On] or [Off] for <POP Authentication before Send>.
[On]: Uses an SMTP server that requires POP before SMTP (method for authenticating users who have logged in the POP server before sending e-mail).
[Off]: Does not use an SMTP server that requires POP before SMTP.
6. Select [On] or [Off] for <SMTP Authentication (SMTP AUTH)>.
[On]: Uses an SMTP server that requires SMTP Authentication (method for authenticating users who have logged in the SMTP server before sending e-mail). Proceed to step 9.
[Off]: Does not use an SMTP server that requires SMTP Authentication. Skip to step 10.
7. Press [User].
8. Enter the user name used for logging in to the SMTP server, then press [OK].
If you are using the server that requires the domain name to be included with your user name, enter a user name in [User] using the following format: user name @domain name.
9. Press [Password].
10. Enter the password used for logging in to the SMTP server, then press [OK].
11. Press [OK].
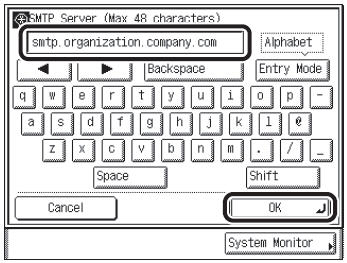
12. Press [SMTP Server].
13. Enter the SMTP server IP address or name using the keyboard on the touch panel display, then press [OK].
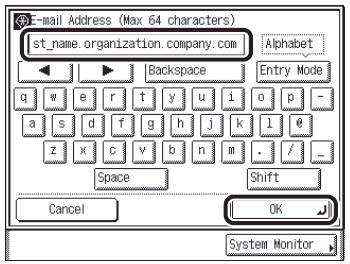
14. Press [E-mail Address].
15. Enter the e-mail address your machine will use, then press [OK].
16. Press [Next].
17. Press [POP Server].
18. Enter the POP server IP address or name using the keyboard on the touch panel display, then press [OK].
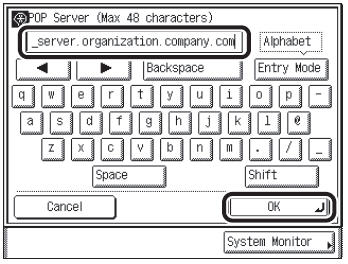
19. Press [POP Address].
20. Enter the login name for access to the POP server, then press [OK].
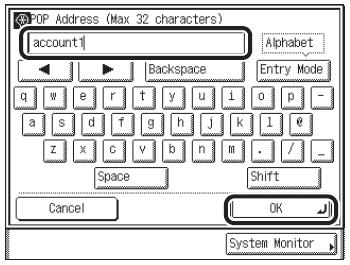
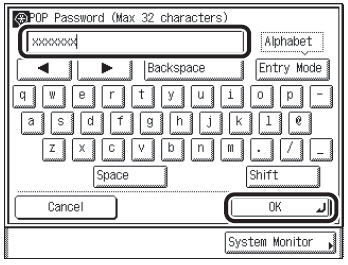
21. Press [POP Password].
22. Enter the password for access to the POP server, then press [OK].
23. Press [-] and [+] or use numeric keys to set <POP Interval> at the interval you want the POP server to check for incoming e-mail.
Press [-] and [+] or use (numeric keys) to set <POP Interval> at the interval you want the POP server to check for incoming e-mail.
note:
If the interval is set to 0, the POP server is not checked automatically.
24. Press [OK].
25. Press [Done] repeatedly until the Additional Functions screen closes.
26. Restart the machine.
Turn off the machine, wait at least 10 seconds, then turn it on.
