|
You can use the software Data Import Utility to save your clips. Refer to PIXELA's website below to download the software and check the latest information. For other inquires regarding the software, consult a Canon Service Center.
http://www.pixela.co.jp/oem/canon/e/index_biz.html
[Saving Clips Using Data Import Utility]
- Save clips to the computer using a card reader.
- Join relay clips that were saved on separate SD cards, and save them as a single clip.
- Join clips split at the 4 GB maximum file size, and save them as a single clip.
For more details, including system requirements and how to install the software, check the Data Import Utility Software Guide, a PDF file in the [\Manual] folder of the downloaded compressed file that contains the software.
IMPORTANT
- Before using Data Import Utility to save clips on the computer, do not access or manipulate the files on the SD card with other software. Failing to do so may result in not being able to save the files with Data Import Utility.
Transferring Movies to the Computer
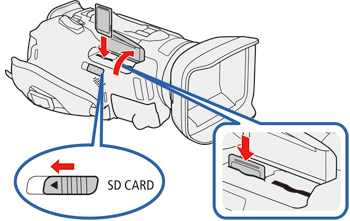
1. Insert SD memory cards in to the camcorder.
IMPORTANT
- If you have relay clips, insert the SD memory cards in which the paired relay clips are saved.
2. Camcorder: Power the camcorder using the AC adapter.

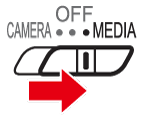
3. Camcorder: Set the power switch to [MEDIA].
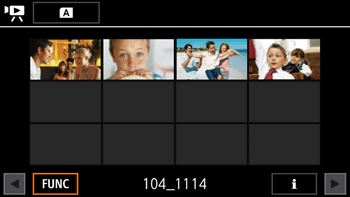
4. Camcorder: Open the desired movie index screen.
5. Connect the camcorder to the computer using the optional IFC-400PCU USB Cable.
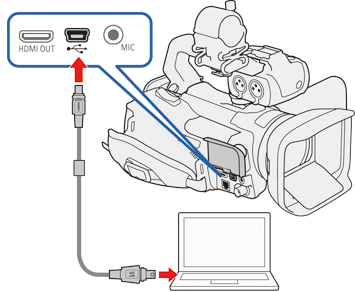
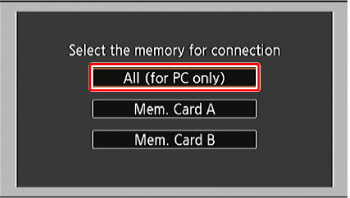
6. Camcorder: Touch [All (for PC only)].
7. Computer: Click the [  ] icon on the desktop to start Data Import Utility.
8. Computer: Use Data Import Utility to save the movies onto the computer.
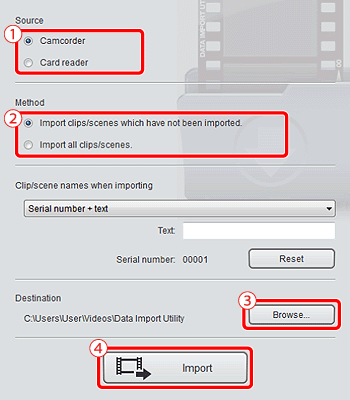
 : Select the device that you connected in STEP 5.  : Select the method. *Select [Import all clips/scenes.] if you want to import clips that you have imported before.
 : Specify the destination.  : Click [Import]. *During importing, the computer does not move on to the Sleep mode.
|