| Article ID: ART180408 |
| |
Date published: 09/16/2021 |
| |
Date last updated: 11/11/2022 |
Description
While attempting to scan you receive the error message "Driver not found" or a TWAIN error. Do you know if a Windows update was applied recently? If so, it is possible that the .INI files were removed from the computer's cache. To fix this, you will need to replace these .INI files by reinstalling the driver. It is also possible that the re-installation of the driver will fail.If it does, follow these steps.
Solution
The first thing that needs to be done is the temp folder needs to be cleared (if possible).
- Navigate to this location: C:\Users\Your Name\AppData\Local\Temp and delete what you can from this folder.
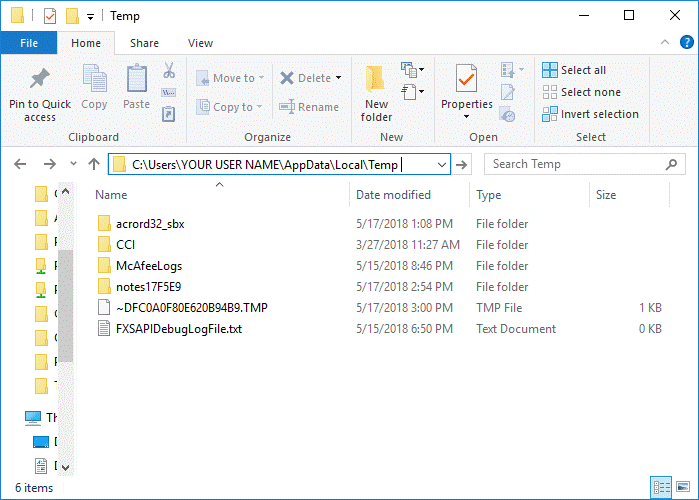
NOTE: If you cannot see File Name Extensions in your Windows Explorer window, then you may need to enable it. To do this, click on view and make sure that "File name extensions" and "Hidden items" is selected.

- Download your DR scanner driver from our website and run the ".exe" file.
When you run it, it will unzip all of the files into a folder of your choice.
- Navigate to the folder where the files where just extracted and run the "setup.exe" file.
In a few moments, you should end up at the "Welcome to the InstallShield Wizard for Canon..." screen. In this example, we are using the DR-C225.
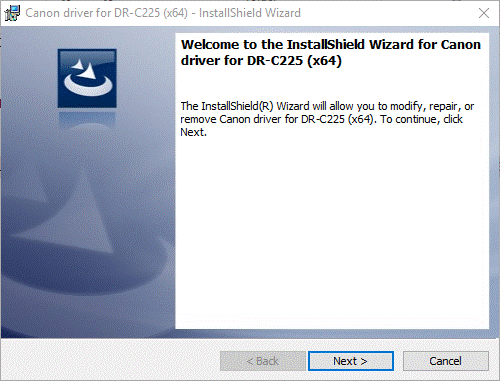
CAUTION: DO NOT CLICK on the NEXT button.
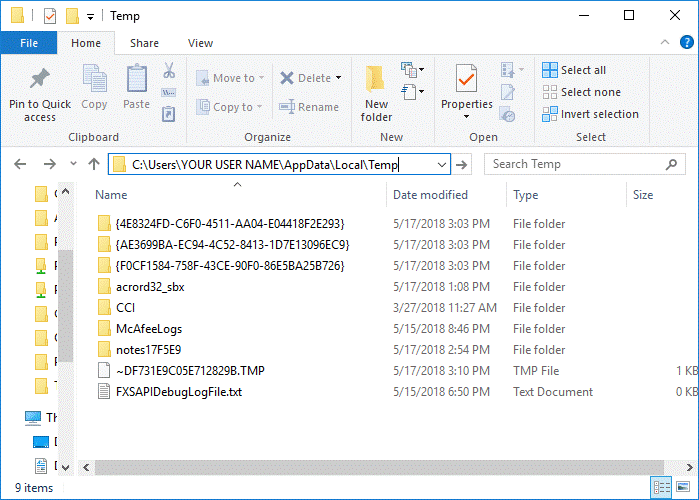
- Go back to the Windows Explorer screen you had open and navigate back to the temp folder you were at.
You should now see at least two new folders that start/end with brackets and have random characters in them.
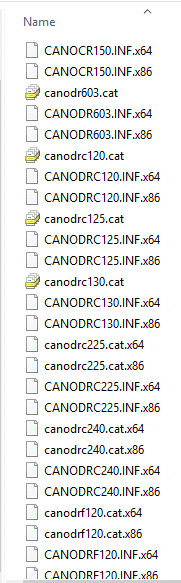
- You need to find the one that contains files that say CANODR****.INF.x64, CANODR****.INF.x86, or CANODR***.cat.x64, CANODR***.cat.x64. The *** will be the model of scanner Example: CANODR G1130.INF.x64 or CANODR C130.INF.x86.
- Once you find the correct folder. You need to copy the contents of it to another location. Like a folder on the desktop.
Make sure you don’t close the Scanner driver installer until you have the Temp folder contents copied to another location.
- Once the files have been copied to a new location. You can close all other windows including the Scanner driver installer.
NOTE:
Windows 64bit
If this was for a DR-C125 being used on a Windows 64bit PC, then you would need to find the files C125 in the name that end with .x64. The extra .x64 extension needs to be removed. Example: CANODRC125.INF.x64 needs to be renamed to CANODRC125.INF
Windows 32bit
If this was for a DR-C125 being used on a Windows 32bit PC, then you would need to find the files that end with .x86. The extra .x86 extension needs to be removed. Example: CANODRC125.INF.x86 needs to be renamed to CANODRC125.INF.
Only do one or the other. When this is complete you can use the Device Manager to point to and update the driver for the scanner.
- If all the steps above fail, please temporarily disable the WIA service.
- Press Windows key + R to open the [Run] dialog.
- Type "services.msc" in the dialog and click OK to open [Services] dialog.
- Right-click "Windows Image Acquisition (WIA)" and select "Property".
- Chose "Disabled" in "Startup Type" list and click OK.
- Reboot your PC.
