When the rollers start to wear out, document feed errors such as paper jams are more likely to occur. If document feed errors continue to occur even after cleaning the rollers, purchase an Exchange Roller Kit, and replace the rollers (feed roller and retard roller) and their covers (feed roller cover and retard roller cover), and the document holding guide.
- Exchange Roller Kit
The Exchange Roller Kit is a kit consisting of replacements for the feed roller, retard roller, and document holding guide.

- Rollers and their covers, and the document holding guide are consumable parts. When the total number of pages scanned with the rollers reaches 100,000 pages, purchase an Exchange Roller Kit and replace the parts.
- When the rollers start to wear out, problems such as paper jams and improper document feeding become more likely to occur. If this happens, replace the rollers regardless of the page count.
- Make sure to reset the roller counter after replacing the rollers.
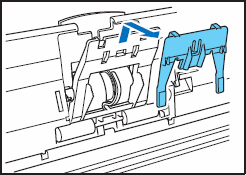
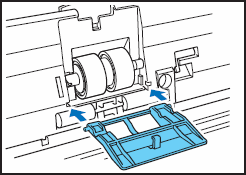
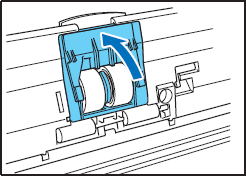
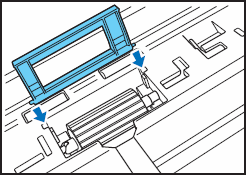
- Open the retard roller cover, and remove the document holding guide by sliding it up.
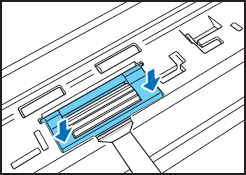
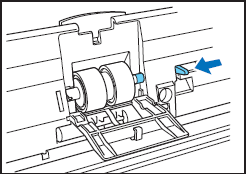
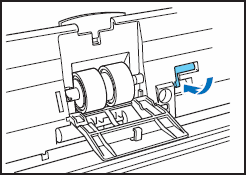
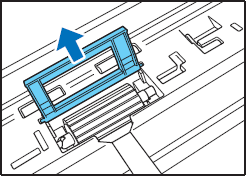
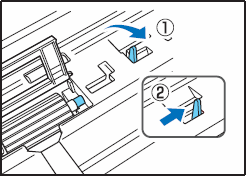
- Remove the retard roller cover by pulling it out straight.
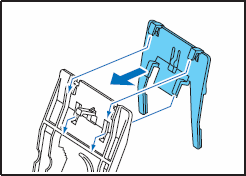
- Hook the new document holding guide (four hooks) onto the roller cover, and slide it down to set it in place.
- Insert the retard roller cover straight with the document holding guide attached.
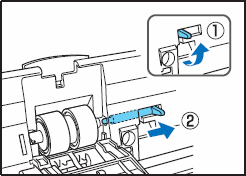
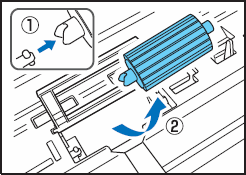
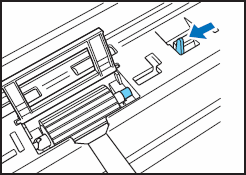
- Lift up the retard roller lock lever
 , and slide it in the direction of the arrow
  .
.
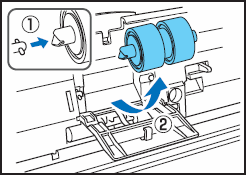
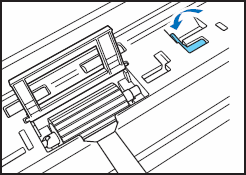
- Move the old retard roller in the direction of the arrow , and then remove it from the shaft .
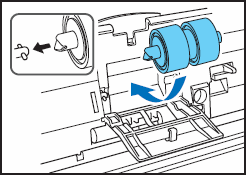
- Place the new retard roller in the roller compartment inside the roller cover, and then align the notch in the roller with the shaft of the scanner.
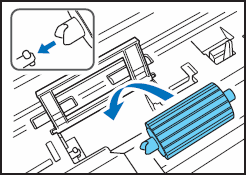
- Slide the retard roller lock lever in the direction of the arrow, and then insert it into the hole of the retard roller.
- Lower the lever to lock the shaft of the retard roller into position.
- Close the retard roller cover. Make sure that you hear a click, which indicates the cover has returned to its original position.
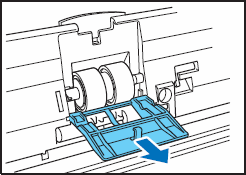
- Open the feed roller cover, and pull it out straight.
- Insert the new feed roller cover straight.
- Lift up the feed roller lock lever , and slide it in the direction of the arrow .
- Move the old feed roller in the direction of the arrow , and then remove it from the shaft .
- Align the notch in the shaft of the new feed roller with the shaft of the scanner, and place the new feed roller into position.
- Move the feed roller lock lever in the direction of the arrow, and then insert it into the hole in the feed roller.
- Lower the feed roller lock lever to lock the new feed roller into position.
- Close the feed roller cover. Make sure that you hear a click, which indicates the cover has returned to its original position.