Perform Print Head Alignment
Instructions to perform a Print Head Alignment directly from the machine. If diagrams or ruled lines are misaligned, print head alignment is required. The print head alignment can be performed automatically or manually. If the automatic print head alignment does not work, adjust the print head manually.
Prepare to print.
Ensure that the printer is powered on and press the <Open> button.
Load two sheets of Letter-sized plain paper in the auto sheet feeder.
Press the <Menu> button.
Use the right / left cursor button to select [Maintenance / settings] and press the <OK> button.
Note: This procedure is skipped if your machine is in Scan mode. Proceed to step 5.
Use the right / left cursor button to select [Maintenance] and press the <OK> button.
Choose the automatic print head alignment or the manual print head alignment as desired.
Automatic print head alignment
Use the up / down cursor button to select [Auto head align] and press the <OK> button.

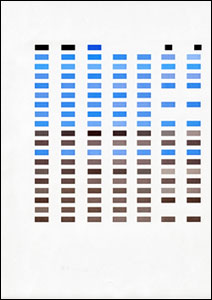
Use the up / down cursor button to select [Yes], then press the <OK> button. (The machine prints the head alignment sheet shown below as the print head alignment is adjusted automatically.)
Manual print head alignment
Use the up / down cursor button to select [Manual head align], and press the <OK> button.
Use the up / down cursor button to select [Yes] and press the <OK> button. (The machine prints the head alignment sheet.)
Note: If the print head alignment pattern prints, use the up / down cursor button to select [Yes] and press the <OK> button. If the print head alignment pattern does not print, use the up / down cursor button to select [No] and press the <OK> button, and then print again. Once the print head alignment pattern is printed out, proceed to step 3.
From each column, select the pattern which has the least visible streaks.
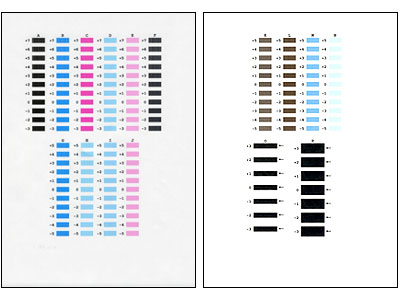
Note: For columns A through N select the patterns with the least visible vertical streaks. For columns O and P select the patterns with the fewest visible horizontal streaks.
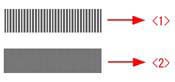
<1> Example of the pattern with the fewest visible vertical streak
<2> Example of the pattern with the most visible vertical streak
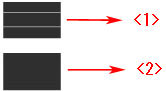
<1> Example of the pattern with the fewest visible horizontal streak
<2> Example of the pattern with the most visible horizontal streak
Use the up / down cursor button to select the column to adjust.
Use the right / left cursor button to select the number of the pattern
After setting all columns (A to P), press the <OK> button.
The print head position will be adjusted.
