
How to print using the mobile terminal such as a smartphone in a wireless LAN
| Article ID: ART113618 | | | Date published: 05/11/2015 | | | Date last updated: 11/04/2015 |
Description
How to print using the mobile terminal such as a smartphone in a wireless LAN
Solution
| How to print using the mobile terminal such as a smartphone in a wireless LAN ID
:
8201311200
_
EN
_
2
|
|
| Solution |
In order to print using the mobile terminal such as a smartphone (iPhone/iPad/iPod touch/Android) in a wireless connection, you must wirelessly connect the printer to the access point or the router.
If the printer is not wirelessly connected to the access point or the router, printing cannot be performed directly from the mobile terminal such as a smartphone.
Follow the procedures below to perform network connection using the operation panel of the main unit.
Preparations before connecting the printer to the network 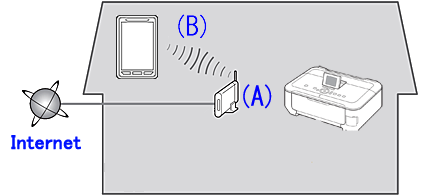
(A) Access point or router (supporting IEEE802.11b/g/n)
You need an access point or router, which is a relay unit for the data communication between the Internet and the network device inside you home (the mobile terminal such as a smartphone, the printer, etc.).
(B) The mobile terminal such as a smartphone communicating with the printer
The mobile terminal such as a smartphone communicating with the printer must be connected to the access point or the router. When the mobile terminal is not connected, refer to [ How to perform the wireless LAN setup for the smartphone (iPhone / iPad/iPod touch) ] or [ How to perform the wireless LAN setup for the smartphone (Android) ] within this webpage.
Decide how to connect the printer and the access point or the router If the access point or the router you are using supports the WPS function, you can use this setup method to connect the printer in a network connection.
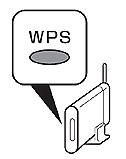
Confirm that the access point or the router you are using has the WPS button.
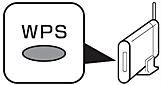
When there is the WPS mark, refer to [ How to perform the wireless LAN setup using the WPS function ] within this webpage.
When there is no WPS mark, refer to, refer to [ How to perform the wireless LAN setup manually ] within this webpage.
How to perform the wireless LAN setup using the WPS function When you select the WPS connection method, follow the procedures below.
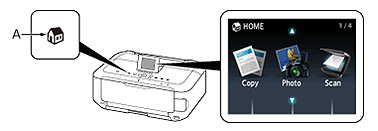
Step 1.
Touch the HOME button (A) on the printer.
Step 2.
(1) Use the
 or or  button (A) to display the Setup icon. button (A) to display the Setup icon.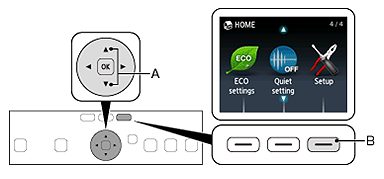
(2) Touch the right Function button (B).
Step 3.
(1) Use the
 or or  button (A) to select Wireless LAN setup. button (A) to select Wireless LAN setup.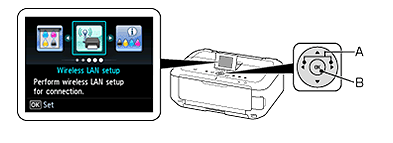
(2) Touch the OK button (B).
Step 4.
When the screen left above is displayed, go to the [ A ].
When the screen right above is displayed, go to the [ B ].
[ A ]
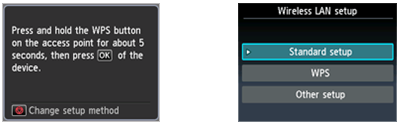
Step 5.
(1) Press and hold the WPS button on the access point (for about 5 seconds).
(2) Touch the OK button on the printer within 2 minutes.
The (blue) Wi-Fi lamp on the printer flashes while searching for or connecting to the access point.

Step 6.
(1) When the screen below appears, touch the OK button.
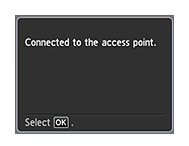
(2) Touch the HOME button.
[ B ]
Step 5.
(1) Select "WPS".
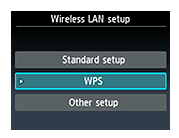
(2) Touch the OK button.
Step 6.
(1) Select "Push button method".
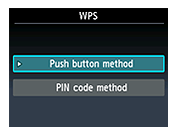
(2) Touch the OK button.
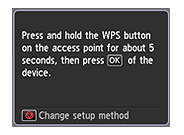
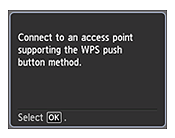
Step 7.
(1) Touch the OK button.
Step 8.
(1) Press and hold the WPS button on the access point (for about 5 seconds).
(2) Touch the OK button on the printer within 2 minutes.
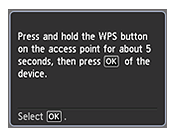
The (blue) Wi-Fi lamp on the printer flashes while searching for or connecting to the access point.
Step 9.
(1) When the screen below appears, touch the OK button.
(2) Touch the HOME button.
The end of the procedure for the wireless LAN setup using the WPS function.
How to perform the wireless LAN setup manually When you select the Standard Setup connection method, follow the procedures below.
In most cases, "Standard Setup" will be used to connect the machine to your access point or router.
Before you continue, you must gather the following information which will be required during the installation.
- Access Point Name/Network Name
* Also referred to as SSID.
An identifier to identify the specific access point.
- Network Key
* Also referred to as encryption key, WEP key or WPA/WPA2 passphrase, Pre-Shared key.
A password to prevent unauthorized access to the network.
Step 1.
Touch the HOME button (A) on the printer.
Step 2.
(1) Use the
or button (A) to display the Setup icon.
(2) Touch the right Function button (B).
Step 3.
(1) Use the
or button (A) to select Wireless LAN setup.
(2) Touch the OK button (B).
Step 4.
(1) Select "Standard setup".
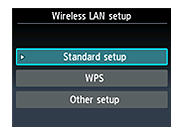
(2) Touch the OK button.
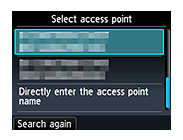
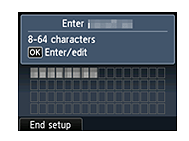
Step 5.
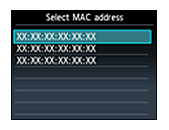
Select your access point, then touch the OK button.
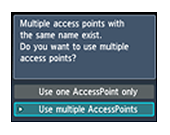
Step 6.
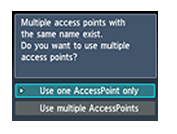
(1) One of the screens below will be displayed on the printer.
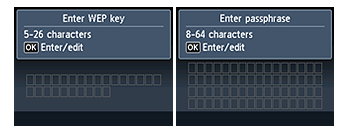
(2) Touch the OK button.
Step 7.
(1) Enter the network password (WEP key or passphrase) of your access point or router into the printer.
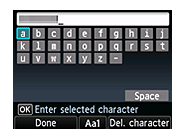
(2) Touch the left Function button.
Step 8.
(1) Make sure that the network key is correct.
Character entry is case-sensitive.
(2) Touch the left Function button.
Step 9.
(1) When the screen below appears, press the OK button.
(2) Touch the HOME button.
The end of the procedure for performing the wireless LAN setup manually.
How to perform the wireless LAN setup for the smartphone (iPhone / iPad/iPod touch) For the wireless setup for iPhone / iPad / iPod touch, follow the instructions below.
NOTE: The procedures below are the ones for iPod touch (iOS 4.3.5).
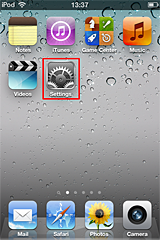
Step 1.
Tap [ Settings ] in the home screen.
Step 2.
Tap [ Wi-Fi ].
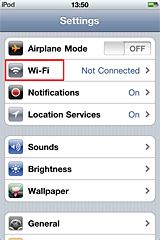
Step 3.
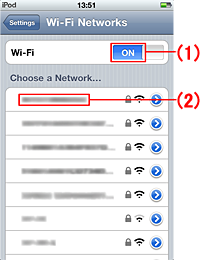
(1) Confirm that [ Wi-Fi ] is ON.
(2) Select and tap the SSID specified on the printer side from the access points listed in [ Choose a Network... ].
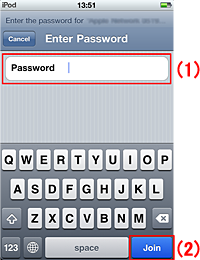
Step 4.
(1) When the "Enter Password" screen is displayed, enter the password used for the access point.
(2) Tap [ Join ].
How to perform the wireless LAN setup for the smartphone (Android) For the wireless setup for the Android terminal, follow the instructions below.
NOTE: The procedures below are the ones for GALAXY S SC-02B (Android 2.2).
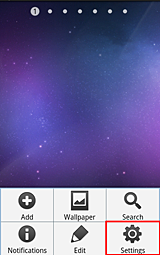
Step 1.
Select the Menu button of the terminal in the Home window to open the menus, then select [ Settings ].
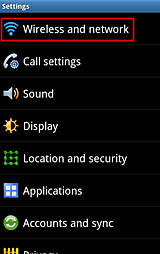
Step 2.
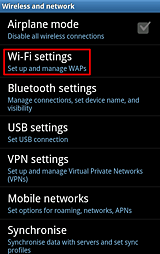
Select [ Wireless and network ].
Step 3.
Select [ Wi-Fi settings ].
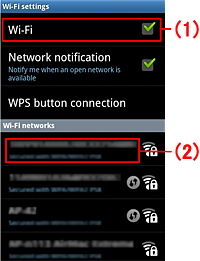
Step 4.
(1) When [ Wi-Fi ] is not selected, select [ Wi-Fi ].
(2) Select the SSID you are using from the access points listed in [ Wi-Fi networks ].
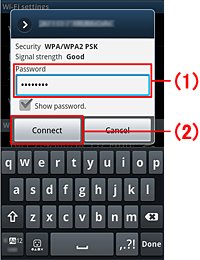
Step 5.
(1) When you are asked to enter the password, enter the password specified in the access point.
(2) Select [ Connect ].
|
 on the access point or the router you are using if it supports the WPS function.

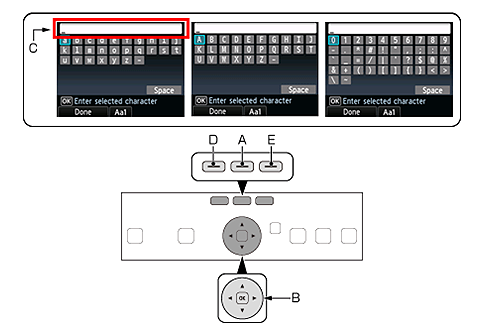
 buttons (B) to select a character from the on-screen keyboard, then touch the OK button to enter it.
 or
or  button, move the cursor to the character on the right of the target position using the
  or
or  button, then enter characters.
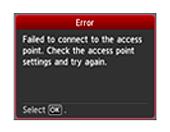
SIMS Doc Id
8201311200