|
|
TS8220 Initial Hardware Setup Screens
| Article ID: ART173694 |
| |
Date published: 02/20/2019 |
| |
Date last updated: 02/26/2019 |
Description
This article shows the screens you will see when setting up the PIXMA TS8220 for the first time.
Solution
After taking the PIXMA TS8220 out of its box and removing the packing material, the screens below will appear when powering the printer on for the first time.
- You will be asked to select a language to be displayed on the LCD. Tap on the language.

- On the next screen, tap OK.
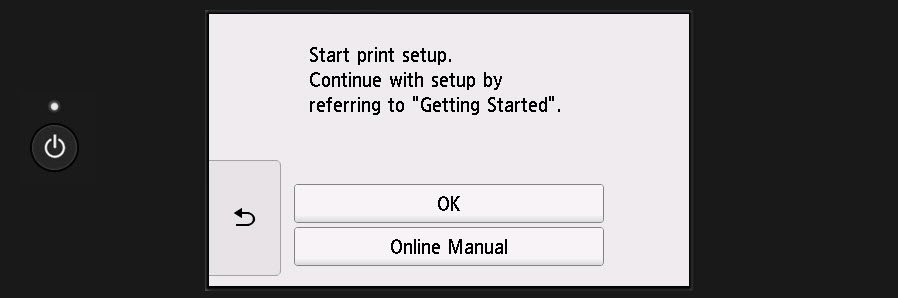
Tapping Online Manual will display the following:
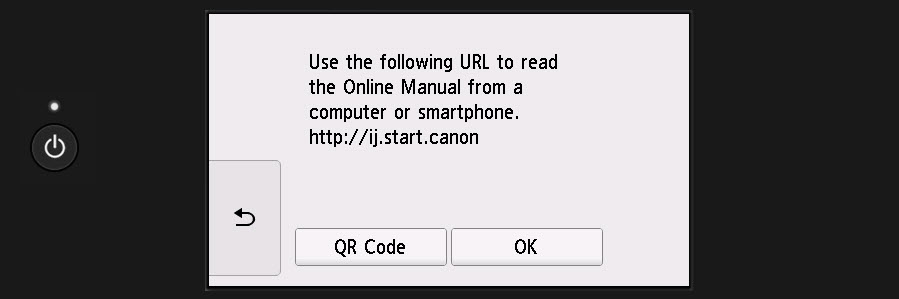
Tapping OK on this screen will take you back to the previous screen. Tapping QR Code will display a code that can be scanned with a mobile device. Scanning this code will take you to the online manual.
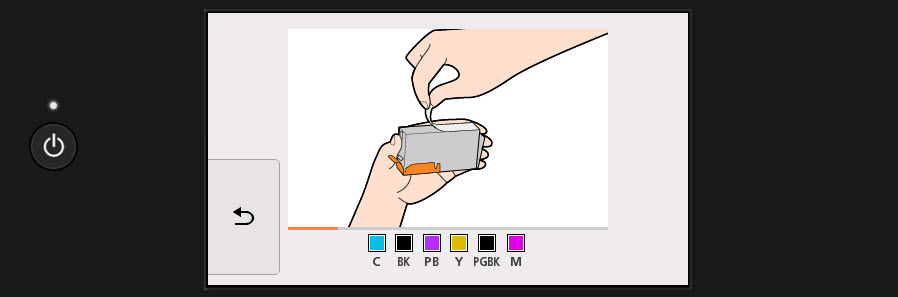
- After tapping OK on the Start print setup screen, an animation will play that will show you how to install the inks in your printer.
- After the inks have been installed, a message will instruct you to prepare A4 or Letter sized plain paper.

Tap OK to proceed to the next screen. If you do not wish to align the print head at this time, tap Perform later.

- If you tapped OK on the first screen in step 4, you will be instructed to insert two or more sheets of A4 or Letter sized plain paper into the cassette. Insert this paper and tap OK.
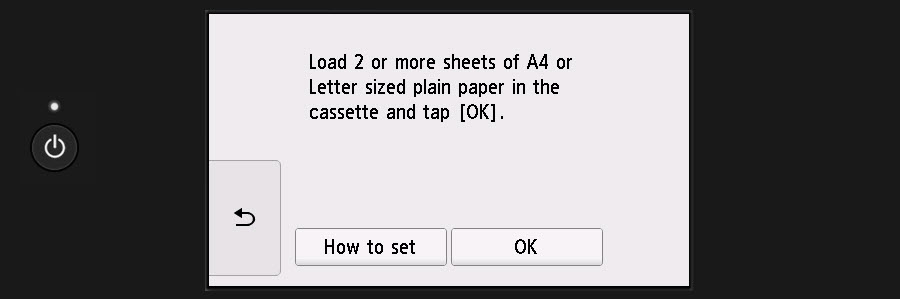
If you tap How to set, an animation will play that will show you how to insert paper into the cassette.
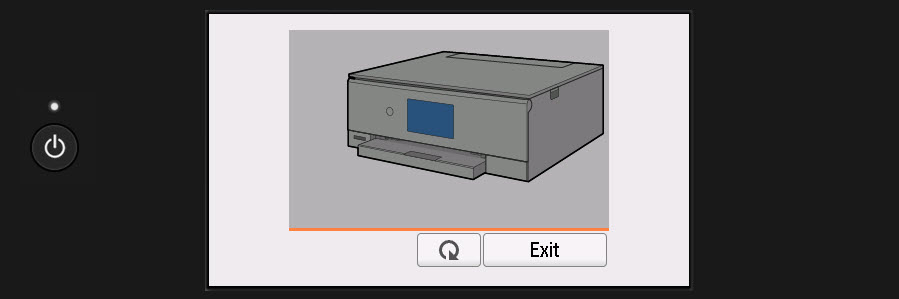
Tapping the Repeat button below the image will replay the animation if you wish to see it again. Otherwise, tap Exit to return to the first screen of this step.
Tap OK to begin the alignment process.
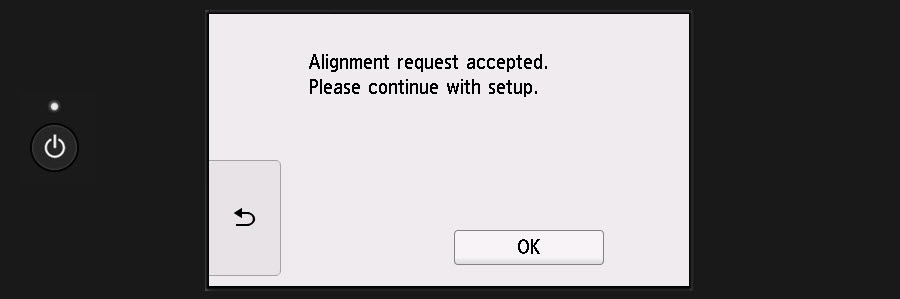
- The printer will notify you that the request to perform the print head alignment has been accepted. Tap OK. The alignment will continue while you proceed through the remainder of the setup process.
- You will see a message requesting some anonymous usage information from Canon. Tap Next.

Tap the up and down arrows on the right side of the screen, or swipe up and down to read the information on the information being requested. Then, tap Next.

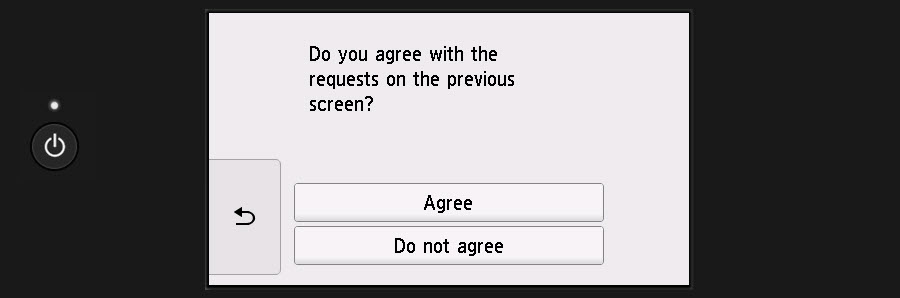
You will be asked if you wish to agree to send anonymous usage information to Canon. Tap Agree if you wish to send this information, or Do not agree if you do not wish to send this information.
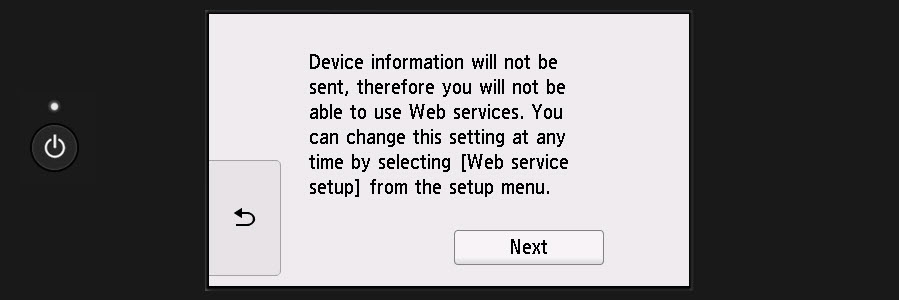
If you tap Do not agree, you will see a message indicating that you will not be able to use Web services with this printer. Tap Next.
If you wish to go back and agree to send this information, tap the Back  arrow, then tap Agree. arrow, then tap Agree.
- If you tapped Agree on the third screen in step 8, you will be asked to answer a brief survey. Tap Yes to proceed with the survey. If you do not wish to answer these questions, tap No.

If you tapped Yes, tap on the applicable answer to each question displayed.
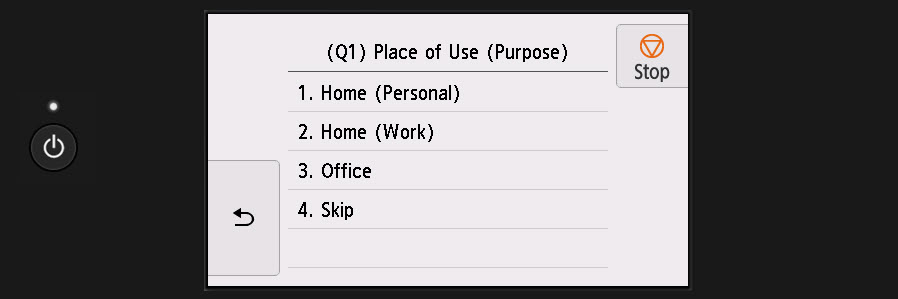

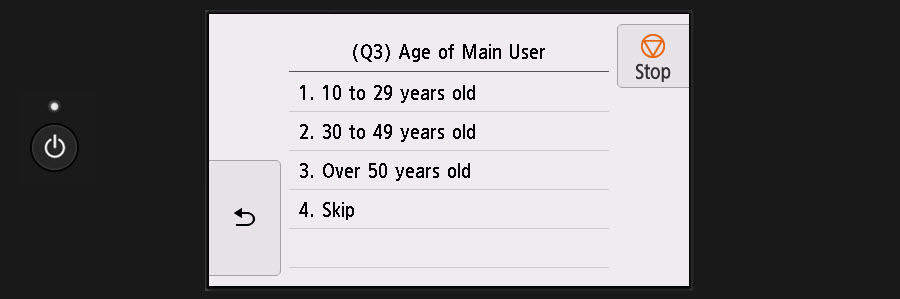

Tap Next.
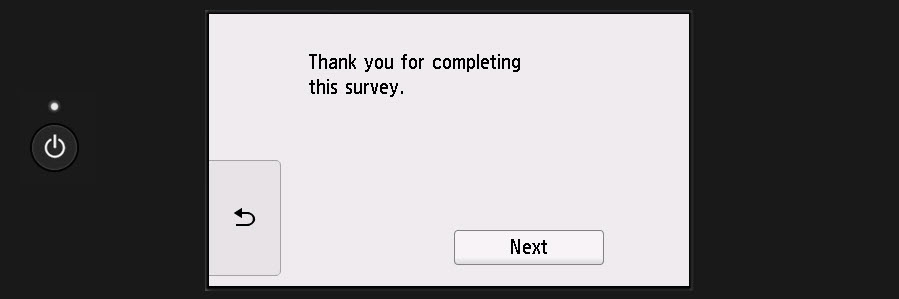
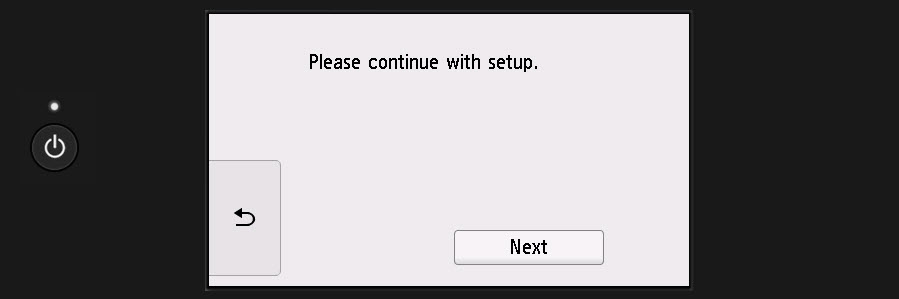
Note that if you tap Stop at any time during the survey, the following message will appear:
- The printer will prompt you to prepare a connection for the printer. Tap Next.

The printer will process for a few moments.

The printer will display the following message:
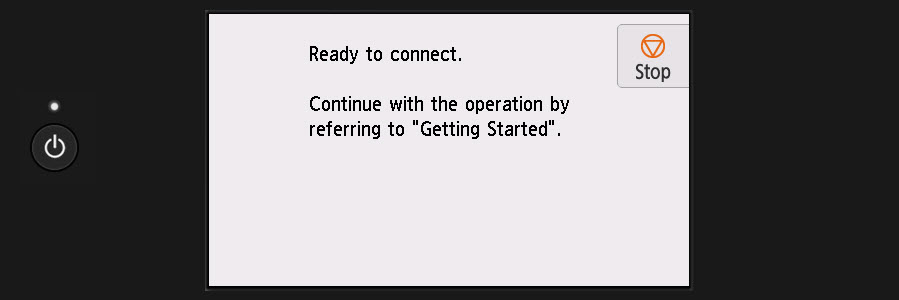
The printer is now in Easy Wireless Connect mode. When the printer is in this mode, you can use a Windows PC, a Mac, an iOS device, or an Android device to send information for your wireless network to the printer. This will allow the printer to establish a connection with your wireless network.
If you do not wish to use this connection method, tap Stop on the touch screen. The following screen will be displayed.
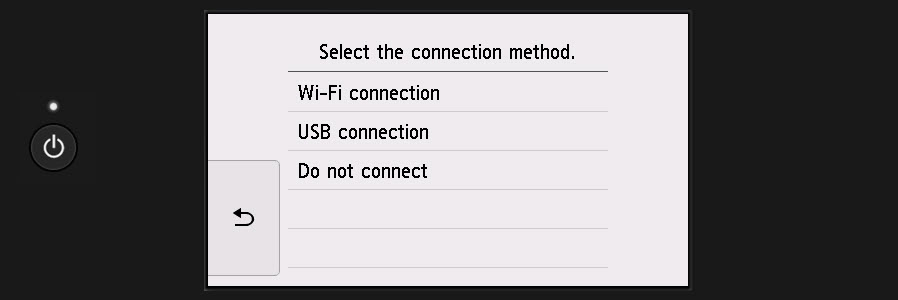
If you wish to use the printer as a standalone copier, tap Do not connect. You will be asked to confirm that you do not wish to establish a connection.
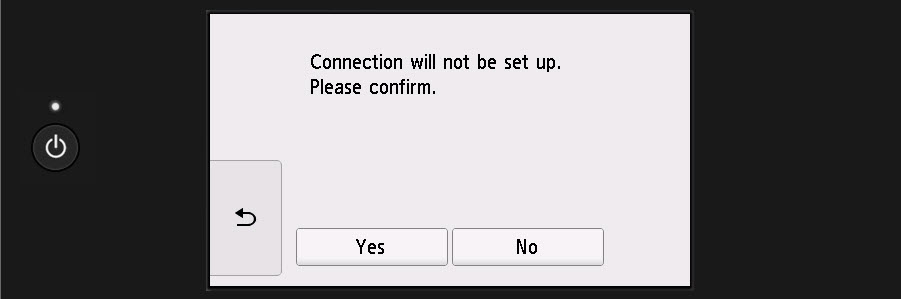
Tap Yes if you do not wish to set up a connection for the printer. If you do this, the printer will process for a few moments.

The printer will then display the HOME screen.
If you wish the use the printer via USB, tap USB connection on the Select the connection method screen. You will be asked to confirm if you want to connect a computer to the printer using a USB cable. Tap Yes to confirm this.

You will need to install the drivers and software for your computer (if you are using a Windows PC), or simply connect a USB cable between the printer and your computer and then download the software (if you are using a Mac).
After tapping Yes, the following message will appear.

If you wish the use the printer via Wi-Fi, tap Wi-Fi connection on the Select the connection method screen. You will be asked to confirm if you want to connect the computer and printer via Wi-Fi. Tap Yes.
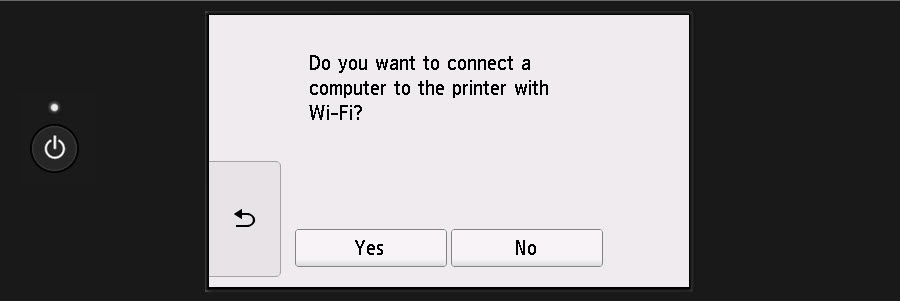
The printer will process for a few moments.

You will then be asked to select a setup method.
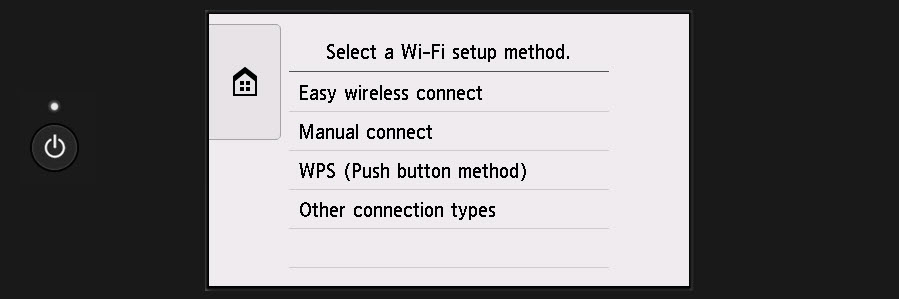
You can select Easy wireless connect, Manual connect, WPS (Push button method), or Other connection types (this includes connecting the printer to a wireless network via the WPS PIN Code method).
Remember that if you use the Easy wireless connect method that you will need to use a Windows PC, a Mac, an iOS device, or an Android device to send information for your wireless network to the printer. This will allow the printer to establish a connection with your wireless network.
After the connection has been established, the printer will display the HOME screen.
TS8220 Support Page
|
