
Wireless LAN setup using USB Cable Method (Mac)
| Article ID: ART137709 | | | Date published: 05/13/2015 | | | Date last updated: 11/04/2015 |
Description
Solution
This article also applies to the PIXMA MX439.
- Prior to installing the software for wireless printing, let's go through some steps to prepare the printer.
- After the printer has been setup, let's install the software.
Read Me First - Before performing the wireless setup Regarding the preparations and the procedures for using the printer in a wireless connection, refer to [ The necessary environment and the procedures for using the printer in a wireless connection ]. Perform the setup using a USB cable.
In most cases, "Wireless Setup Using the USB cable" will be used to connect the machine to your access point or router. Before you continue, you must gather the following information which will be required during the installation. Refer to the instruction manual for the access point or the router you are using, or you may contact the manufacturer for help. - Access Point Name / Network Name * Also referred to as SSID. An identifier to identify the specific access point. - Network Key * Also referred to as encryption key, WEP key or WPA/WPA2 passphrase, Pre-Shared key. A password to prevent unauthorized access to the network.
Screens are based on Mac OS X v.10.7. Actual screens may differ depending on the OS version. |
Preparing the Printer
- Insert the CD-ROM into the computer.
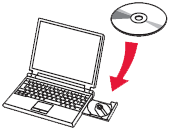
 Important: If the USB cable is already connected, unplug it. If a message appears on the computer, click Cancel.
 - Double-click the Setup icon
 of the CD-ROM folder to proceed to the following screen. Enter your administrator name and password, then click OK.
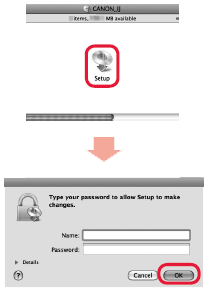
 Note:
Note:
If the CD-ROM folder does not open automatically, double-click the CD-ROM icon on the desktop.
If you do not know your administrator name or password, click the help button, then follow the on-screen instructions.
- Click Next.
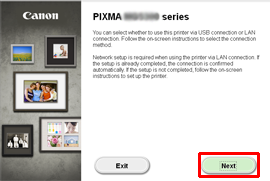 Important: The Setup Guide will launch in a window on the computer screen (as shown below in step 4). The Setup Guide includes instructions to set up the printer in a wireless LAN environment. Follow the instructions on each Setup Guide window pressing the appropriate buttons on the printer's operation panel. Then click the Next button to proceed to the next Setup Guide window.
Go to the next step (4). - At step 1-1 (Connection Method Selection), click Wireless Connection.
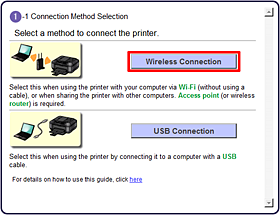
If another message appears, refer to Troubleshooting on the right.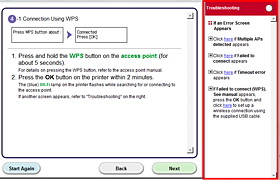
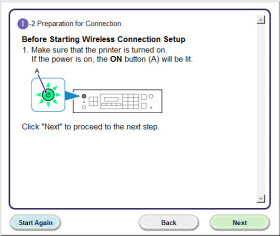
- At step 1-2 (Preparation for Connection), ensure the printer is powered on and then click Next on the Setup Guide window.
- At step 2-1 (Printer Setup), click Next.

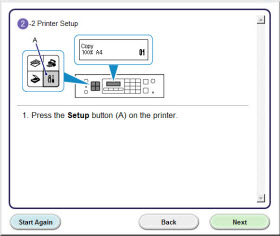
- At step 2-2 (Printer Setup), press the Setup button on the printer and then click Next.
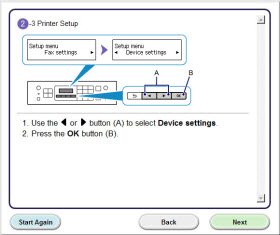
- At step 2-3 (Printer Setup), press the left or right arrow to select Device settings, press the OK button and then click Next.
- At step 2-4 (Printer Setup), press the left or right arrow to select LAN settings, press the OK button and then click Next.

- At step 2-5 (Printer Setup), press the left or right arrow to select Wireless LAN setup, press the OK button and then click Next. Note:
The Wi-Fi lamp will light up blue.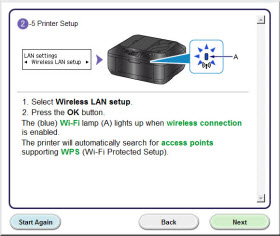
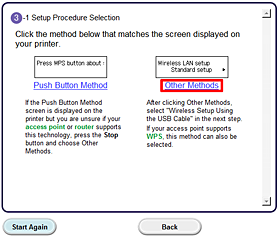
- At step 3-1 (Setup Procedure Selection) window, click Other Methods.
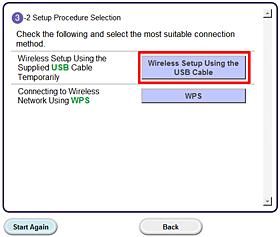
- At step 3-2 (Setup Procedure Selection) window, click Wireless Setup Using the USB Cable. The Software Installation List should appear. If the list does appear on your computer screen, click here for the next set of instructions.
 Note:
Note:
If the Detected Access Points List screen appears.
Select the access point for the printer to connect to, and then click Connect.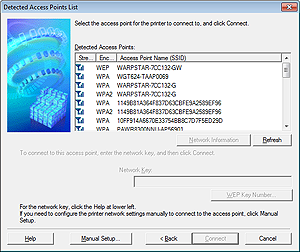
When Connect is grayed out, the access point you selected may be encrypted.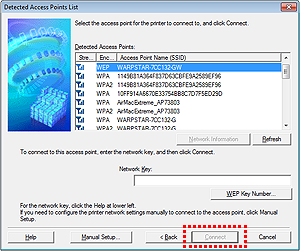
To connect to this access point, enter the network key and then click Connect.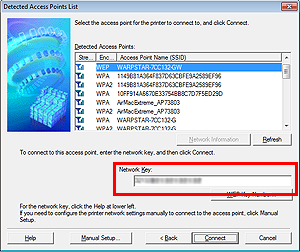
- Now install the software. Click here to go to this section.
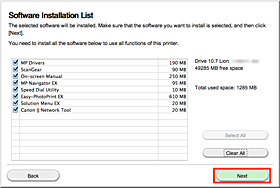
Install the Software (Information)
Let's perform the software installation.
- Click Next.
- At Set Up New Printer window, click Next to use a USB cable to set up a network connection for a new printer.

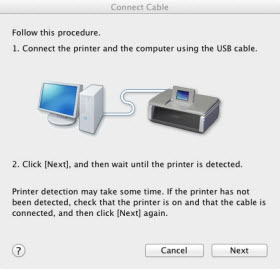
- At Connect Cable window, connect your printer and the computer with a USB cable and then click Next.
- At Confirm Connection Access Point window, ensure your network appears under Access Point and then click Yes.

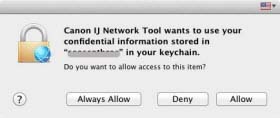
- The Canon IJ Network Tool will be able to check retrieve the network information stored in Keychain. Click Allow to have Canon IJ Network Tool retrieve the network information.
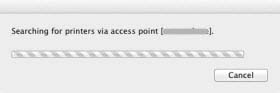
- Setup will then search for printer connected to the access point.
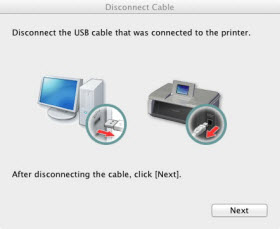
- When the network printer is detected, disconnect the USB from the printer and computer and then click Next.
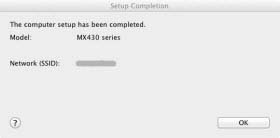
- After setup has completed, the printer model and network (SSID) will appear. Click OK.
- Click Add Printer.
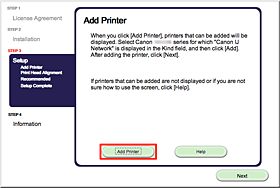
REFERENCE:
The alphanumeric characters after Canon xxx series is the machine's Bonjour service name or MAC address.
If the machine is not detected, make sure of the following. - The machine is turned on.
- The firewall function of any security software is turned off.
- The computer is connected to the access point.
REFERENCE:
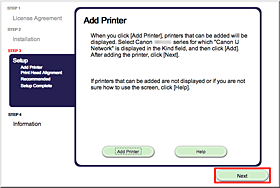
XXX: xxx refers to the model name you are using. - Select Canon xxx series Canon IJ Network and click Add.

CAUTION:
If you will be installing the Canon printer driver on Mac OS X and using the printer through a network connection, you can select Bonjour or Canon IJ Network in the Add Printer dialog.
If Bonjour is selected, remaining ink level messages may differ from those indicated by Canon IJ Network.
Canon recommends you to use Canon IJ Network for printing. - Click Next.
- Click Next.
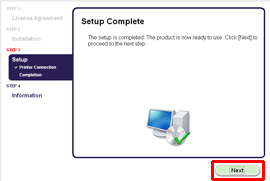
- Important Information for the Installation
If the Extended Survey Program screen appears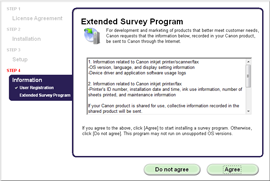
If you can agree to Extended Survey Program, click Agree.
If you click Do not agree, the Extended Survey Program will not be installed.
(This has no effect on the machine's functionality.)
When the Test Print window is displayed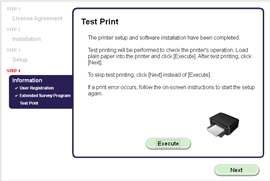
Test printing will be performed to check the printer's operation.
Load plain paper into the printer and click Execute.
After test printing, click Next.
To skip test printing, click Next instead of Execute. - Click Exit to complete the installation.
Remove the Setup CD-ROM and keep it in a safe place.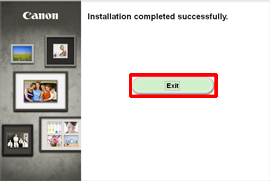
- Solution Menu EX starts.
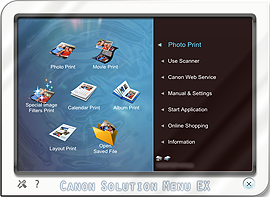
The end of the procedure of the wireless LAN setup.