
Using the Web Browser of a Smartphone or Tablet Device to Save and Playback Movies via Wi-Fi (Playback via Browser) (XF200 / XF205)
| Article ID: ART116664 | | | Date published: 05/12/2015 | | | Date last updated: 02/20/2024 |
Description
Using the Web Browser of a Smartphone or Tablet Device to Save and Playback Movies via Wi-Fi (Playback via Browser) (XF200 / XF205)
Solution
| Using the Web Browser of a Smartphone or Tablet Device to Save and Playback Movies via Wi-Fi (Playback via Browser) (XF200 / XF205)
ID : 8202112600 _ EN _ 1
|
|||||||||||||
| Solution |
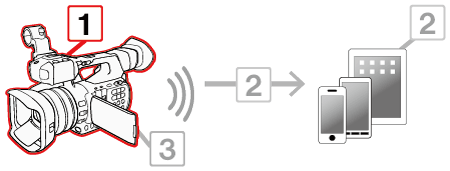
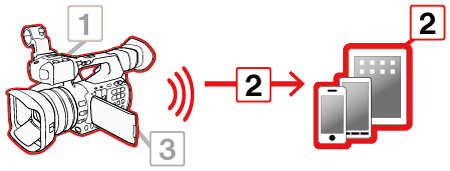
You can use the Playback via Browser function to access the MP4 clips and photos in the camcorder from the Web browser of a connected smartphone or tablet device. You can then play back your recordings using the Web browser and even save local copies of them on the device.
The procedure for using the Playback via Browser function via Wi-Fi is explained in the following sections. To use the Playback via Browser function with a wired network connection, please refer to Using the Web Browser of a Computer or other device to Save and Playback Movies via a Wired LAN (Playback via Browser) (XF200 / XF205).
 Step 1: Performing Camcorder Settings Step 1: Performing Camcorder Settings Step 2: Connecting the Smartphone or Tablet Device and Playing back/Saving Recordings Step 2: Connecting the Smartphone or Tablet Device and Playing back/Saving Recordings Step 3: Ending Playback via Browser Mode Step 3: Ending Playback via Browser Mode
Step 1: Performing Camcorder Settings
1. Hold down the button on the <POWER> switch and slide the switch to <MEDIA>.

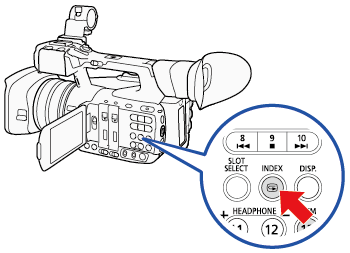
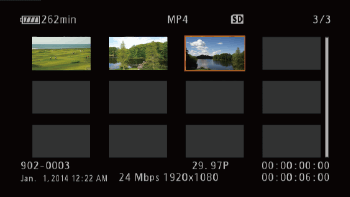
2. Press the <INDEX> button and Open the [MP4] or [Photos] index screen.
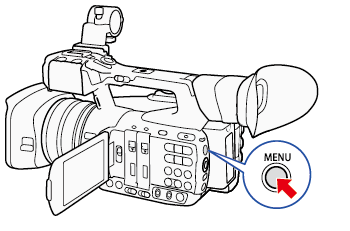
3. Press the <MENU> button.
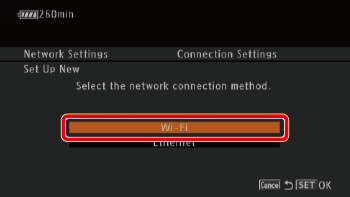
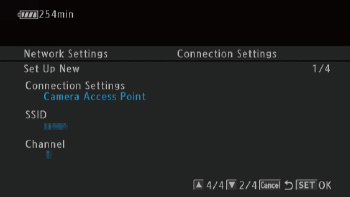
4. Select a Camera Access Point connection.
Push the joystick up/down to select [
 Other Functions] > [Network Settings] > [Connection Settings], and then press <SET>. Then, Select [Set Up New], and then press <SET>. Other Functions] > [Network Settings] > [Connection Settings], and then press <SET>. Then, Select [Set Up New], and then press <SET>.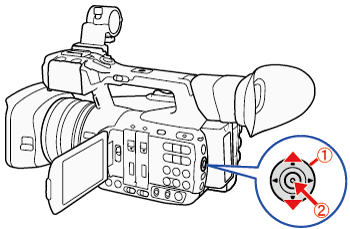  : Joystick : Joystick : In the following procedures, 'Press <SET>' refers to the action of pressing the joystick straight down to select the desired setting. : In the following procedures, 'Press <SET>' refers to the action of pressing the joystick straight down to select the desired setting.
5. Select [Wi-Fi] and then press <SET>.
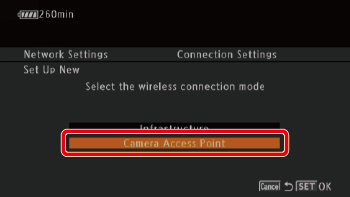
6. Select [Camera Access Point] and press <SET>.
7. Entering the SSID.
Select [Input] and then press <SET>.
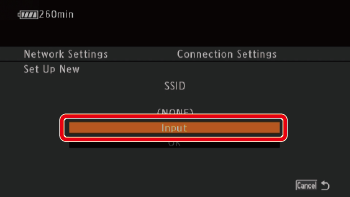
Enter the SSID
* This SSID is needed to connect the network device to the camcorder. If necessary, write it down.
After entering the desired text, select [OK] and then press <SET>.
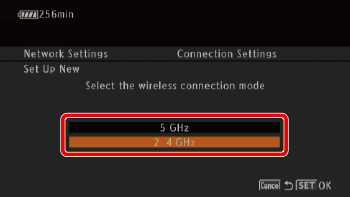
8. Select the wireless connection mode (5 GHz band or 2.4 GHz band) and then press <SET>.
9.Select the channel.
Push the joystick up/down to select a channel and then press <SET>. Available channels will be different depending on the wireless connection mode selected in step 8.

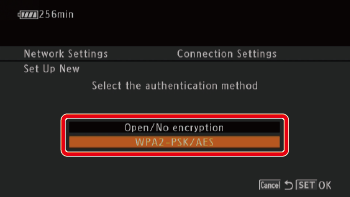
10. Select the authentication method and the encryption method.
-If you selected [Open/No encryption], proceed to step 12.
-If you selected [WPA2-PSK/AES], proceed to step 11.
11. Entering the encryption key.
Select [Input] and press <SET>.
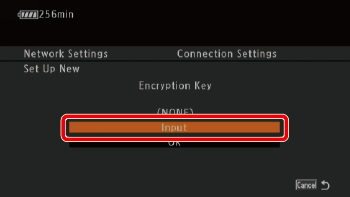
Enter the encryption key.
*This encryption key (password) is needed to connect the network device to the camcorder. If necessary, write it down.
After entering the desired text, select [OK] and then press <SET>.
Valid encryption keys vary depending on the encryption method.
*2: Hexadecimal characters comprise the numbers 0 to 9 and the letters a to f and A to F. *3: Distinction between ASCII and Hexadecimal will be made automatically based on the number of characters entered.
12. Select the method for assigning the IP address and then press SET.
The procedure for [Manual] is shown below.

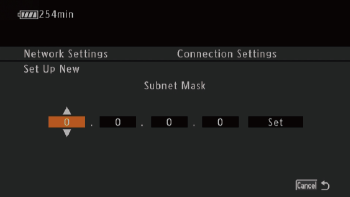
13. Enter the IP address, Subnet Mask, and Default Gateway
Push the joystick up/down to select a value for the first field and then press <SET>.
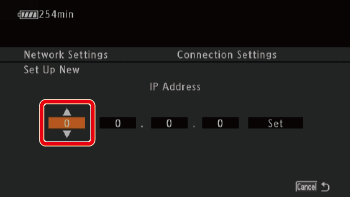
The cursor will move to the next field.
Repeat the process for all four fields.
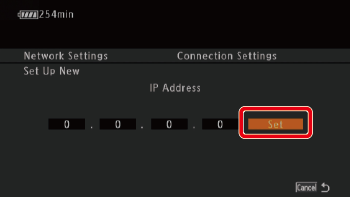
14. Select [Set] on the right side of the screen, and then press <SET> to confirm the address.
15. Enter the [Subnet Mask] and [Default Gateway] addresses in the same way.
16. Confirm the settings.
The first screen shows the access points SSID and the type of connection. Push the joystick up/down to review additional settings before pressing <SET>.
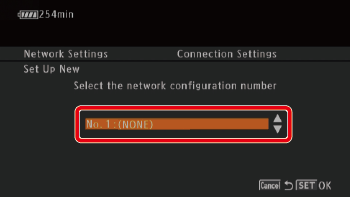
17. Save the settings.
Push the joystick up/down to select the desired configuration number and then press <SET>.
18. If necessary, enter the [Network Configuration Name].
Select [Input] and then press <SET>.
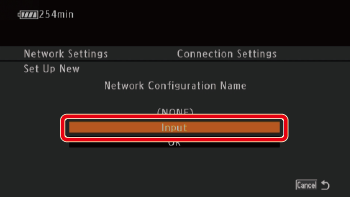
Enter the network configuration name.
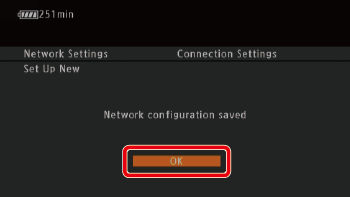
Select [OK] and then press <SET> to save the network configuration.
19. Select [OK] and then press <SET>.
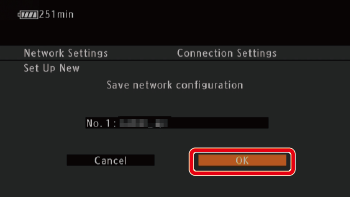
You can save up to 5 different network configuration profiles in the camcorder. If you select a configuration number that was already in use, the previous configuration will be overwritten by the new one.
20. Press <SET>.
21. Press the [CANCEL] button twice to return to the menu prior to the previous menu ([
Other Functions]).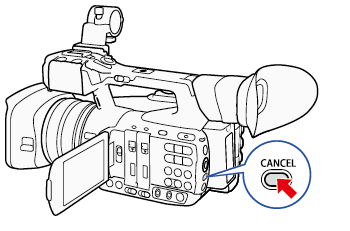 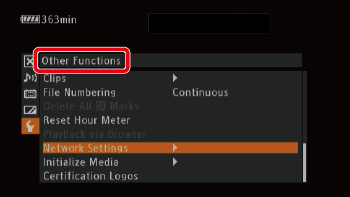
22. Select [
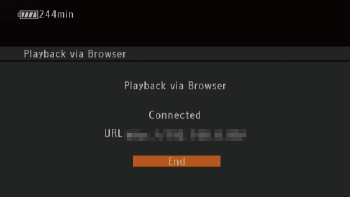
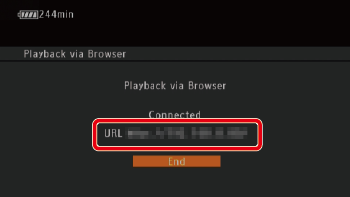
Other Functions] > [Playback via Browser] and press <SET>.[Connected] and the camcorders URL will appear on the camcorder's screen.
 While the camcorder is in Playback via Browser mode, only the <Power> switch, CANCEL button and the joysticks <SET> button can be used on the camcorder.
Step 2: Connecting the Smartphone or Tablet Device and Playing back/Saving Recordings
Connect the smartphone or tablet device to the camcorders access point.
Enter the SSID and encryption key that you wrote down while performing the previous steps.
1. Activate Wi-Fi in the settings screen on the smartphone or tablet device.

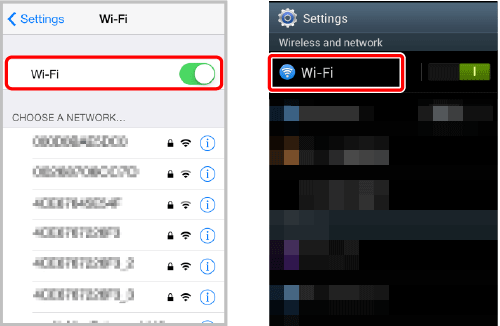
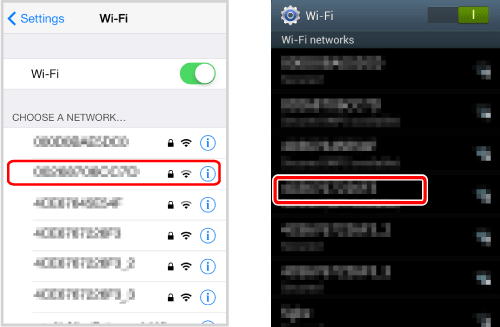
2. Touch the access point with the same SSID and network name as that of the one you wrote down while performing the previous steps.
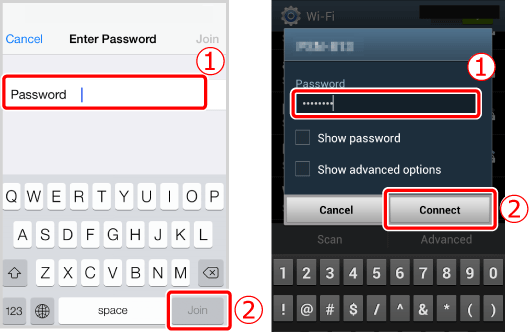
3. Enter the password that you wrote down while performing the previous steps.
4. Start the Web browser.
5. Enter the URL displayed on the camcorders screen.
The Playback via Browser screen will appear.
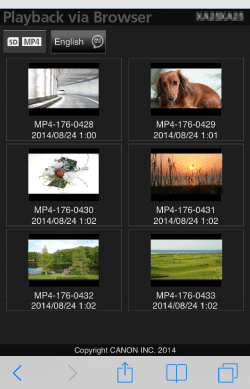
6. Select the desired MP4 movie or photo to play it back.
To change the index screen displayed, touch the button on the top left of the screen
Touch [
   ], to show MP4 clips or [ ], to show MP4 clips or [  ] to show photos. ] to show photos.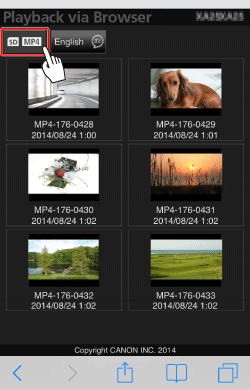
7. Touch [
] or [ ].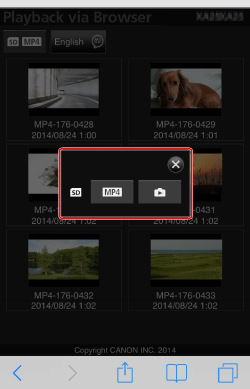
8. Touch the desired recording from the list of recordings.
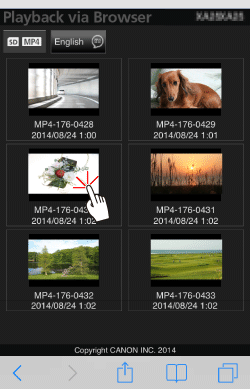
9. Touch the image.
The selected movie or photo will be played back.

10. Touch [
 ] to return to the list of recordings. ] to return to the list of recordings.
11. Devices other than iOS devices: Touch/click [
 ] to save a local copy of the MP4 clip/photo on the device. ] to save a local copy of the MP4 clip/photo on the device.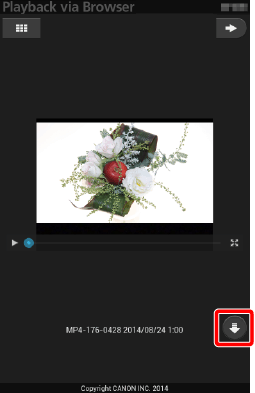
Step 3: Ending Playback via Browser Mode
1. When you have finished playing back, press <SET> to end the Playback via Browser mode.
Playback via Browser mode will end.
|
||||||||||||

 ] / [
] / [  ] / [
] / [  ] / [
] / [  ]) to change the position of the cursor and the backspace character [
  ] to delete the last character entered.
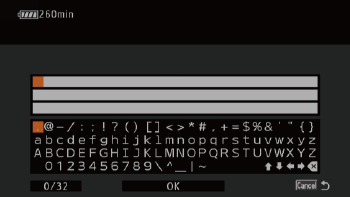

SIMS Doc Id
8202112600