Setting the Ink Cartridge and Adjusting the Print Position - CR190
Article ID: ART106993
|
Date published: 05/11/2015
|
Date last updated: 11/12/2015
Description
The ink cartridge needs to be set to pritn. Set the ink cartridge according to the following procedure.
Solution
The ink cartridge needs to be set to print. Set the ink cartridge according to the following procedure. You can adjust the print position to two different levels.
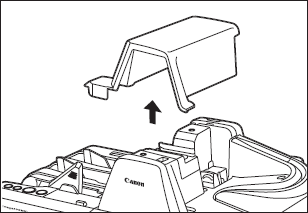
To set the ink cartridge, turn the scanner OFF before removing the Top Cover. After the ink cartridge is set, replace the Top Cover, and then turn the scanner back ON.
Remove the Top Cover.
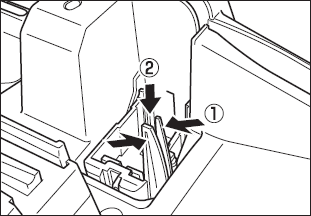
Squeeze the Print Position Adjustment Lever, and push it down to the bottom position.
Place the ink cartridge as shown in the diagram below.
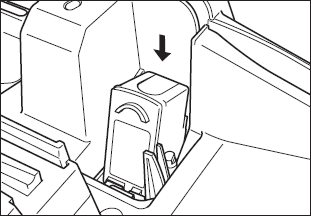
Do not touch the electrical contact on the carriage. Doing so may cause a malfunction.
Do not use more than one cartridge by rotation. If you do so, applications cannot check the ink level precisely.
Push down the ink cartridge until it clicks into place.
Make sure that the ink cartridge is securely in place.
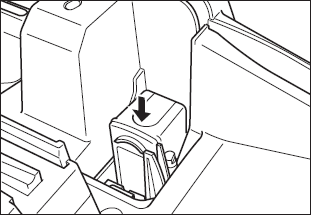
Squeeze the Print Position Adjustment Lever and more it to adjust the print position. Top: 1.92" (48.8 mm) from the bottom edge of the document Bottom: 1.17" (29.6 mm) from the bottom edge of the document.