Print Head Alignment adjusts differences in the print head position and corrects uneven horizontal or vertical print results. A manual print head alignment corrects small differences that might not correct with an automatic print head alignment.
Check to be sure that the printer cable connects to the printer and both the computer and the printer are turned on.
-
Launch IJ Printer Utility.
 In versions of Mac OS X older than 10.4, go to IJ / BJ Printer Utility from the Library > Printers > Canon > BJPrinter > Utilities folder.
-
In the Apple menu select System Preferences.
-
Open Print & Fax.
-
Make sure the correct printer is selected and, depending on your OS version, select Open Print Queue... or Print Queue...
-
Select the Utility icon.
-
Select the printer, then select Maintenance.
In some versions of Mac OS X, you will select Options & Supplies, the Utility tab, then Open Printer Utility.
-
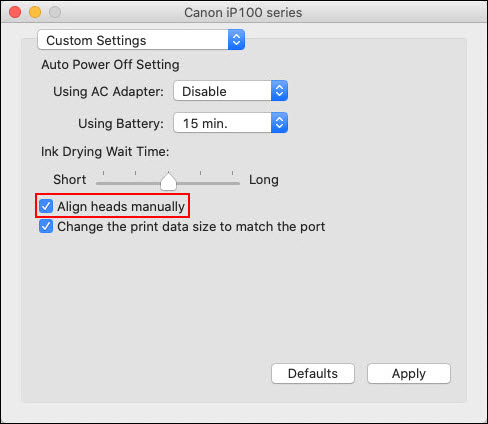
In the pop-up menu, select Custom Settings. (The window you see varies according to the printer model.)

-
Select Align heads manually, then Apply.
-
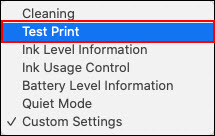
In the pop-up menu, select Test Print. (The window you see varies according to the printer model.)
-
Select the print head alignment icon.

-
Load two sheets of letter-sized plain paper in the rear tray, then select Align Print Head.
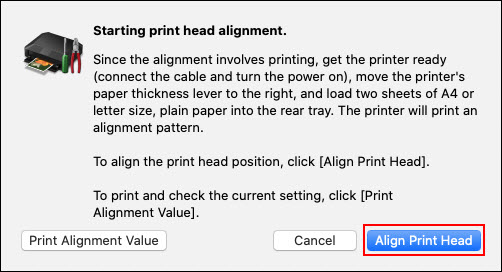
If you want to print and check the current settings before you align the print head, select Print Alignment Value.
-
Print Head Alignment starts. Don't begin any other tasks until printing completes.
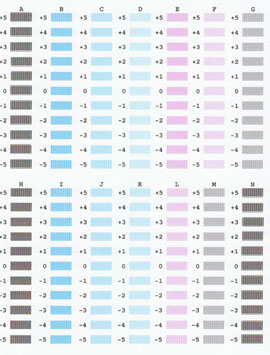
The first pattern prints and looks similar to this.
-
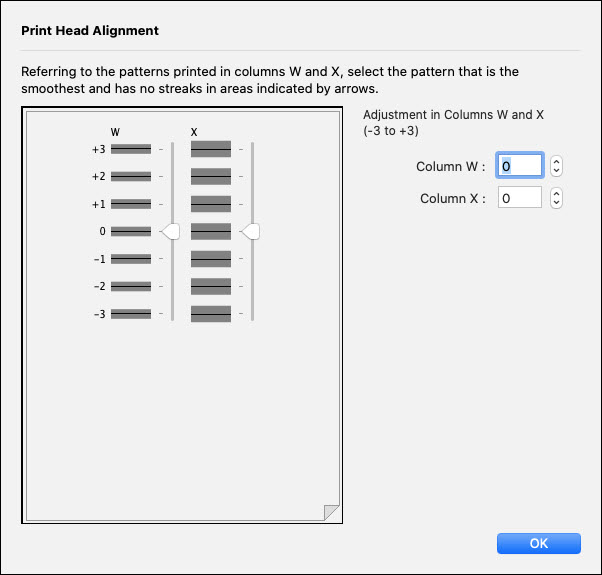
Examine the print pattern sheet, then enter the values requested in the Print Head Alignment window.
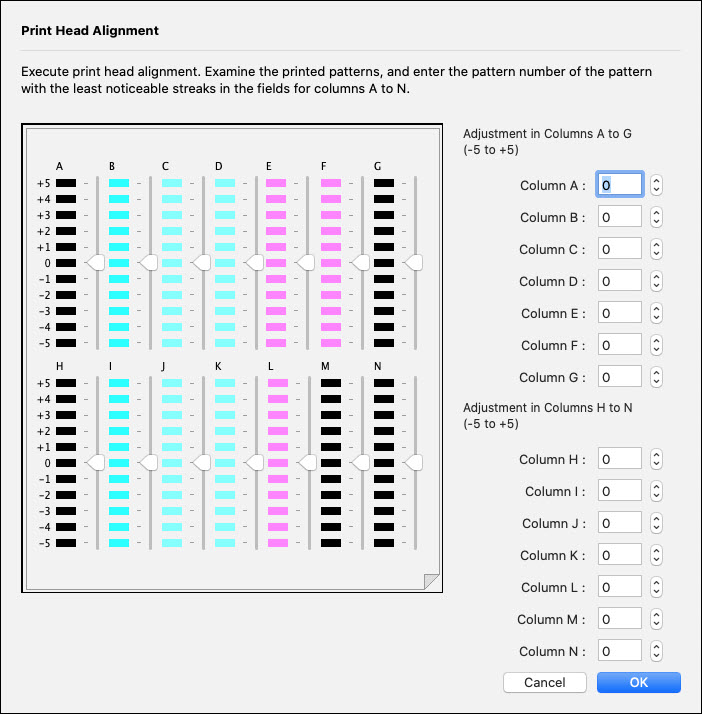
Look for the pattern with the fewest streaks and enter the corresponding number in Columns A-N.
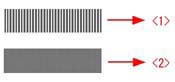
<1> An example of a pattern with a lot of streaks.
<2> An example of a pattern with very few streaks. (In this example, you would enter the value associated with the #2.)
-
When you enter all the numbers, select Send.
-
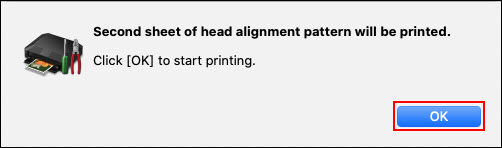
Next, insert another sheet and print the second pattern sheet, then select OK.
Print Head Alignment starts. Don't begin any other tasks until printing completes.
-
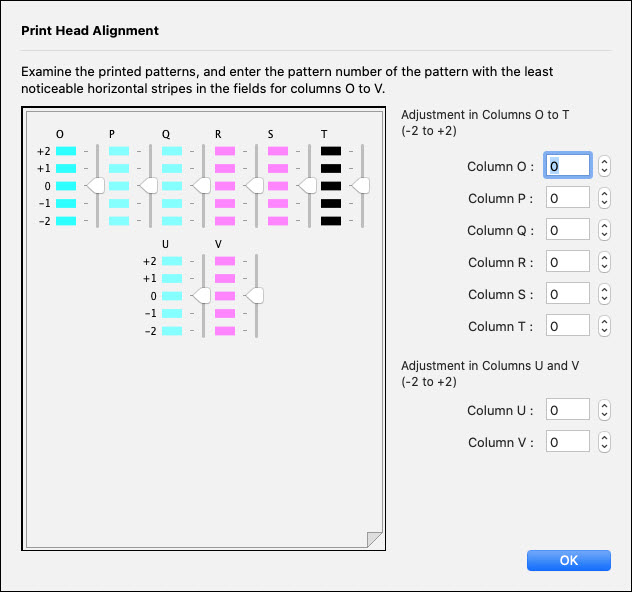
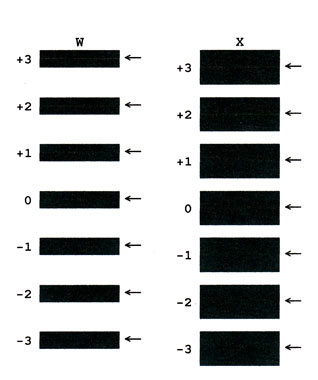
The second pattern prints and looks similar to this.

Refer to the printed sheet, and enter the numbers on the Print Head Alignment window in the same way you did in Step #13.
-
When you enter all the numbers, select OK.
-
Next, insert another letter-size sheet in the rear tray, then select OK.

Print Head Alignment starts. Don't begin any other tasks until printing completes.
-
The third pattern prints and looks similar to this.
Examine the printed sheet, and enter the numbers of the pattern with the least visible horizontal line.
-
After entering all the numbers, select OK to complete the manual print head alignment.
