Wrap around tape consists of a printable part and a transparent laminate. It is used for indicating the destinations of cables.
Prepare a wrap around tape cassette and print characters following the steps below.
Note that a wrap around tape cassette is not supplied with the machine; it must be purchased separately.
Installing cassettes
Install a ribbon cassette and the wrap around tape cassette.
-
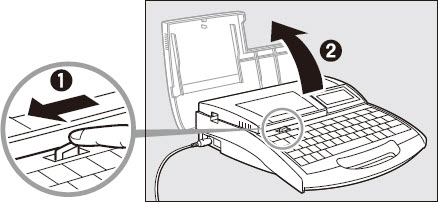
Open the cover.
|
|
-
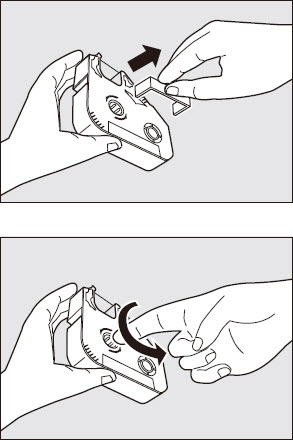
Take up any slack in the ribbon.
 The printer cannot detect the ribbon if it has any slack. Always be sure to take up slack in the ribbon when installing a cassette. The printer cannot detect the ribbon if it has any slack. Always be sure to take up slack in the ribbon when installing a cassette.
Dispose the removed stopper according to local government regulation.
|
|
-
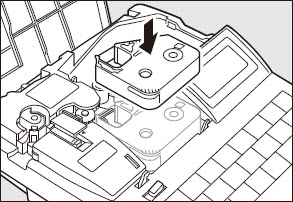
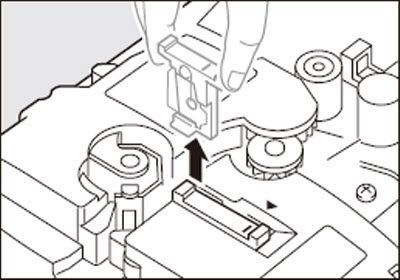
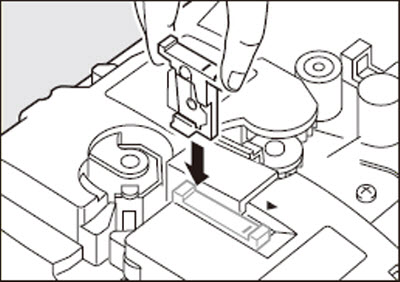
Install the ribbon cassette in the printer.
If the ribbon cassette is loose, the ribbon may not be detected, so be sure to press it in until it clicks.
|
|
|
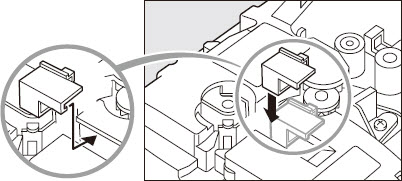
 Do not hold the connection terminal (metal part) of the cassette. Doing so could cause an improper recognition of the cassette. Do not hold the connection terminal (metal part) of the cassette. Doing so could cause an improper recognition of the cassette.
|
-
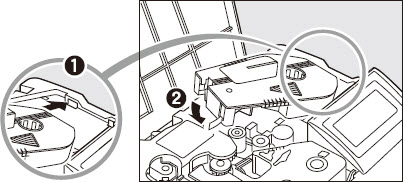
Install the wrap around tape cassette into the printer.
|
|
Install the wrap around tape guide
If the wrap around tape guide has been installed, verify that it is installed correctly.
-
Pull out the cutter.
|
|
-
Install the wrap around tape guide.
|
|
-
Install the cutter.
|
|
-
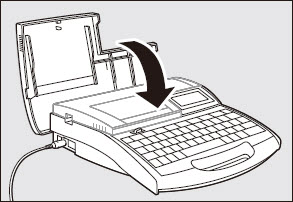
Close the cover.
|
|
Proceed to the next step.
If your product issue was not resolved after following the steps above, or if you require additional help, please create or log in to your Canon Account to see your technical support options.
Or if you still need help, visit our Canon Community by clicking the button below to get answers:

____________________________________________________________________________________________
