Sharing the printer and using it on a network
Several computers connected to a network can share the printer connected to one of the computers. To share the printer, set up the printer as a shared printer on the server or host (the computer connected to the printer) and install the printer driver on each client or remote system (computers other than the server).
Note: The Server service must be running on all applicable computers in order to share the device successfully. Normally, the Server service is started automatically when Windows starts. Click Here for instructions to check the Services.
Example of networking:
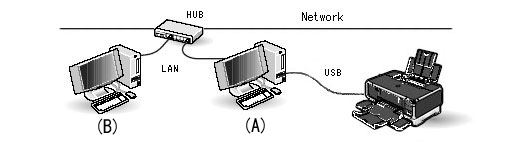
Note: Hereafter, the computer connected to the printer to be shared with a USB cable (A) is called "the print server", and the computer to be added (B) "the client". Two computers are on the same network (LAN).
- Specify the printer sharing settings in the print server.
- Check a computer name of the print server.
- Add the printer to be shared to the client.
Note:
- Login with the Administrator account type to specify the settings in a Windows XP computer.
- Before following the procedures below, confirm printing can be performed properly with the print server.
- Network printing cannot be performed if the Microsoft printer driver and the Canon printer driver are used together. Install the Canon printer driver in the print server and the client.
Specify the printer sharing settings in the print server
Specify the settings so that the printer connected to the print server can be shared on the network.
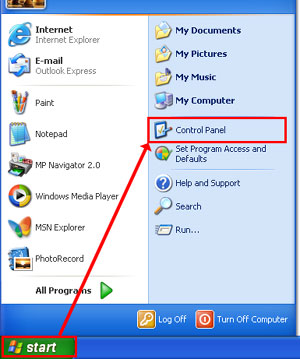
- Click 'Start', then 'Control Panel'.
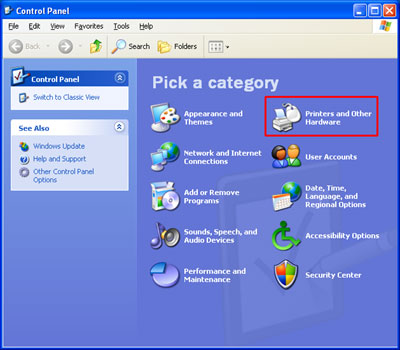
- Click 'Printers and Other Hardware'.
Note: The window may not be displayed depending on the computer environment.
- Click 'Printers and Faxes'.
Note: The window may not be displayed depending on the computer environment.

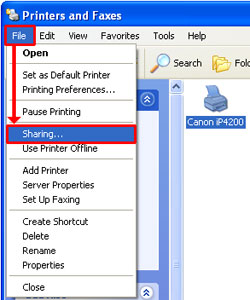
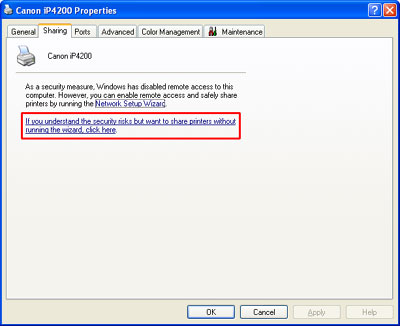
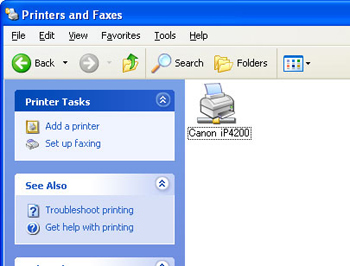
- Select your printer model (the below illustration will show 'Canon iP4200), then click 'Sharing' from File menu.
- Click 'If you understand the security risks but want to share printers without turning the wizard, click here.'
Note: The window may not be displayed depending on the computer environment.
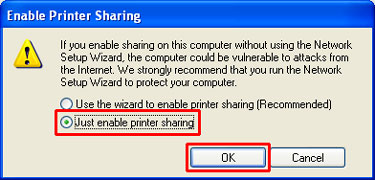
- Select 'Just enable printer sharing,' then click 'OK'.
Note: The window may not be displayed depending on the computer environment.
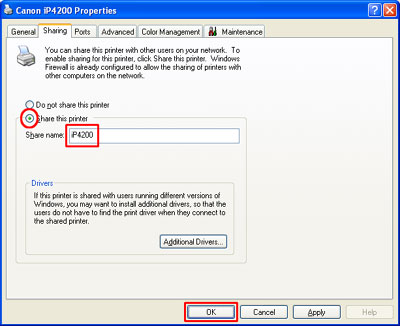
- Select 'Share this printer' and enter any name in 'Share name' then click 'OK' to close the Properties window. (Click here to return to step 7b.)
Note:
* Here, iP4200 is entered.
* The name entered here will be needed when specifying the settings in the client.
- Confirm that the following icon which indicates that the Canon iP4200 printer is shared is displayed.

Check a computer name of the print server
Check a computer name of the print server. This name will be needed in procedure 3 to specify the printer.
- Right-click 'My Computer', and select 'Properties'.
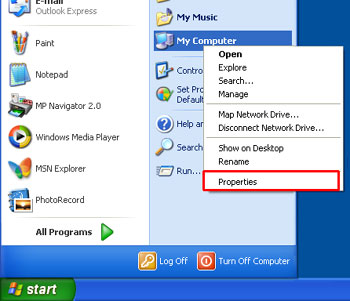
- Click the 'Computer Name' tab to check Full computer name. The name in Full computer name is the computer name of the print server. Click here to return to step 7b.)
Note:
* Here, our computer name is Canon as an example.
* Since this computer name will be needed when specifying the settings in the client, please write it down.

Add the printer to be shared to the client
Add the printer to be shared on the network to the client.
- Click 'Start', then 'Control Panel'.
- Click 'Printers and Other Hardware'.
Note: The window may not be displayed depending on the computer environment.
- Click 'Printers and Faxes'.
Note: The window may not be displayed depending on the computer environment.
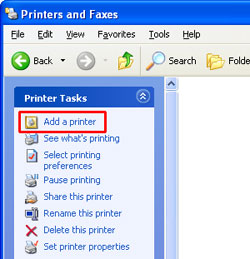
- Under Printer Tasks, click 'Add a printer'.
- Click 'Next'.
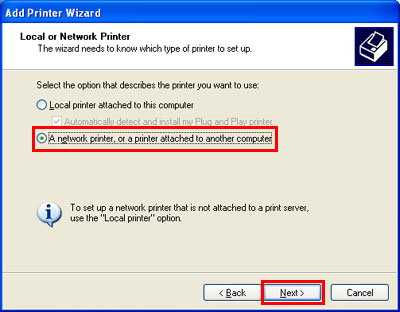
- Click 'A network printer, or a printer attached to another computer' then click 'Next'.
-
Specify the printer.
Note:
During the procedures of specifying a printer, the window to request you to enter a password may be displayed.
Enter the password, then go to the next step.
If you do not know the password, please ask the network administrator.
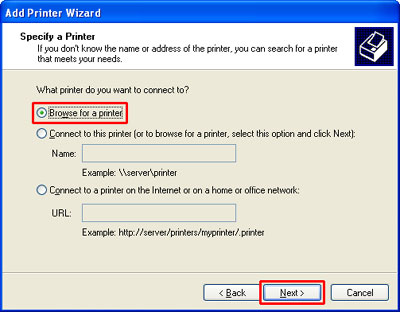
- Select 'Browse for a printer' then click 'Next'.
- Click the computer name (here, Canon) of the print server selected in step 2, then the icon of the printer to be shared will be displayed below the computer icon.
- Click the printer icon, then click 'Next'.
Note:
The printer name is the name you entered in step 7 to 'Share this printer'.

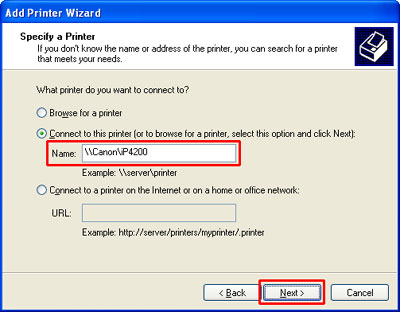
- Specify the printer from 'Connect to this printer (or to browse for a printer, select this option and click Next)'.

- Enter the following in Name, then click 'Next'.
\\computer name of the print server\name of the printer to be shared
Note:
* Here, \\Canon\iP4200 is entered as an example.
* The computer name of the print server is the name you confirmed as the full computer name in procedure 2-2).
* The name of the printer to be shared is the name you entered in procedure 1-7).
- If you want to set the printer as a default printer, click 'Yes', and if not, NO, then click 'Next'.
- Click 'Finish'.
- In the Printers and Faxes window, the Canon iP4200 icon will be created.
Now, printing can be performed from the client.
When printing from the application software, select the shared printer in the printer list before printing.
Opening the Services Window
- Click 'Start'
- Click 'Run'
- Type: services.msc
- Click OK
- Scroll down the list of services until you see Server.
- If the Status is not listed as 'Started', click your right mouse button on the Server service and click 'Start' from the menu that appears.
TOP
