If scanned images contain spots or documents become dirty after scanning, the scanning glass or transport rollers inside the scanner may be dirty. Please clean periodically.

The pickup, feed, and retard rollers are consumable components. You need to replace these rollers when cleaning does not appear to improve performance.
 |
 |
Turn OFF the power switch, and disconnect the power plug from the power outlet when you remove or reinstall the rollers. Leaving the power turned ON may result in an electric shock. |
|
Do not place excessive force on the rollers when removing or reinstalling the rollers. Deformation of the rollers may cause feed errors. |
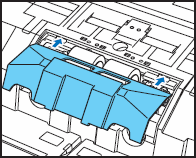
- Press the Open/Close button and carefully raise the upper unit until it stops.
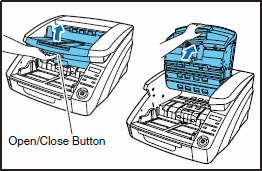
- Wipe any dust off the scanning glass with a cleaning cloth or a clean, dry cloth.
Make sure that you clean scanning glasses, the one below and one above.
Never spray mild detergent or water directly on the scanning glasses. The spray could penetrate below the glass, and contaminate the light source and lenses.

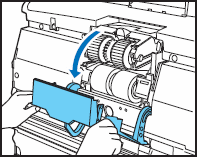
- Dampen a cloth with water, wring it out thoroughly, and then wipe the rollers while turning them.

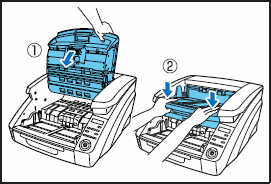
The location of the various rollers are shown below.

- Remove the pickup roller by opening the roller cover.
- Open the roller holder.


The roller holder returns to its original position when released.
- Remove the pickup roller.
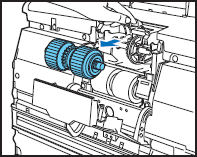
- After cleaning the pickup roller, open the roll holder, and insert the pickup roller.

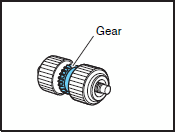
Install the pickup roller so that the side with the gear is on the left.
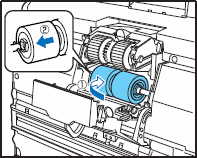
- Pull the feed roller lock lever down.

- Slide the feed roller to the right, and then pull them towards you.

- Remove the feed roller.

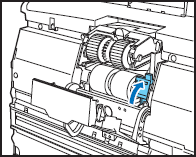
- After cleaning the feed roller, place the feed roller on the pin.

- Put the feed roller in place
 , and align the notch in the roller's axle with the shaft on the scanner
  .
.
- Push the roller lock lever up to lock the feed roller.
- Close the roller cover.
Check that it makes a latching sound and that it is securely returned to its original position.

Failure to firmly close the roller holder and roller cover may cause a feed error. Always be sure to check that the roller holder and roller cover are closed.
- To remove the retard roller, grasp the roller cover with your fingers, and pull it up to remove it.

- Push the roller lock lever up and move it to the left to unlock the roller.
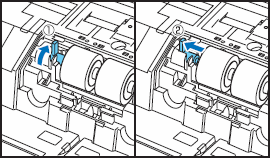
- Remove the retard roller.

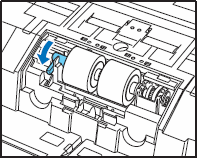
- After cleaning the retard roller, set it back into place in the scanner.

- Align the notches in the roller with the shaft pins in the scanner, then slide the roller lock lever in the direction indicated by the arrow.

- Pull the roller lock lever down to lock the retard roller in place.
- Replace the roller cover.
- Gently lower the upper unit . Press down on sides of the upper unit to ensure that it is securely closed .
Make sure that the hook is completely latched and the roller cover is not loose. If the roller cover is loose, the document feed tray will catch on it causing the scanner to malfunction.
