You may occasionally need to replace or reset a print head, for instance to resolve an error condition or print quality issue.
There are two steps to this process.
- Remove the print head.
- Replace or reset the print head.
1. Remove the print head
-
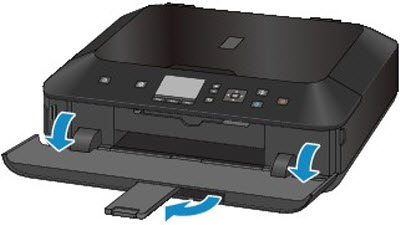
Turn the printer on. Hold both sides of the paper output tray, and gently open it. The output tray extension opens automatically when the paper output tray is opened.
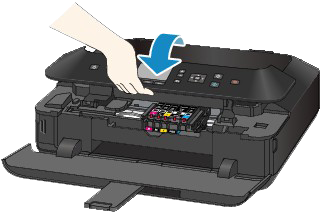
-
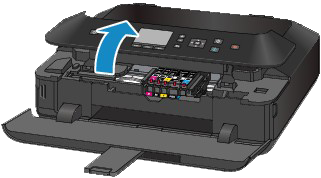
Lift the operation panel open until it stops. The print head holder moves to ink tank replacement position (near the center).
-
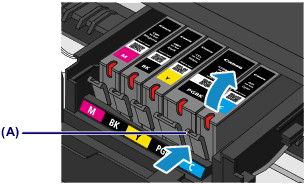
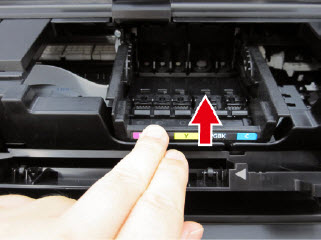
Push down on the ink tank tab (A) and lift the tank out of the printer.
-
Remove the rest of the ink tanks in the same manner (see image slide show below).
-
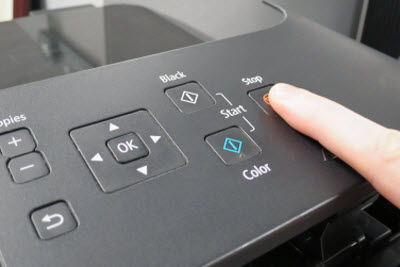
Press and hold the Stop button for a few seconds until the print head carriage moves to the replacement position, then release the button.
-
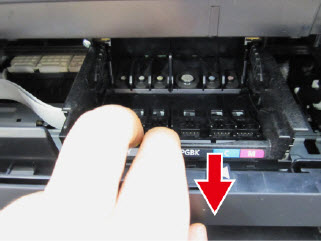
Pull the head set lever towards the front of the printer.
 You may find resistance when the bottom of the head set lever hits the back of the front edge. The head set lever moves forward as it slides above that front edge.
-
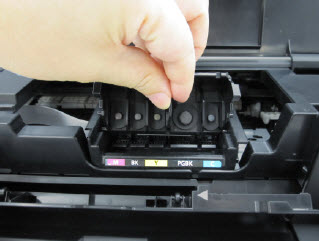
Use your fingertips to grab the top of the center tab and pull out the print head. The print head drops face down as you pull it out.

2. Replace or reseat the print head
The steps below are the same, whether you need to reseat or replace the print head.
If you need to install a new print head, remove it from the packaging.
-
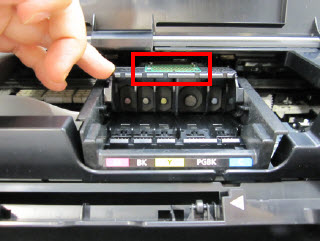
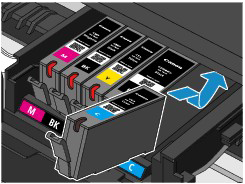
Hold the center tab of the print head with the front facing down (so you can see the green circuit board). Then, insert the two tabs at the bottom of the print head into the rails on either side of the print head holder.
-
Slide the print head into the printer. As the print head slides in to the holder, it will start to sit in an upright position.
-
Once the print head is seated, push the head set lever towards the back of the printer.
-
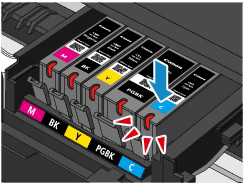
Reinsert the remaining ink tanks into their proper slots (see image slide show below).
Insert the front end of the ink tank into the print head at a slant.
Press on the top of the ink tank until the ink tank snaps firmly into place. Make sure that the ink lamp lights up red.
-
Close the operation panel.
If the print head carriage returns to home position before the print head is installed, close the operation panel and follow the instructions on the display. Then repeat step 5 in Part One to get the print head holder into the replacement position.
