
Controlling the VC-C50i or VC-C50iR with the WL-V5 Wireless Controller
| Article ID: ART112758 | | | Date published: 05/11/2015 | | | Date last updated: 08/17/2015 |
Description
Solution
Controlling the VC-C50i or VC-C50iR with the WL-V5 Wireless Controller
The Wireless Controller WL-V5 is optional.
Contents:
What the Buttons on the Wireless Controller do
Changing the Camera Head Angle (pan/tilt/home position)
Adjusting the Brightness (BRIGHT)
Storing a Preset Camera Position (PRESET)
Switching the Camera ON and OFF
What the Buttons on the Wireless Controller do
While the wireless controller buttons are being used, the LED on the camera blinks green (at 0.1-second intervals).
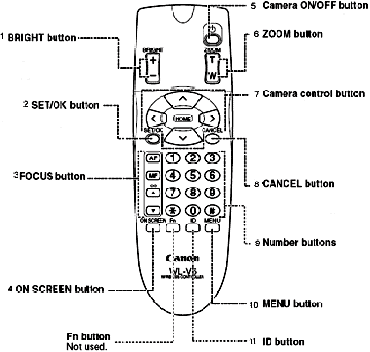
| 1. BRIGHT button |
Adjusts the brightness of the image on the monitor.
|
| 2. SET/OK button | Used to store preset positions. Can also be used to proceed to the next level when specifying settings in a setting menu. |
| 3. FOCUS button |
Adjusts the focus.
|
| 4. ON SCREEN button | Displays or hides the date, time and text. |
| 5. |
Switches the camera on and off. |
| 6. ZOOM button |
Increases or decreases the size of the subject on the monitor screen.
|
| 7. Camera control button |
Used to change the camera head angle and to move the on-screen cursor.
|
| 8. CANCEL button | Cancels registration of a preset camera position. Also cancels a setting selected in a setting menu and returns you to the previous level. |
| 9. Number buttons | Used to store and restore preset positions, and to select the camera when multiple cameras are used. The * and # buttons are not used. |
| 10. MENU button | Used to display and exit the MAIN MENU. |
| 11. ID button | Used to control multiple cameras individually. When the cameras are switched off, pressing this button begins individual camera control. |
 : Lengthens the focal distance.
 : Shortens the focal distance.
|
|
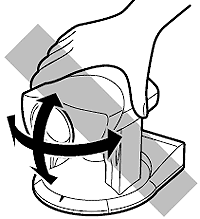
Changing the Camera Head Angle (pan/tilt/home position)
Use the procedures below to change the camera head angle.
To move the camera head left and right (pan):
Press the  and
and  buttons.
- When pointing the remote control in the direction of the camera and using it, the image on the monitor moves in the direction of the arrow on the button pressed, and the camera head moves in the oppsite direction.
- When DIRECTION MIRROR (set in the Camera Menu) is set to ON, the camera head moves in the direction of the arrow on the button pressed.
- Holding the button down increases the speed of camera head movement as shown below.
-
- Low speed
 Medium speed High speed
- Low speed
To move the camera head up and down (tilt):
Press the  and
and  buttons.
- Holding the button down increases the speed of camera head movement as shown below.
-
- Low speed Medium speed High speed
- Low speed
To move the camera head to the Home position:
Press the  button.
- This moves the camera head to the center position at high speed.
|
 |
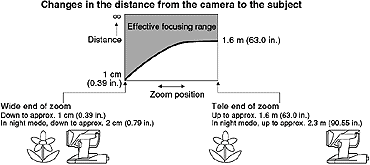
Zooming In/Out (TELE/WIDE)
The zoom function increases (zoom in) and decreases (zoom out) the size of the subject on the monitor screen.
To zoom in (TELE):
Press the  side of the button.
- Holding down the button changes the rate of zoom.
To zoom out (WIDE):
Press the  side of the button.
- Holding down the button changes the rate of zoom.
|
At some zoom settings, the camera may not be able to focus on the subject.
|
Focusing (FOCUS)
This section describes how to focus on the subject. The VC-C50i/VC-C50iR has an auto-focus mode, in which the camera automatically focuses on the subject, and a manual focus mode, in which the operator can adjust the focus by hand. (The default setting is auto-focus.)
To use autofocus mode press the  button.
- The camera focuses automatically.
![]() Subjects not suitable for auto-focus
Subjects not suitable for auto-focus
The camera may have difficulty focusing automatically on subjects of the type shown below. Use the manual focus mode for such situations.
 Subjects with little or no contrast (a white wall, for example) |
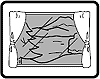
 Angled subjects |
 Highly reflective subjects |
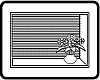 Horizontally striped subjects |
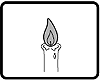 Insubstantial subjects such as flames or smoke |
 Subjects seen through glass |
To fix the focus:
Press the  button.
- This switches auto-focus off and fixes the focus.
To focus on nearby subjects, press the ![]() button.
button.
- This enables switching the camera to manual focus mode while moving the focal point closer to the camera.
- Holding the button down moves the focal point closer to the camera.
To focus on distant subjects, press the  button.
- This enables switching the camera to manual focus mode while moving the focal point further from the camera.
- Holding the button down moves the focal point further away from the camera.
- At some zoom settings, the camera may not be able to focus on the subject.
Adjusting the Brightness (BRIGHT)
This function brightens or darkens the image. When the camera is switched on, the brightness is set to the Normal level.
To brighten or darken the image, press the  side of the button to brighten the image and the
  side to darken the image.
- The image gradually brightens (or darkens) while the button is held down.
- The Normal brightness setting corresponds to setting [5] in the AE REFERENCE screen. The brightest setting is [10] and the darkest setting is [1].
- In particularly dark locations, it may not be possible to adjust the brightness.
Storing a Preset Camera Position (PRESET)
This section describes how to store a camera head angle, zoom position and brightness level. Up to nine (1 to 9) preset positions can be stored. Switching the power off or the camera off does not erase the stored preset positions.
To store a position:
- Set the camera head angle, zoom position and brightness.
- The focus setting is not stored. - Press the
 button.
- The LED on the camera blinks green (at 0.5-second intervals).
- Press the button again to cancel the operation.
 - Press a button from
 to
to  .
.
- When the position has been stored, the LED on the camera stops blinking and remains green.
- Any existing preset information is overwritten.
To restore a preset position press a button from ![]() to
to ![]() .
.
- The VC-C50i/VC-C50iR returns to the stored camera head angle, zoom position and brightness level.
|
Switching the Camera ON and OFF
The camera is switched on and off by using the ![]() (camera ON/OFF) button on the wireless controller. Even if you switch the camera OFF, the stored preset positions, the date, the time and the ID number are not cleared.
(camera ON/OFF) button on the wireless controller. Even if you switch the camera OFF, the stored preset positions, the date, the time and the ID number are not cleared.
To switch the camera off, while the camera is ON, press the ![]() button.
button.
- The image disappears and the LED on the camera turns red (camera OFF). The camera will now respond only to the
 button or
  button on the wireless controller.
To switch the camera on while the camer is on, press the ![]() button.
button.
- An image appears on the monitor screen and the LED on the camera turns green (camera ON). The camera will now respond to all operations performed from the wireless controller.
- Even if the camera is off, when you press the button the LED on the camera blinks orange and you can begin ID mode operation.

|