|
Adjust the Printhead alignment (iPF605)
|
| <Adjusting the Printhead Alignment Automatically> |
1. When using sheets, have an unused sheet A4/Letter-sized or larger ready when Standard Adj. is selected or 5 when Advanced Adj. is selected.
When using a roll, load a roll 10 inches (254 mm) or wider. |
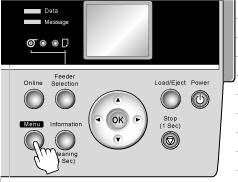
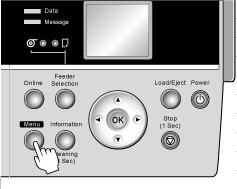
| 2. Press the Menu button to display MAIN MENU . |
 |
3. Press  or or  to select Adjust Printer , and then press the to select Adjust Printer , and then press the  button. button. |
| 4. Press or to select Auto Head Adj. , and then press the button. |
| 5. Press or to select Advanced Adj. , and then press the button. |
| 6. Press or to select Yes , and then press the OK button. |
| A test pattern is printed for printhead adjustment. |
| After reading the pattern, the printer automatically adjusts the Printhead alignment. |
| <Adjusting the Printhead Alignment Manually> |
| <Note> |
| - If Manual Head Adj is not displayed in the menu, choose Advanced Adj. in Auto Head Adj. Manual Head Adj is displayed after you try Auto Head Adj. once. |
1. When using sheets, have an unused sheet A4/Letter-sized or larger ready.
When using a roll, load a roll 10 inches (254 mm) or wider. |
| 2. Press the Menu button to display MAIN MENU . |
 |
| 3. Press or to select Adjust Printer , and then press the button. |
| 4. Press or to select Manual Head Adj , and then press the button. |
| 5. Press or to select Yes , and then press the OK button. |
| A test pattern is printed for printhead adjustment. |
| 6. Press or to select D , and then press the button. |
| 7. Press or to select D-1 , and then press the button. |
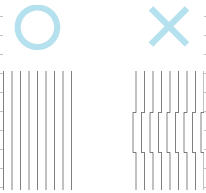
| 8. Examine test pattern D-1 for printhead adjustment. After you determine the pattern with straight lines, press or to choose the pattern number, and then press the OK button. |
 |
| 9. Repeat steps 7 and 8 to specify the adjustment value for D-2 to D-5 and D-7 to D-11 . |
10. Press the  button. button. |
| 11. Press or to select Register Setting , and then press the button. |
| 12. Press or to select Yes , and then press the OK button. |
| <Operation procedure with the printer driver> |
| <Windows> |
| 1. Select the [Utility] sheet. |
2. Click the [Maintenance] button.
imagePROGRAF StatusMonitor starts up, and the [Maintenance] sheet is displayed. |
3. Click the [Printhead Adjustment] button.
The confirmation screen is displayed. |
4. Load media, then click the [OK] button.
The printhead adjustment pattern is printed. |
| <MacOSX> |
| 1. Display the Utility panel. |
| 2. Click the [Set...] button of [Perform printer maintenance.]. |
3. Click the [Printhead Adjustment] button.
The confirmation screen is displayed. |
4. Load media, then click the [OK] button.
The printhead adjustment pattern is printed. |
