Saving Scanned Images
If the free space of a computer is getting small, scanning cannot be performed.
In that case, it is necessary to delete unwanted application software or files, or change where to save the scanned image data.
-
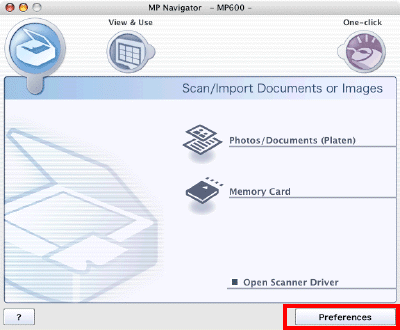
Launch MP Navigator.
-
-
To open the Applications folder, click the icon of the hard disk where MP Navigator is installed.
-
Double-click the MP Navigator 3.0 icon.
* Display varies according to the printer model.
-
Click 'Preferences'.
-
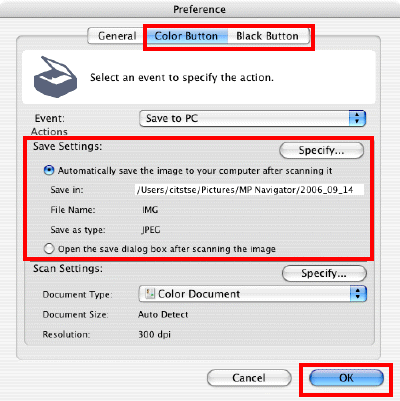
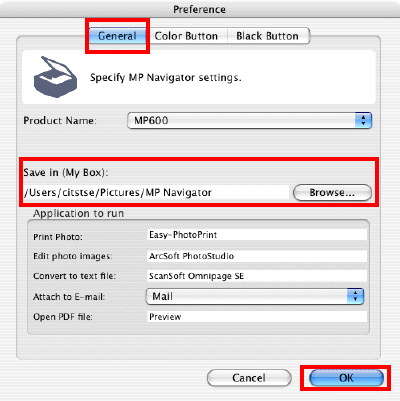
To scan with MP Navigator, click the 'General' tab. To scan from the operation panel, click the 'Color Button' tab or the 'Black Button' tab.
To scan using MP Navigator:
(A) Select the General tab.
(B) Click 'Browse' in Save in (Photobox) and then select where to save the scanned image in the Browse for Folder window.
(C) Click 'OK'.
To scan using the operation panel:
(A) Click the 'Color Button' tab or the 'Black Button' tab.
Memo:
The settings in the Color Button tab or Black Button tab can be operated respectively when you push the <Color Start> button or the <Black Start> button on the operation panel if the printer is in SCAN mode.
(B) In Event drop-down, select 'Save to PC' or 'Save as PDF file'.
Memo:
When selected, the scanned image will be saved appropriately if the printer is in SCAN mode and the button is pressed.
(C) In section Actions Save Settings, select how to save the file.
- To save images automatically in the place where you specified in advance, click 'Automatically save the image to your computer after scanning it' then click 'Specify' and change where to save the scanned image in the Save Settings window.
- To determine where to save each time after scanning, click 'Open the save dialog box after scanning the image'. If you choose this function, the settings are completed here.
(D) Click 'OK'.