Setting the Toner Save Mode
This unit does not have a [Toner Save] setting on the control panel. The only way to enable [Toner Save] is through the printer driver following the steps below.
1. On the [ ] (Start) menu, click [Control Panel] -> [Printers].
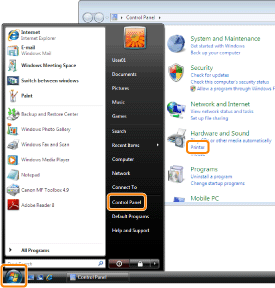
The [Printers] folder is displayed.
Note:
- If you are using Windows 7, select [Start] - [Devices and Printers].
- If you are using Windows XP Professional/Server 2003, on the [Start] menu, click [Printers and Faxes].
- If you are using Windows XP Home Edition, on the [Start] menu, click [Control Panel] -> [Printers and Other Hardware] -> [Printers and Faxes].
- If you are using Windows 2000, on the [Start] menu, point to [Settings] -> click [Printers].
- If you are using Windows Server 2008, on the [Start] menu, click [Control Panel] -> [Printers].
2. In the [Printers] folder ([Printers and Faxes] folder, or [Devices and Printers] folder), right-click the icon of the printer whose settings you want to configure -> click [Printing Preferences] from the displayed menu.
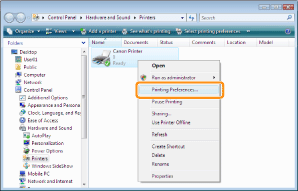
The printer driver screen is displayed.
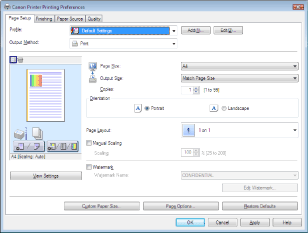
3. Display the [Quality] sheet.
Display the sheet by left clicking on the [Quality] tab.
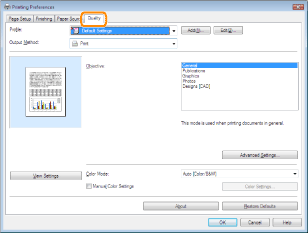
4. Select the [Objective] you wish to use to print.
[Objective] Choices:
- General
- Publications
- Graphics
- Photos
- Designs [CAD]
Note:
If you wish to use multiple [Objective] settings, [Toner Save] mode needs to be enabled separately for each.
5. Select [Advanced Settings...].
The Advanced Settings dialog is displayed.
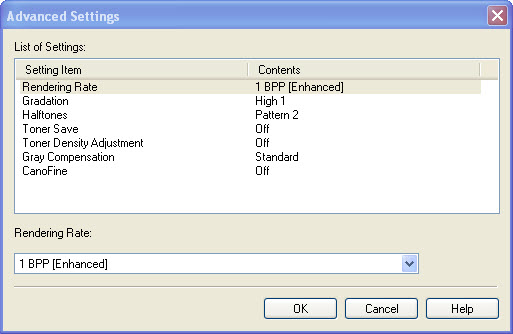
6. Select [Toner Save].
7. Click the drop down at the bottom, select [On].
8. Click [OK].
9. Click [OK] again.
Older versions of Windows may need to click [Apply], then [OK] to save the settings.
Note:
Repeat from Step 4 to enable [Toner Save] for other objectives.
