Untitled Document
Installing the Print Head and Ink Tanks
Note: Be sure printer is powered on and cover is open.
Install the Print Head
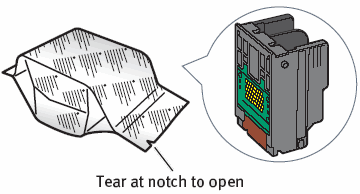
1. Remove the print head from its package.
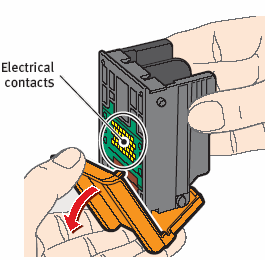
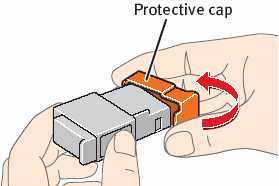
2. Remove the orange protective cap.
Caution: Do not touch the electrical contacts on the back and bottom of the print head.
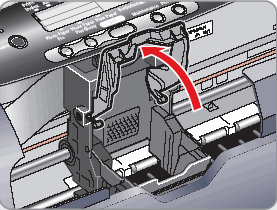
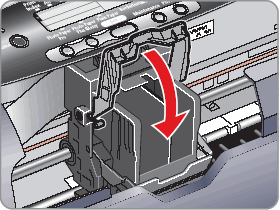
3. Raise the gray lock lever on the printer.
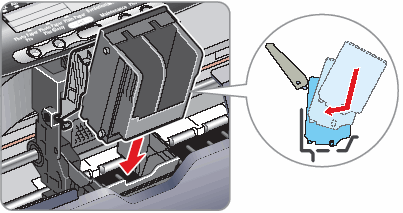
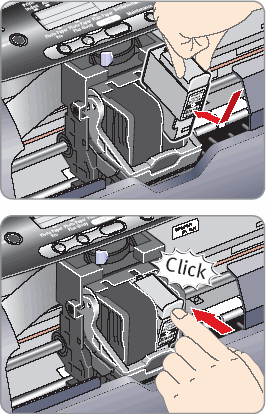
4. Slide the print head into the holder until it is securely seated. Do not press it down.
5. Lower the lever until it clicks into place.
Install the Ink Tanks
1. Remove the black ink tank (BCI-24 Black) from its package and pull off the orange protective cap.
NOTE: Avoid ink at the bottom of the tank.
2. Insert the black ink tank into the slot on the right, then push in until the ink tank clicks into place.
IMPORTANT: For correct printer operation, make sure ink tanks are secure in slots.
3. Repeat the procedure for the color ink tank (BCI-24 Color), inserting it into the remaining slot.

