Untitled Document
Installing the Print Head
1. Turn on the printer.
2. Open the front cover. The print head holder will move to the center.
Note: When installing the print head for the first time, remove the attached orange tape.
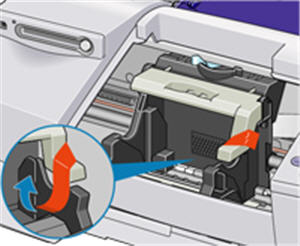
3. Raise the print head lock lever.

Note: If the front cover is left open for more than 10 minutes, the print head holder will move to the right. If this occurs, close the front cover once, and then re-open it.
4. Remove the print head from its package and remove the orange protective cap.

Note: To avoid any damage, do not touch the ink supply filters or the electrical contacts on the print head. Once removed, do not re-attach the orange protective cap.

<1> Electrical Contacts on the Print Head
<2> Orange Protective Cap
5. Insert the print head into the print head holder.

6. Lower the print head lock lever until a click sound is made.

The print head is now installed.
