
Editing images in ZoomBrowser EX ver. 6.x
| Article ID: ART123119 | | | Date published: 05/12/2015 | | | Date last updated: 11/16/2015 |
Description
Solution
Editing images in ZoomBrowser EX ver. 6.x
This section explains the procedures for editing images displayed in the Viewer Window. To bring an image into the Viewer Window for editing, double-click on the thumbnail image.
|
IMPORTANT
|
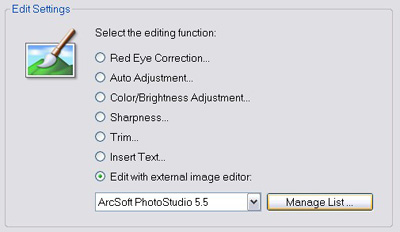
You can perform the following editing operations in ZoomBrowser EX:
Red Eye Correction
Use this to correct images in which people's eyes appear red.
Auto Adjustment
Use this option to have ZoomBrowser perform a standard improvement adjustment on the selected image.
Color/Brightness Adjustment
This option allows you to adjust Color, RGB, Levels and Tone Curve to correct color and tone of the image in addition to contrast, saturation, hue etc.
Sharpness Adjustment
Allows you to control the amount of sharpness to apply to an image you wish to sharpen.
Trim (Crop)
This function trims portions of images. Use it to cut away (or crop) unwanted parts of the image.
Insert Text
Allows you to add text to an image in a variety of colors sizes and types.
Edit with External Image Editor
You can bring the image into a third party image editor for more advanced editing functions. A third party (non-Canon) image editor program must be installed on the PC.
Red Eye Correction
This corrects the red portion of eyes that appear red.
Auto Mode
- Select the image to be edited and click
 (Edit) in the Viewer Window and select [Edit Image] to open the edit image option window.
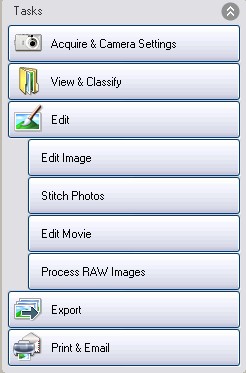
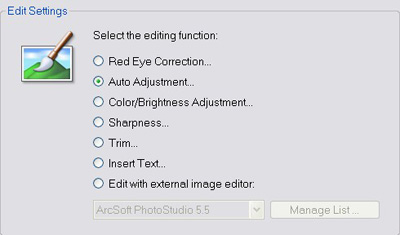
- Select the Red Eye Correction... from the edit option window.
- Select [Auto Mode] and click [Start].
- Red eyes will automatically be corrected.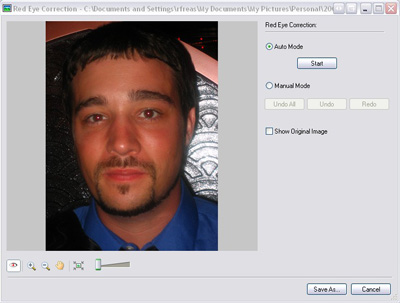
- Click [OK] when it finishes correcting.
- Click [Undo All] to restore the image to its pre-correction state.
-Click [Undo] to cancel the action immediately preceding.
-Click [Redo] to reinstate an action canceled with the Undo button.
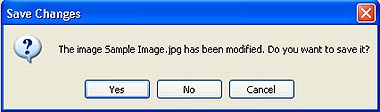
When the Viewer Window is closed after editing an image, the following message will display:
-
If you would like to replace the original image with the modified one, click [Yes].
-
If you would like to exit the Viewer Window without saving the modified image, click [No].
-
If you would like to save the modfied image, and retain the original image, click [Cancel] and follow the procedure for saving the file under a different name.
Manual Mode
- Follow the above instructions until you are in the [Red Eye Correction] window and choose [Manual]
- Select [Manual Mode], then move the mouse cursor over the red eye portion and click the relevant portion.
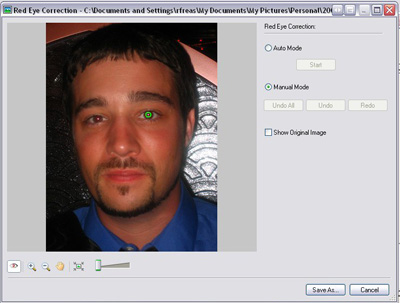
3. Click [Save As] when it finishes correcting.
-
If you would like to replace the original image with the modified one, click [Yes].
-
If you would like to exit the Viewer Window without saving the modified image, click [No].
-
If you would like to save the modfied image, and retain the original image, click [Cancel] and follow the procedure for saving the file under a different name.
Auto Adjustment
- Select the image to be edited and click (Edit) in the Viewer Window and select [Edit Image] to open the edit image option window.
- From the next window choose [Auto Adjustment] and click finish.
- This will bring you to the Auto Adjustment window. Click the [Auto Adjustment] button and ZoomBrowser will automatically adjust the image to improve it's visual quality. For fine tune adjustments please see the procedures outlined below.
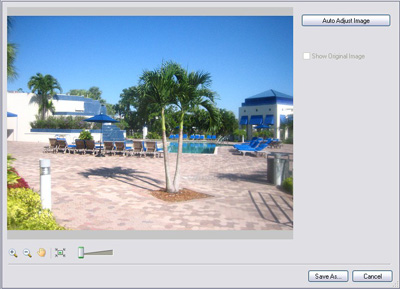
- Click [Save As] to complete the adjustment.
Color/Brightness Adjustment
- Select the image to be edited and click (Edit) in the Viewer Window and select [Edit Image] to open the edit image option window.
- From the next window click [Color/Brightness Adjustment] and click [Finish].
- The Color/Brightness Adjustment window will open and the sliders on the right control the level and amount of adjustment to be applied to the image. The following options are available for adjustment:
- Color Adjustment: Allows you to adjust Brightness, Saturation, and Contrast.
- RGB Adjustment: Allows you to control the Red, Green and Blue color channels.
- Level Adjustment: Allows you to adjust the highlights, mid-tones, and shadows in an image and also offers and Auto Levels option to perform a level adjustment automatically
- Tone Curve Adjustment: Allows you to adjust the tone curve of an image offering RGB, Red, Green and Blue adjustment options.
The Window shown below is for Color Adjustment, to access the other adjustment options click the down arrow in the top right selection box to access the drop down showing the other options.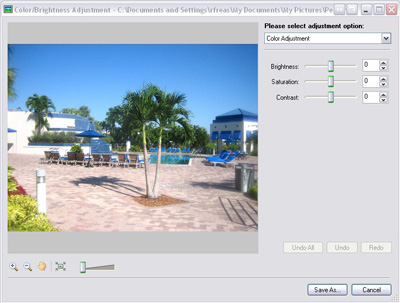
- Once the adjustments have been made, click [Save As] to complete the adjustment.
-
Select the image to be edited and click
(Edit) in the Viewer Window and select [Edit Image] to open the edit image option window. -
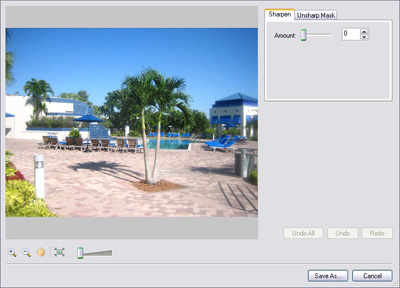
From the next window choose the [Sharpness] option and click [Finish].
-
The following window appears allowing you to control how much sharpness [Sharpen] to apply and also offers [Unsharp Mask] options.
-
Click [Save As] to complete the adjustment.
Trim (Crop) Image
Use this to delete unnecessary portions of the image and leave only the necessary portions.
-
Select the image to be edited and click
(Edit) in the Viewer Window and select [Edit Image] to open the edit image option window. -
From the following window choose [Trim] and click [Finish].
-
Position the mouse pointer over the image and drag it to select the trimming area.
- Hold down the left mouse button and draw a square around the part of the image you would like to keep. A dotted-lined box will appear. Dragging the corner or center points of this box will allow you to make the box larger or smaller.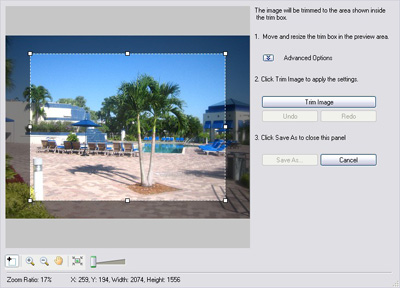
-
Click [Trim Image].
-
Check the trimmed image and click [OK].
-
Once finished trimming the image click [Save As] to save the trimmed image.
When the Viewer Window is closed after editing an image, the following message will display:
-
If you would like to replace the original image with the modified one, click [Yes].
-
If you would like to exit the Viewer Window without saving the modified image, click [No].
-
If you would like to save the modfied image, and retain the original image, click [Cancel] and follow the procedure for saving the file under a different name.
- Select the image to be edited and click (Edit) in the Viewer Window and select [Edit Image] to open the edit image option window.
- From the following window choose the [Insert Text] option and click [Finish].
- From the following window that opens you can choose the color, font name, font size and text attribute. Once those selections have been made click in the image where you want the text to appear and begin typing the text you wish to appear in the image. The text will also show in the box labeled [text].
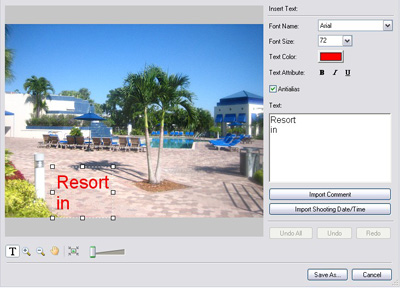
- Once finished click the [Save As] button to save the image with the text inserted.
Edit with External Image Editor
This section explains how to start other image editing programs to edit an image selected in ZoomBrowser EX.
REFERENCE
|
How to start other image editing programs
-
Select the image to be edited and click
(Edit) in the Viewer Window and select [Edit Image] to open the edit image option window. -
From the following window choose [Edit with external image editor] and choose the program you wish to use from the drop down menu. To add additional programs choose the manage list and browse to the programs executable or launch icon.
-
The image editing program will start and open the selected image(s) in it.