The PIXMA MG5320 printer has both a rear tray, and a cassette (front tray). You can switch from one paper source to another from your Mac®.
Switch the paper source
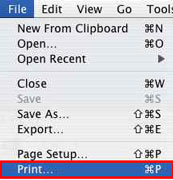
- From the File menu, select Print to open the Print dialog.
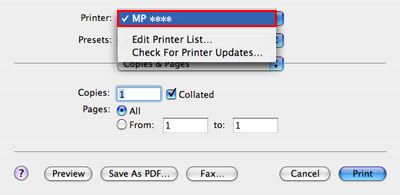
- Select your printer from the Printer drop-down.
- In the third drop-down menu from the top, select Quality & Media.
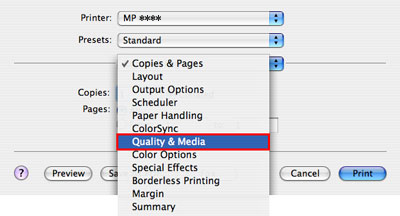
 If a window similar to the one shown below appears, select the Down Arrow
  for additional options.
-
Select the appropriate paper type from the Paper Source drop-down (see below for help).
Select the paper source that meets your needs from the Paper Source drop-down. Available media types vary by model.
-
Automatically Select
Plain paper that is Letter 8.5"x11", A5, A4, or B5 feeds from the cassette (front tray). Other paper sizes or types feed from the rear tray.
-
Rear Tray
Paper always feeds from the rear tray.
-
Cassette
Paper always feeds from the cassette (front tray).
Use the rear tray to feed paper sizes other than Letter 8.5"x11", A5, A4, or B5, and paper types other than plain paper.
-
Continuous Autofeed
When plain paper runs out in one source, the printer switches to the other. This is helpful if you print large volumes, since you can load the same paper in both trays.
Continuous Autofeed is unavailable when paper other than Plain Paper is selected for Media Type.
When you start a new print task, paper feeds from the paper source you used the last time.
-
Paper Allocation
To change the paper settings, select Paper Allocation. When the Canon IJ Printer Utility appears, select Paper Allocation from the drop-down and choose the new settings.
If you often use plain paper in the cassette, the printer feeds paper from the rear tray when the print data indicates a different type of paper. You can therefore reduce the trouble of having to load different paper in the cassette.
-
After you choose the paper source, select Print to complete your print task.
