Establish connection using a USB cable temporarily
Solution
Wireless Setup via USB Cable - Mac OS X** Computers
To be able to use the PIXMA printer to print or scan wirelessly on a Mac computer, the printer must first be connected to the Wireless Network and software drivers and applications installed on the computer.
** For information on setting up on a Windows computer, click here
The instructions / screenshots below show an alternative setup method whereby a USB cable is connected temporarily to the printer and computer to set up the wireless connection
Read the information taking note of the information concerning warning messages that may appear during setup then click the "Download" button.
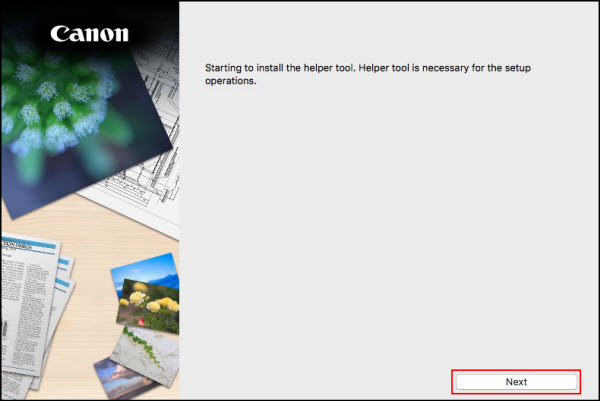
Start setup. Click Next on the first screen.
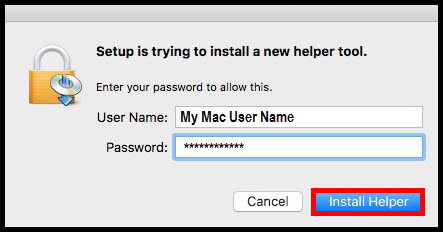
Enter your computer User Name and Password then select Install Helper.
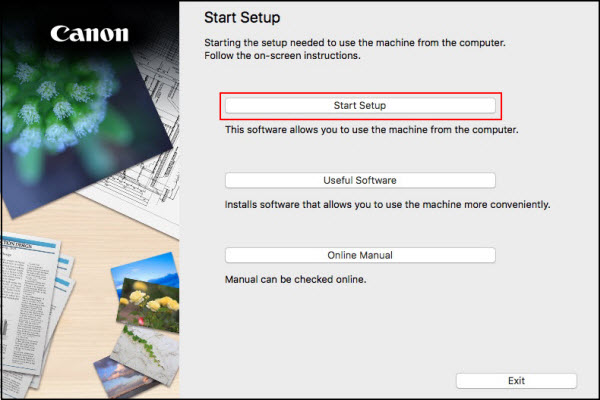
Select Start Setup
Select appropriate region and click Next
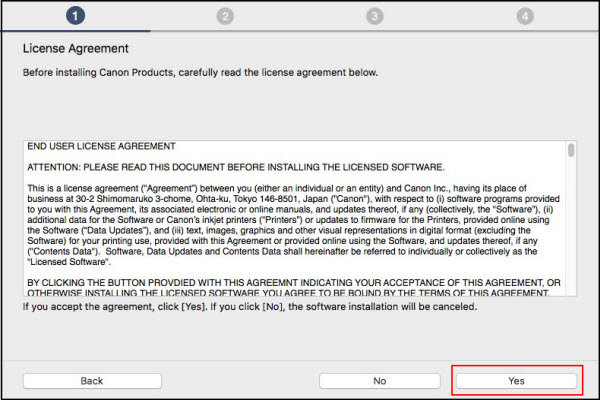
Select Yes on the License Agreement.
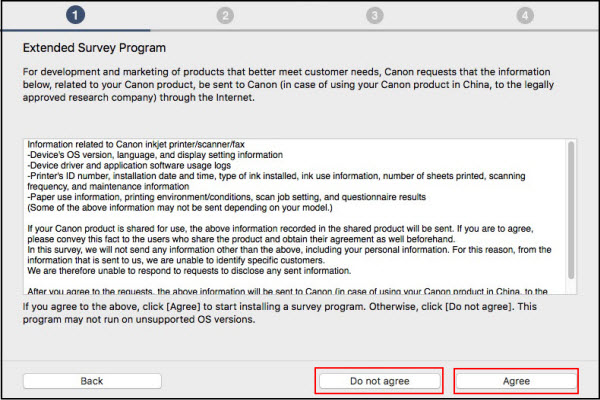
Select Agree or Do Not Agree to the Survey.
Status check occurs
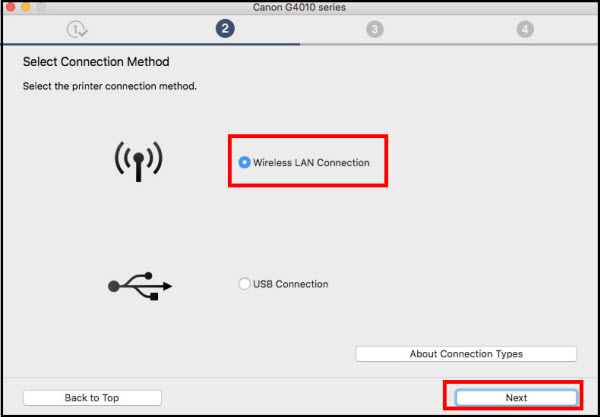
Select Wireless LAN Connection on the Select Connection Method screen.
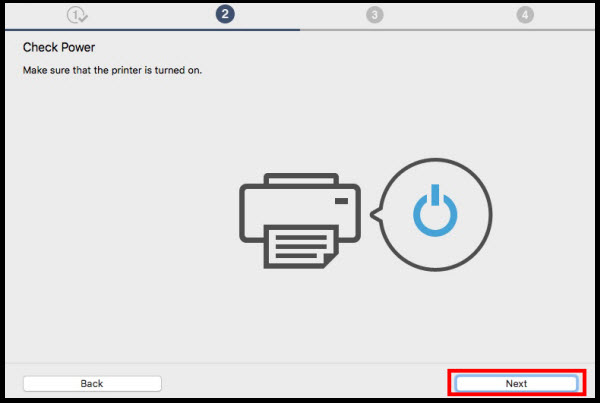
Click Next on Check Power
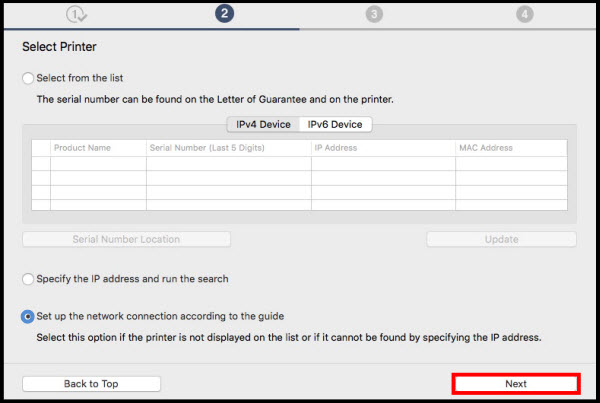
Select Set up the network connection according to the guide and click Next.
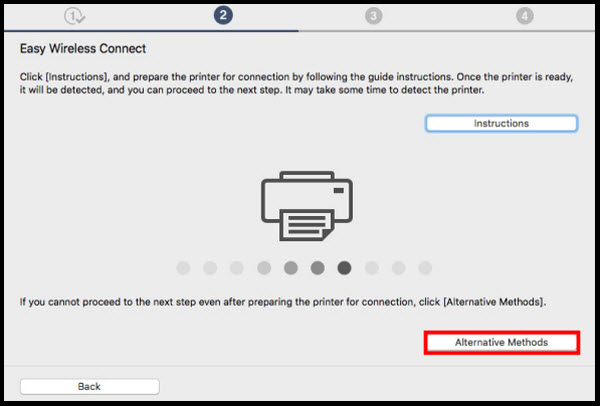
If an Online Manual page opens, close it and select Alternative Methods.
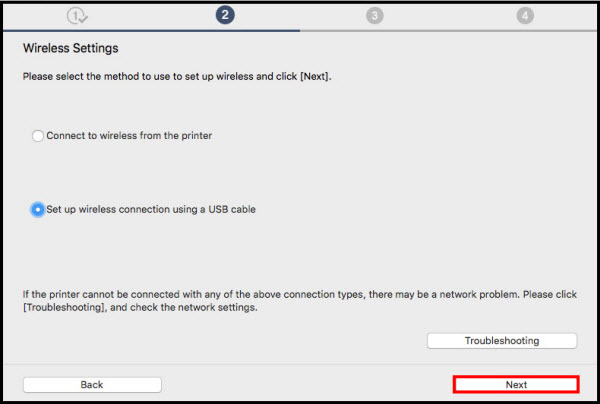
Select Set up wireless connection using a USB cable and click Next.
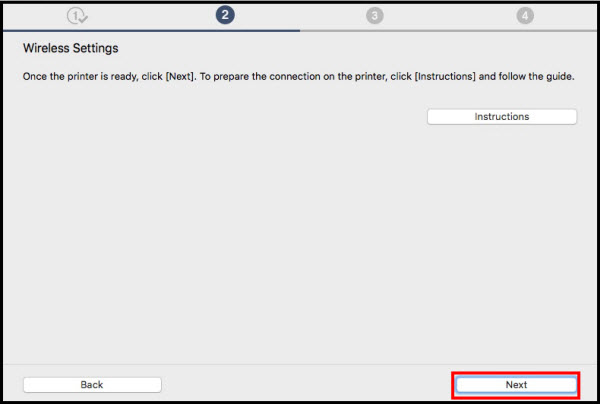
If an Online Manual page opens, close it. Click Next on Wireless Settings.
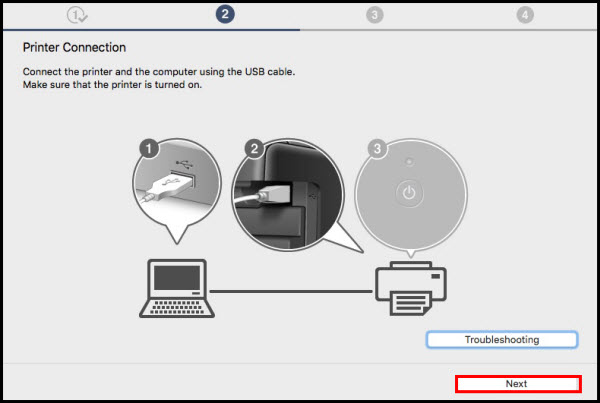
Make sure the printer is powered on. Connect the printer to the computer with a USB cable. Click Next
Network Connection completed. Click Next
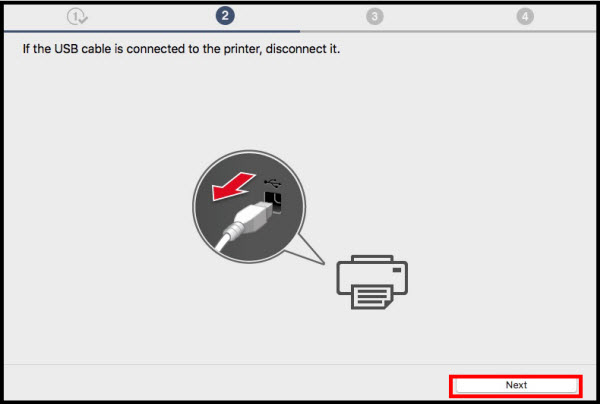
Disconnect the USB cable. Click Next
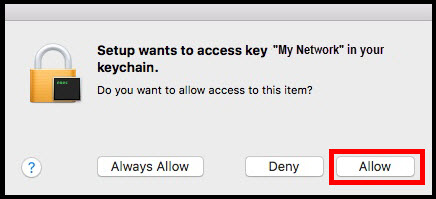
If the following appears, click Allow.
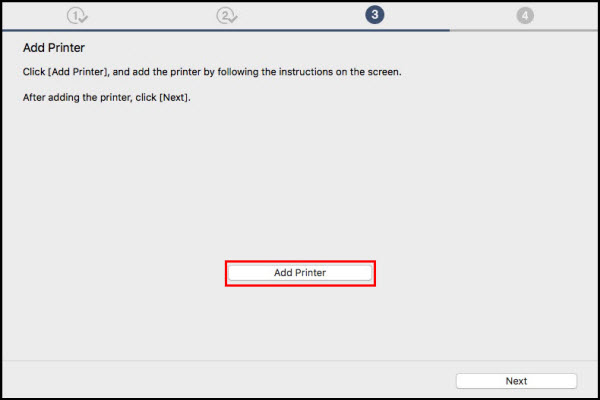
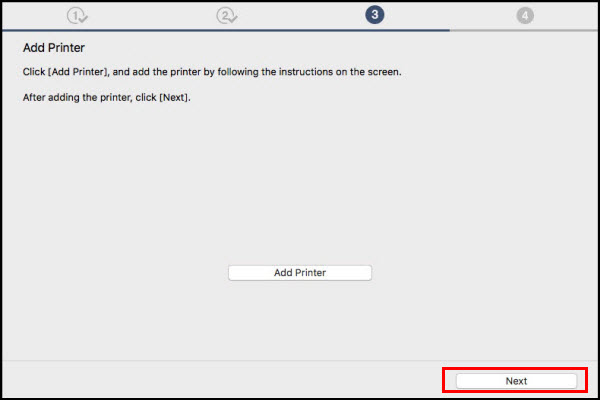
Click Add Printer on the Add Printer screen
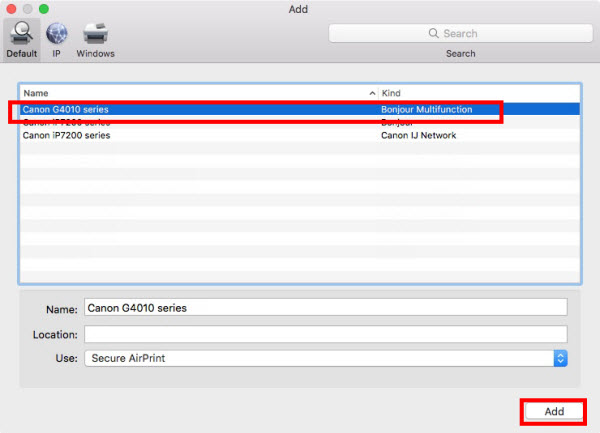
On the Add screen, select the G4010 series with Bonjour Multifunction listed in the Kind column. Select AirPrint or Secure AirPrint in theUse:dropdown list.
Click Next on the Add Printer screen.
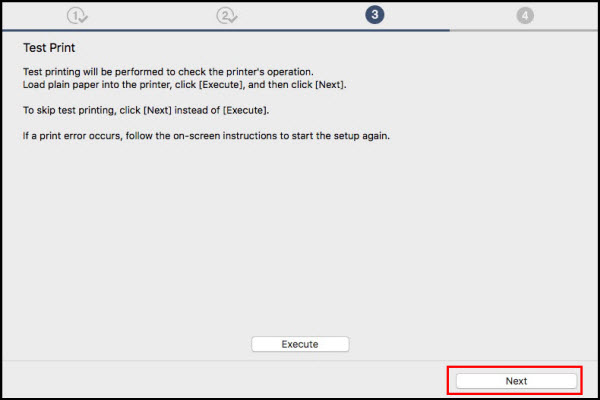
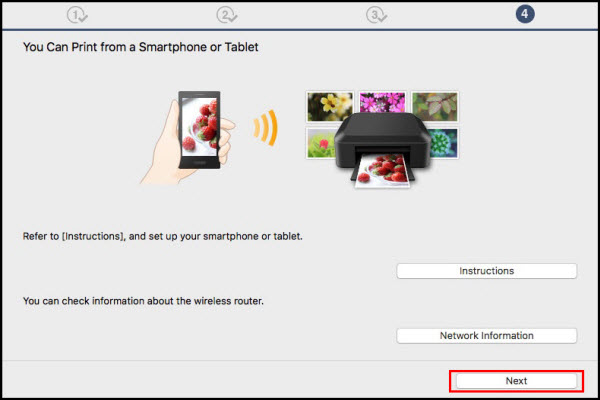
Click Next
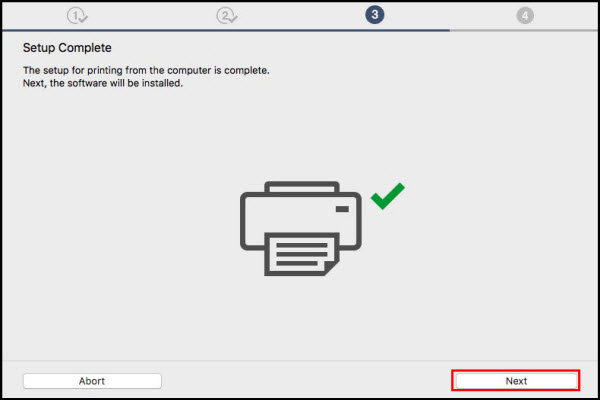
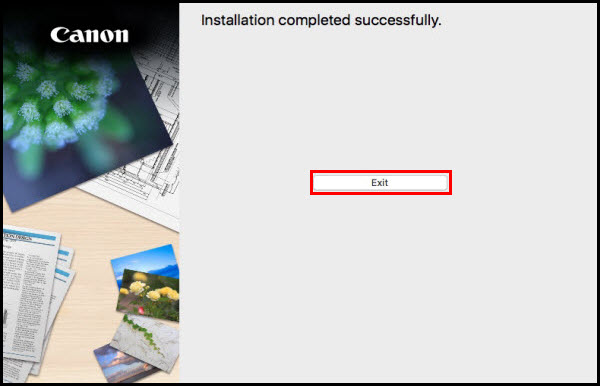
Setup complete. Click Next
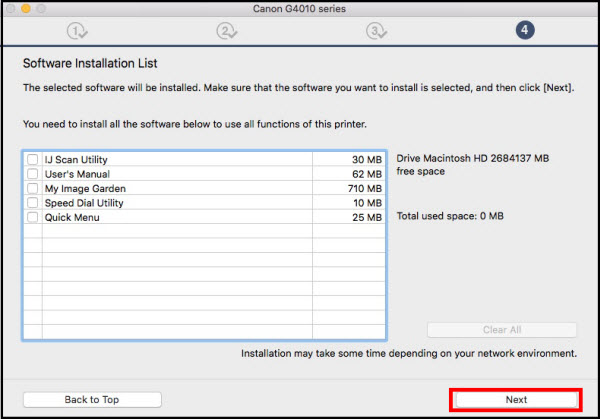
Select any optional application software desired. Click Next
Click Next
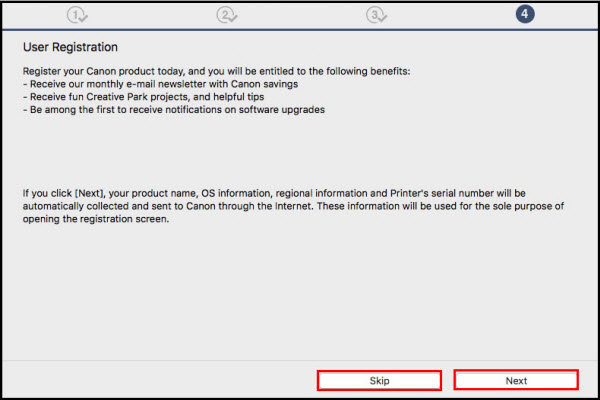
Click Next or Skip
Select whether or not to create a shortcut for the manual.