➤
Home
Articles
FAQs
Ask a Question
Search
Models related to this article
PIXMA MP450
PIXMA MP150
PIXMA MP170
Home
Articles
Articles Detail
Reseat ink cartridge (MP150 / MP170 / MP450)
Article ID: ART153473
|
Date published: 06/02/2015
|
Date last updated: 08/18/2015
Description
Reseat the ink cartridge if an error appears on the LCD or to improve print quailty.
Solution
Reseat Ink Cartridges
Reseat (
remove
/
reinstall
) the ink cartridges if an error appears.
Removing Ink Cartridges:
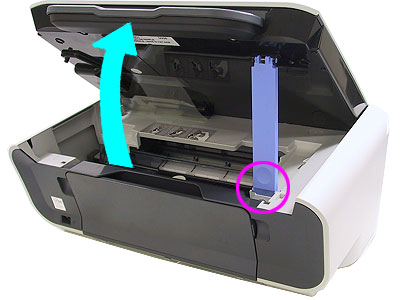
After confirming that the printer is powered on, open the scanning unit (printer cover). The ink cartridge holder moves to the replacement position.
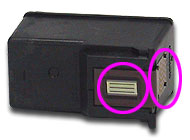
Press down on the semi-circular tab to release the cartridge and then remove it.
Note:
Handle the ink cartridges carefully to avoid staining clothes and surrounding work area.
Remove and replace each cartridge individually. Or, remove the second cartridge after the first has been removed.
Note: Do not touch the gold electrical contacts or the print head nozzles after removing the protective tape.
Installing ink cartridges:
After confirming that the printer is powered on, open the scanning unit (printer cover). The ink cartridge holder moves to the replacement position.
Note:
After confirming that the scanning unit support is fixed into position, release your hands.
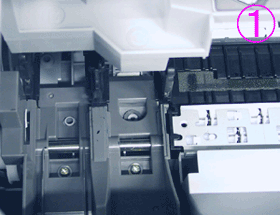
Insert the ink cartridge into the ink cartridge holder.- Black: the left slot- Color: the right slot
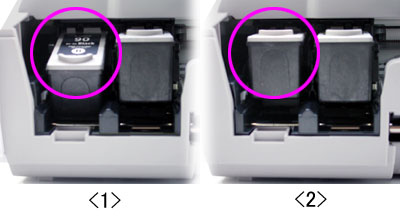
Push up on the front of the cartridge until it locks into place. (A click sound will be heard when the cartridge is locked in place.)
Confirm that the ink cartridges are installed properly.
<1> The ink cartridge is not installed properly.
<2> The ink cartridge is installed properly.
Fold the scanning unit support and close the scanning unit (printer cover).
Wait until the preparatory operation is complete; it takes about one to two minutes.
SIMS Doc Id
0
Rate this Article
Was this article helpful?
Yes, This document is helpful
No, This document needs a clearer explanation
Please provide your comments
Rate Article