The instructions below will help you install a new print head and ink tanks.
Install print head and ink tanks.
Remove print head and ink tanks.
Install the print head
-
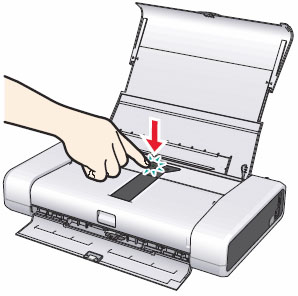
Turn the printer ON.
-
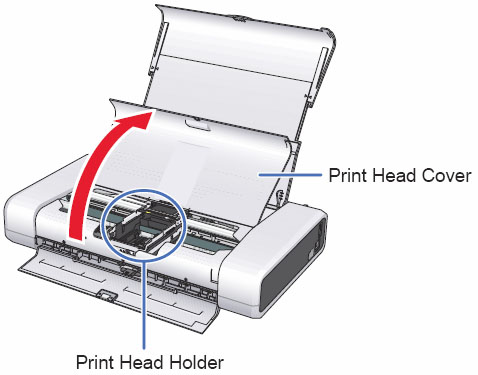
Open the print head cover. The print head moves from the right to the center.
-
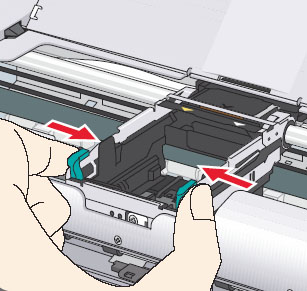
Squeeze the tabs inward to unlock the print head lock lever.
-
Raise the print head lock lever until it stops.

 Don't touch parts other than the print head lock lever.
-
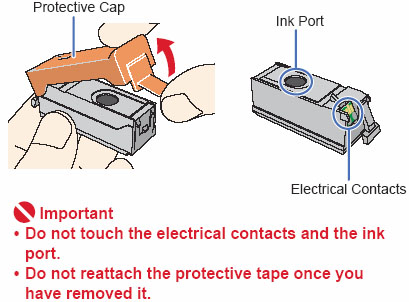
Remove the print head from its package and remove the orange protective cap.
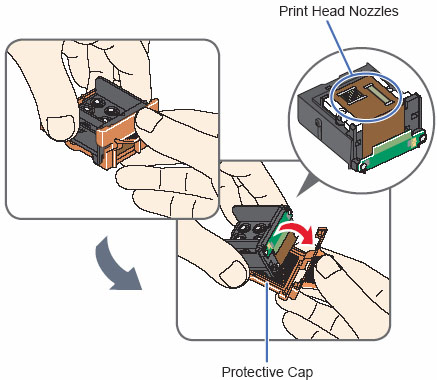
Don't touch the print head nozzles. Be careful not to get ink on yourself when handling these items.
 There may be some transparent or light blue ink on the inside of the bag the print head comes in, or the inside of the protective cap. This has no effect on print quality.
-
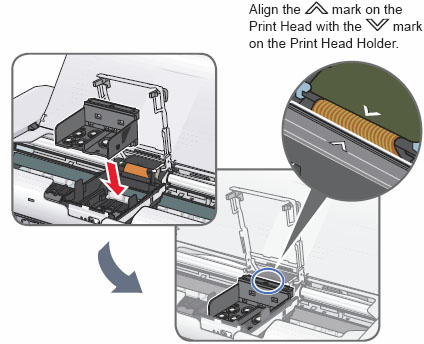
Insert the print head.
-
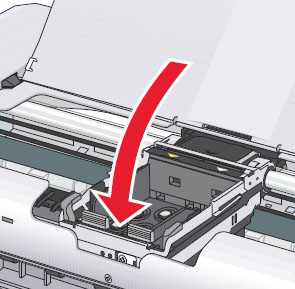
Carefully lower the print head lock lever .
-
Push tabs in left to right order until each one clicks into place.

-
Remove the orange protective cap from the ink tank and discard it.
-
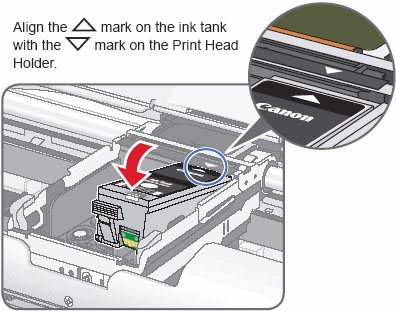
Insert the ink tanks.
-
Confirm that the red light for each tank is lit and the ink tanks are installed properly.
-
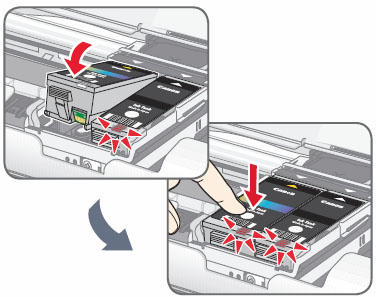
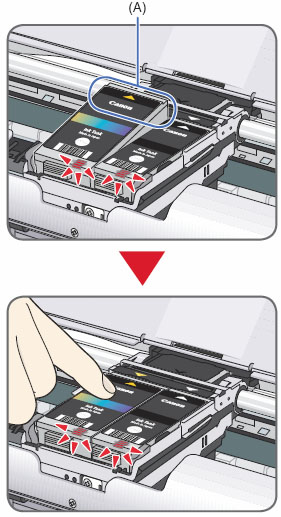
Press down on the Push mark on the ink tank to lock the ink tank into its slot in the print head. You will hear a click when it locks into place.
-
Press the back end (A) of the ink tank all the way down.
The red light may still be lit even if the back end of the tank isn't completely installed.
-
Close the printer cover.
Remove and reinstall the print head and ink tanks
-
Turn the printer ON.
-
Open the print head cover. The print head holder moves to the center.
If the print head cover is left open for more than 10 minutes, the print head holder moves to the right. Close, then reopen the top cover to return the holder to the center.
- Push the tab and remove the ink tank.
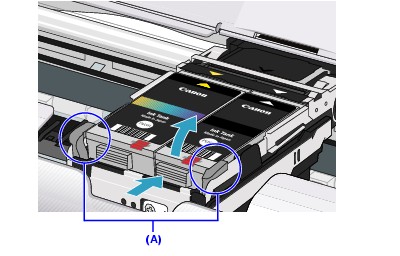
Don't touch the print head lock lever (A). Remove only the ink tank.
-
Squeeze the tabs inward to unlock the print head lock lever.
-
Raise the print head lock lever until it stops.
Don't touch parts other than the print head lock lever.
-
Carefully lift the print head out of the printer.
Don't touch the print head nozzles and careful not to get ink on yourself when handling these items.
-
Re-insert the print head.
-
Carefully lower the print head lock lever .
-
Push the tabs in (from left to right order) until each one clicks into place.
- Re-insert the ink tanks.
-
Confirm that the red light for each tank is lit and that the ink tanks are installed properly.
-
Press down on the Push mark on the ink tank to lock the ink tank into its slot in the print head. You will hear a click when it locks into place.
-
Press the back end (A) of the ink tank all the way down.
The red light may still be lit even if the back end of the tank is not completely installed.
- Close the printer cover.
If your product issue was not resolved after following the steps above, or if you require additional help, please create or log in to your Canon Account to see your technical support options.
Or if you still need help, visit our Canon Community by clicking the button below to get answers:

____________________________________________________________________________________________
