|
|
MP560 / MP640 / MP990 Initial Setup Mac OS X v10.6 / Mac OS X v10.7 (Lion)
| Article ID: ART133636 |
| |
Date published: 05/13/2015 |
| |
Date last updated: 01/25/2016 |
Description
MP560 / MP640 / MP990 Initial Setup Mac OS X v10.6 / Mac OS X v10.7 (Lion)
Solution
To set up your MP560 / MP640 / MP640R / MP990 for use on a wireless LAN, follow the steps below. Please note that although the image of the printer used in these instructions is an image of the MP560, the steps also apply to the MP640, MP640R and MP990.
Note: If your printer is already connected to your wireless network, click here for instructions on configuring your computer to communicate with the printer.
Connecting your printer to your wireless network
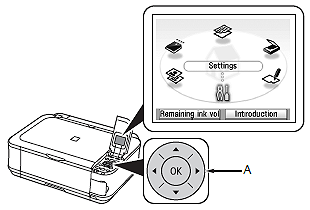
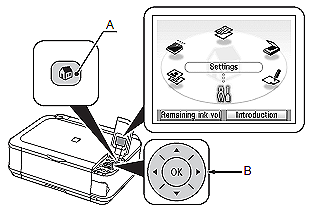
- Use the Easy-Scroll Wheel (A) to select Settings, then press the OK button.
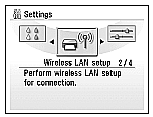
- Select Wireless LAN setup, then press the OK button.
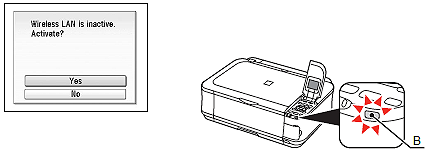
- Select Yes, then press the OK button.
When wireless connection is enabled, the Wi-Fi lamp (B) lights blue.
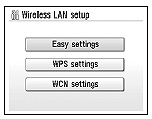
- Select Easy settings, then press the OK button.
- Select the name of your access point (network), then press the OK button.
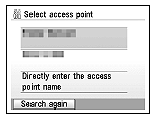
Note:
If you are living in an apartment, nearby access points in use may be detected.
The access point names with 2-byte characters are not displayed properly, however, can be selected.
If the message Multiple Access Points with the same name exist appears, please follow the instructions beginning on page 4 of the Network Setup Troubleshooting Guide to select the desired Access Point.
- When one of the following screens is displayed, enter the network key for your access point (network), then press the OK button.
If the following screen is not displayed, go to step 8.
Use the Easy-Scroll Wheel to select the character. Use the  button to move the cursor to the right. button to move the cursor to the right.
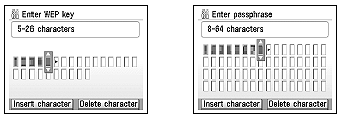
Important: Enter upper and lower case letters of the alphabet correctly.
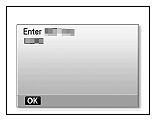
- Make sure that the network key is correct, then press the OK button.
- When the completion screen appears, press the OK button, then press the HOME button (C).
The standby screen returns.
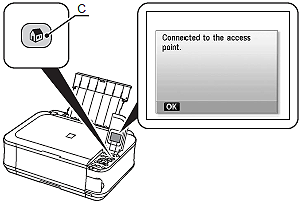
Note:
When the completion screen appears, press the OK button, then press the HOME button (C).
The standby screen returns.
Confirm Connection Status
- Press the HOME button (A), select Settings using the Easy-Scroll Wheel (B), then press the OK button.
Important: Confirm connection status after installing the machine in the target location.
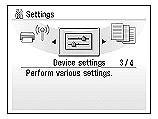
- Select Device settings, then press the OK button.
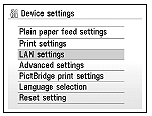
- Select LAN settings, then press the OK button.
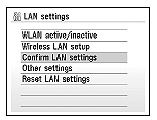
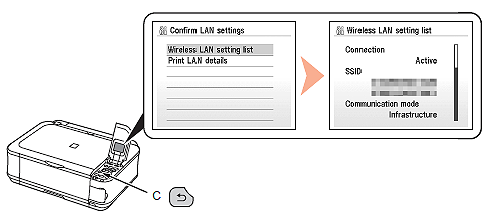
- Select Confirm LAN settings, then press the OK button.
- Select Wireless LAN setting list, then press the OK button.
Make sure that Connection is set to Active, then press the HOME button.
It may take a while before the connection is complete. In this case, press the Back button (C) and wait for about a minute, then display the Wireless LAN setting list screen again.
Note: If the communication status does not improve, make sure of the following.
- The machine and access point are turned on.
- There is no obstacle between the machine and access point, and wireless communication is possible.
- There is no microwave, refrigerator or any other object that may cause radio interference nearby.
Configuring your Mac to communicate with the printer across the network
- Click on the appropriate link to go to the Drivers & Downloads page for your printer.
MP560
MP640 / MP640R
MP990
- The version of OS X installed on your computer will be automatically detected and will show in the drop down menu. If your version of OS X is not detected, select it from the drop down menu.
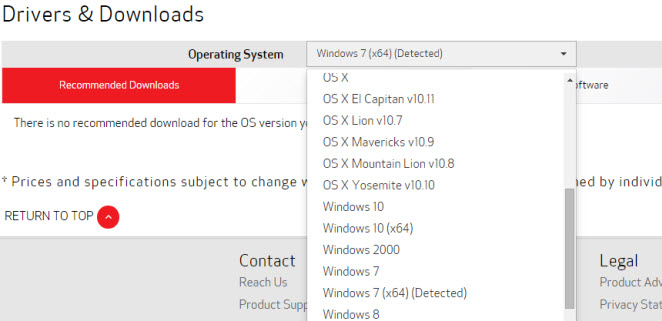
- Under the Recommended Downloads, Drivers and Software tabs, download the CUPS Printer Driver, the ICA Driver, the Scanner Driver and the IJ Network Tool. To do this, click the Select button to the right of each file. Place a check in the box to indicate that you agree to the terms of the Disclaimer. Then, click the Download button.

- After each file has finished downloading, open each file and then double click on the .pkg file contained within the files that have been downloaded. Follow all on-screen instructions to install the drivers and software.
- After installing the drivers and software, click on the Apple menu at the upper left and go to System Preferences.
- Click on Print & Fax (OS X 10.6) or Print & Scan (OS X 10.7).
- In the Add Printer window, wait for a few moments and a Canon IJ Network listing for your printer will appear in the list. Select it and make sure that the Print Using drop down menu shows the name of your printer. Click Add and the printer will be added to your printer list.
Your printer is now ready for network use with your Mac.
|
